 The other night Matt brought home some flowers for me. I love flowers. They are so fun and bring such a fresh pop of color into your home. Well, I went to put my new flowers in a vase and decided I wasn’t happy with my options.
Really, truth be told, I had some wooden dowel rods that I had already envisioned somehow wrapping around a jar. So, these new flowers gave me an excuse, and I got to work. It started off like a mash-up of Lincoln Logs meets a weird game of Jenga. After several attempts, I came up with a design I liked. So I wanted to pass on to you my DIY painted wood vase tutorial.
I started by cutting my dowel rods four inches in length. I had a collection of widths measuring from 3/8″ to 5/8″. I love how the different widths of wood add a variety of depth and breaks it from being in a solid pattern. Note: Before you cut your dowel rods, measure how long they need to be around the width of glass vase you will put in the center. I used a Dollar Tree slender tall vase. If you use a fatter vase/jar your dowel pieces will need to be longer.
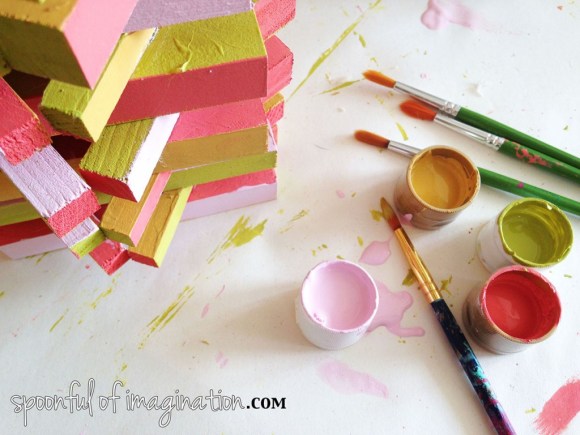
 I then picked out some pretty spring paint colors and painted each side of my dowel rod pieces a different color. This step was a little tedious, but it was mindless and for that I loved it!


 After the dowel rods were painted on every side and the ends, it was time to start connecting them together. This step was sort of like a puzzle to stack the pieces in a way where a) there were not two of the same colors on top of each other and b) there were not two of the same size rods on top of each other. I simply used a small dab of hot glue to attach the rods to one another. Note: It was important to place the base shape of my design around my intended vase to make sure I was creating a wide enough center.

 I simply kept adding blocks and glue till my vase was tall and I had used all my dowel rods.
 Once I was done stacking all my dowel rods pieces, I went back and touched up my paint job in various places that were obvious.
 Finally, I gave my new wood vase a quick spray of Rustoleums Clear Gloss spray, let it dry, and it was done! I put my flowers in water in the glass vase and placed it inside the wood vase. I can’t stop looking at it. I love how it came out.


 We have so many glass or ceramic vases. It is so fun to see a non traditional use for wood and a splash of spring color in my vase as part of the centerpiece.
There are so many possibilities with this idea. I was going to originally do an ombre look, but I couldn’t decide which color I wanted so I scratched that for my vase. I think a really pretty teal/mint ombre version would be gorgeous or just staining the wood pieces would be pretty too!
This idea can also be used for a pencil or paintbrush holder. You don’t have to stick the glass vase inside!
 So, I am a little excited about this creation. What do you think!? Do you need a change for your flowers too??
Thanks so much for stopping by!

Such a cute idea, Erica! And you could create different looks just by experimenting with different sized wood pieces or with paint colors or stain. ( I still love the trend of tree stump side tables. It’s been on my wish list forever!)
This kind of reminds me of Jenga! Love the bright colors 🙂
Adorable!!