 Imagine a mom out in the backyard playing with her kids. As she is noticing the change of color in the trees and enjoying the cool breeze, she can’t help but keep gathering sticks and throwing them in a pile. To do what with them she does not know, but she has to save them.
That mom is me a lot of days. You have seen my stick obsession in my stick heart wall art and in my stick Thanksgiving turkey. Today, I want to show you my latest stick creation. My Christmas Joy sign!
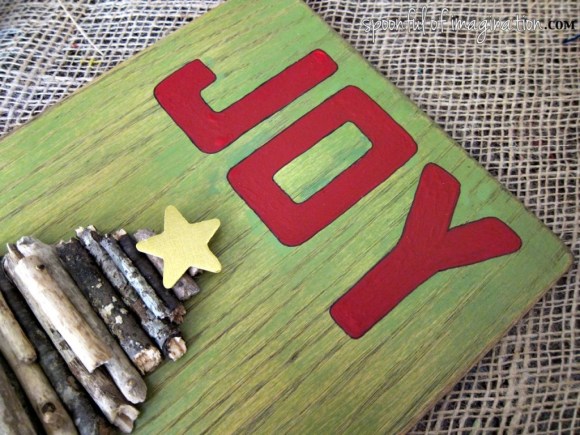
I started with a piece of scrap Purebond wood from my planked wall. I sanded it and sprayed it with a really pretty green spray paint called Eden from Rust-oluem. It’s perfect for Christmas!
 I then sanded the corners briefly with a heavy 60 grit sandpaper
 to round them. From there it got a bit crazy, and I retaught myself a lesson that I’ve learned the hard way like five other times now.
I stained my piece, but I forgot that stain eats at spray paint. Using stain over spray paint causes the spray paint to start disappearing and makes the stain hard to wipe off as it gets sticky. I quickly finished staining the board (to keep it all uniform) and wiped it off as much as I could, as soon as I remembered my mistake. For this project, I liked the look this mistake caused in creating a worn green board. I wish I had gotten more pictures, but I was in panic mood.
Next, I used some of my collected sticks to create a Christmas tree. I made the tree next to my board so I could configure the height and order placement I liked of sticks to transfer onto my board.
 I then picked one stick up at a time and hot glued a strip of glue along it ad placed it onto my green board. I simply kept doing this method, so my tree grew taller and taller till I had transferred all the sticks.


 Next, I took extra sticks and filled in gaps and holes in my tree. This step created a more dimensional, layered, and full tree.
 I really like the simplicity of this tree. I didn’t want to dress it up much, since it was pretty obvious it was a tree. I simply glued a little yellow, wood star at the top and my tree was done.
 My last step was to add JOY to my Christmas sign. What is Christmas without joy, right!? I picked out the letters from one of my stencils, and I dabbed red paint to paint the letters onto my board. I then decided to paint the letters in solid and outlined them with a thin Sharpie to give the joy a small pop.

 My Christmas sign was then complete! I love how it turned out. It was free to me, since I had all the supplies. I think this simple craft makes a great Christmas decor item.
 Have you started decorating or creating for Christmas yet?
I don’t usually start this early, since I love Fall and my Jeremiah has a birthday Thanksgiving week. This year is different though. I have big plans coming. I’m brewing something fun for my out-of-state readers. Those that are close though, this little sign will be a giveaway at my next Spoonful Lab. Yay! Do you want it!? Sign up for my next lab here.


 It was fun creating this sign, and I fell in love with it once it was complete. I love the rooster silhouette rather than a cup of coffee like on most kitchen signs. I loved it so much-I decided to go huge. I made another one that is almost poster size to hang above my frig.


