As I mentioned in my last post, we are READY for spring around here. Sunshine. Warmth. Color. Anything to get beyond this cold grey reality. While the weather around here isn’t totally cooperating with my desires, I’ll continue to take matters into my own hands and create something to introduce a little warmth and pop of color. Take that Old Man Winter.
If you’ve been around here for a while you know that I love to make flowers out of all kinds of materials for different projects. Burlap. Felt. Chiffon. Today I want to walk you through one of my all-time favorite projects, the Easy DIY Satin Flower.
If you like to read the step by step, carry on, my friend. However, if you’d like to get your supplies and create along with me – you can do that too! Our latest YouTube video is me walking you through this tutorial step-by-step. Enjoy!
Supplies:
- Your favorite colors of satin fabric. (An 1/8 of a yard will go a long way. The more satin flowers you want to create and the more colors you would like to incorporate, the more satin you should purchase.)
- Sharp scissors
- Needle and thread (thread color doesn’t matter because it won’t be seen)
- A multi-purpose lighter
- Fun embellishments of your choice, i.e., buttons, beads, scrapbook charms & hardware, jewels, etc.
- Hot glue and hot glue gun
- Once you’ve created your flower it can be used in dozens of different projects. In the YouTube video, I use mine for hair bows and headbands. You can get a variety of those from the dollar store.
- Alligator clips (If you’d like to have a flexible way to attach your flower without permanently connecting it to a hairband.)
Tutorial:
For this tutorial, you are going to cut your satin into 6 circles. When you branch out to make your own, feel free to adjust the number of layers for your own unique look. Before starting on your circles you may want to cut the satin into manageable squares/rectangles to making cutting the circles easier.

The circles do not need to be perfectly round and you’ll see why in a moment. The first circle should be the largest. You can decide how large you’d like for your flower to be but I’d recommend 3-4″ round for the first one. Now cut 5 more circles making each one a little bit smaller.


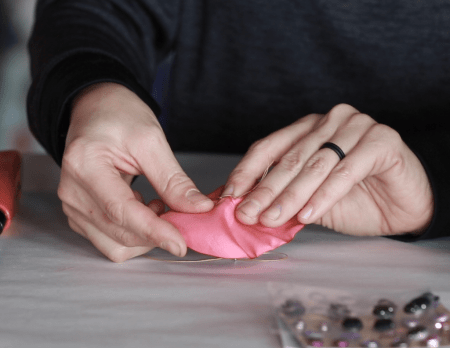
Now being very careful, use your lighter to singe the edges of your satin circles. As the flame is applied to the satin, the heat will cause the edges to begin to curling up. The longer the heat is applied the more the satin will curl. Test it out and find the look that you prefer. This step will also help to seal the edges of the fabric and keep it from fraying in the future. The satin flower should not catch fire. If it does, you are holding the flame to the fabric too long.

Once all of your satin circles have been curled with the lighter, stack them largest to smallest. Get your needle and thread and go ahead and thread your needle. I like to double thread mine to make it extra strong. Give yourself about 18-24″ of thread and double knot it at the end leaving a few inches of slack past the knot.

Now sew your needle through the bottom of your satin flower petals all the way through to the top of the smallest one. Because you are going through 6 layers of satin you may want to use a table or hard surface to help push your needle through. Be careful and watch your fingers! Don’t ask me how I know!? 😉 Pull your thread through so that the knot presses against the bottom of the satin petals. Now sew back through the top down to the bottom. Repeat this step 5 to 6 times to make sure that your satin flower petals are securely fastened. Finish by sewing through the bottom. Take the remaining thread and the slack from your first knot and tie them together with another double knot. Your flower is now secure you can cut off the slack, being careful not to cut through the knots.


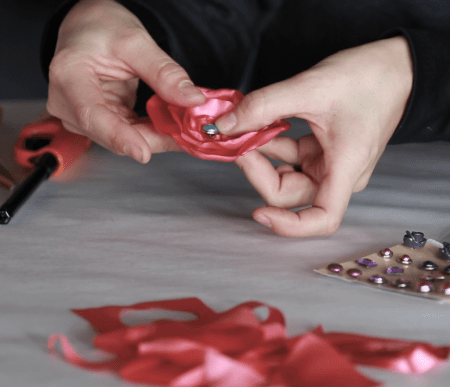
Pick out a fun embellishment for the center of your flower. Sew or hot glue it to the center of your flower depending on what you choose.


At this point, your satin flower is done. Now the question is, what are you going to do with it?
The possibilities are endless. Make several and sew them to a pillow. Hot glue it to a frame or table display. Sew or clip it to a handbag. Or you can do like I did and incorporate it into a hair bow.

If you are going to use it in a hair bow for a little one and you’d like to add some flexibility and longevity to your flower, I’d recommend hot gluing one of the alligator clips to the back. That way the flower can be attached to the perfect newborn headband for those itty-bitty newborns… but as they grow, it can be moved to a bigger hairband to grow with them!


You can do this! This project is easy, fun, and a GREAT way to give an inexpensive but super special gift for a variety of occasions. Share your projects on social media using the #spoonfulofimagination hashtag so that we can be inspired by your creations. Keep checking out our YouTube Channel for new videos and projects. We’d appreciate it a ton if you’d subscribe and share with your followers. Have a great week that hopefully filled with lots of warmth and color!
