I grew up sharing a room with a younger sister. It is hard stuff to blend two different personalities, styles, behaviors into one little space. Kind of like marriage, right?
Looking back, those late night whispers, singing, and even complaining about whose side belonged to who are some of my favorite childhood memories.
Even if we had the space for our boys to have their own room, I would still make them share. I hope and pray they grow up with memories of those same little whispers, we often hear well after we have tucked them in for the night. My boys are best friends and they would tell anyone that is true. We didn’t get very far in designing their last bedroom. We had huge plans, but it was one of the last rooms to start tackling and as soon as we had space and time to really dive into it, we moved.
Now that we are in our new home, I am dreaming up a space for them that they will love.
Our boys are very different… one is all sports and people, the other is more timid and is in his element in the quiet outdoors exploring. As I have thought about how to create a space that both boys love (and that helps us in the long, cold winters), I came up with one element that would be the inspiration for the whole room.
They needed a chalkboard wall.
 It is funny to me that this will be the third house we do chalkboard walls, yet I have never shown you HOW I do my walls. I am obsessed with them, and I want to quickly show you how you can create one too.
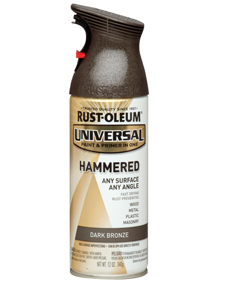
First off, Rustoleums Chalkboard paint is my absolute favorite. It’s the first one I used four years ago, and I still love it today.
 1. To prep your wall, you simply wipe it down with a damp cloth to remove any dust or grime.
2. I use painter’s tape to frame in where I want to paint. I am a messy painter, so the tape helps me to stay off the window trim and adjacent walls. If you didn’t want to paint an entire wall like we do, you could also use painters tape to measure off a section of wall to create a smaller chalkboard.
 3. I then use a paint brush to cut in all the edges of my paint surface.
4. Next, I start rolling. It is very important to use a roller nap for a smooth surface. Light even strokes are important to create a smooth finished surface. I try to go slow to prevent much spraying and to ensure that the paint is going on evenly. After the wall is painted, I let it dry four hours and do a second coat. Since we are in a slightly colder climate this time around, I let it dry longer. I painted the first coat one afternoon and the next afternoon I did a second coat.
 Do not worry if the paint looks more navy while it is wet, It will dry a really pretty dark, soft black.
 5. Once the wall has two coats and is dry, we wait three days before we use it. Before writing on it, it is important to condition the wall by rubbing the side of a piece of chalk all over the surface and erase. This will create a layer of chalk dust that provides the best erasable surface later on. You should then wait seven days before using a damp cloth to wash the wall. This ensures the paint has fully cured for chalkboard mode.
Now, of all the wonderful ideas I have for this room, I can promise you this next picture shows TWO things that I did not have in my design.
 Oh the posters… I loath them. I think I literally shrieked when my brothers gave those to Caleb for Christmas. Caleb shrieked as well but his was from delight. Those posters are not what I had planned for my boys’ room, but it is their room. I hope they have the memory growing up that their mom let them have a say in their room.
There’s still a huge section of this wall that can be used for drawing and writing. I hope it helps them to dream and create. I see some tic-tac-toe games in our future here while also using it during some of our homeschool lessons. I know it will get used as its intended chalkboard purpose, but I actually love the soft black color for just a wall in general too. Seeing the posters up on the other half of the wall (and the rich color that helped his posters pop {shesh those posters}), gave me an idea for another wall in the house to paint with Rustoleum Chalkboard paint too. I will show you more of that room soon!
So, do you love chalkboard walls too? Do you have a child obsessed with something that includes lots of posters?
Do you have any posters that you may or may not secretly hope they keep falling off the wall?
I am excited to share with you more of what we have planned for this room soon! For now, it’s one of the first projects we have tackled other than unpacking boxes. I hope you have a great week and get the opportunity to create!

Disclosure: I received the Rustoleum Chalkboard paint for free, but all feelings and opinions are my own. This post does include affiliate links.
 Does gold make you swoon?
 I found these beauties at the thrift store for around $1.00 each. I love the shape, the metal, and the designs. I kept one gold for a little while, but when I found more for my collection, I ended up spray painting all of them with my favorite paint.
 When Rustoleum has so many beautiful colors, it is hard to keep things gold for me. After I spray painted my candle sticks, I pulled out one of our butter knives and did a little widdling as I shaved away the ends of candles so they would fit down in the candlesticks.
 Once my candles were in my new colorful candlesticks, I stuck my washi tape on the candles. I love it! I love the color of the candlesticks with the fun patterns and colors of the washi tape. I use this stuff so often. It is fun to have it displayed and act as a decoration to enjoy.
 Now, I can enjoy looking at my washi tape as much as I enjoy using it. This might be a slight excuse to make sure my collection stays stocked well. 🙂

 What do you think of the gold trend? Do you love it? Or do you join me and spray paint over it with COLOR!?!


