Spoonful of Imagination

Add it to a Family for Something Beautiful

  • Home
  • Our Family
    • Our Home
  • Courses
  • Shop
  • Contact

8 Easy DIY Kid Ornaments

December 12, 2012 By Erica Deuel 5 Comments

Today, I have 8 easy DIY kid ornaments to share! They are all really cheap and would make presents for grandparents or proud aunts and uncles! I bet you already have the supplies in your house to make a few of these with your kids.

1.  Wood Block Ornament

I have gotten some sweet comments on these wood blocks on Facebook, so I thought I would share how to make them.  I started with a small piece of wood.  It’s cut roughly about 2.5″ x 2.5″.  I sanded it down, so the edges and corners were smooth.  I then let my boys paint their ornament any color they wanted.  My sweet girl was only 10 months at the time of this craft, so I painted hers a solid purple.  I sized the pictures down on my computer, so they would print a size that would fit on the ornaments.  I cut them, rounded their edges, glued them on, and gave the whole block a good coat of Mod Podge.  I then screwed a little hook in the top and added ribbon and string, and they were done!  We gave ornaments like these to their grandparents last year for Christmas, and I think they were a hit!  Other ways to use the ornaments are to capture a first year marriage (with wedding pic) or a baby’s first Christmas (with a baby picture).  These are both gifts I have given.  I love to add a personal touch to gifts.  There are so many ways this ornament could be given as a wonderful present!  I can’t wait to make new ones for our tree for this year!

2. Paper Hand-print Ornament with Bells

You might remember from my Thanksgiving Turkey post that I am obsessed with hand prints.  For this ornament, I simply stamped their hand onto a sturdy card stock, cut it out, and glued it to a coordinating color card-stock.  I then punched a hole in the top and added some ribbon and bells.  I love that it’s simple, but it captures the “year” of your little ones size hand.  Make sure to date the back!

3.  Painted Plastic Balls

You can get a big tube of plastic ornaments anywhere.  I had a package of plastic balls that I no longer liked to hang on the tree.  I let my kids paint them, and I all of a sudden liked them again.  🙂  We switched out the hooks for pipe cleaners, and they make great ornaments on my boys’ tree in their room.

4.  Paint Pre-made Wood Ornaments

There are a lot of simple but cute wood ornaments you can find on sale at your craft store.  I love to let my kids paint one every year.  It is fun to see their growth in their painting skills to look back at previous years.  I also like to maximize the use of a tacky, kid ornament going on my tree.  I stamp their hand or glue a picture to the back side of these ornaments, if there is room for it.  It is kind of like having an easy scrapbook to pull out every year by having ornaments that contain their art, picture, or hand prints.  I love it.

5.  Paint Pre-made Pottery Ornaments

Right by the pre-made wood ornaments there are usually unfinished clay/pottery ornaments that you can buy.  I also love to do these every year.  After we paint them and let them dry, we go back and give them a good coat of mod podge and they look just like any DIY pottery ornament that you could paint at an art studio for probably about 1/4 the price.  We did this same technique with our pumpkins this past fall.  In that post, I gave you tips on how to paint with little kids.  Yet, you can see from these pictures even with lots of painting practice, it is still tricky.  I had to stop my four-year-old from eating paint after taking one of these pictures.

6. Popsicle Ornaments


I love all the possibilities with popsicle sticks for ornaments.  We have done a Christmas tree and a star so far this year.  I actually love their stars probably more than my star.  I still want to make a popsicle snow flake this Christmas season.  After the glue dried holding the popsicle sticks together, they painted their trees green and their stars yellow.  They then went back and glued buttons on their trees for ornaments and sprinkled glitter on their stars so they would sparkle.  We simply added some pretty rope, and they were done! I then picked a few pictures to cut and paste to the back allowing the popsicle sticks to act as a frame.

7.  Puzzle Piece Ornament

This puzzle piece ornament is another one we did last year.  We got a dollar store puzzle and painted all the pieces red and green.  After they were dried, I let them glue the pieces around a the construction paper “frame” that I had already cut out.  Once that was dry, I glued a picture to the back and hot glued some rope on.  I love the contrast of a black and white photo with the colored puzzle pieces.

8.  Tomato Sauce Lid Ornaments

We go through a lot of salsa and tomato sauce around here, and I have started saving the jars’ lids.  I knew I would come up with a reason to use them, and I did.  I used the same technique I created for my bottle cap necklaces.  I spray painted the backs white, nailed a hole in the top, added string, cut pictures to fit, glued them in, and mod podged over them.  These are still drying, but I plan on writing a quote my kids have said this Christmas season on the back of their lid. I think it would also be cute to write something they “wished” for this Christmas, so you capture what they were asking from Santa.  Another idea instead of inserting their picture is to allow them to draw a picture of their family and glue that inside.  I might have to spray paint some more lids and create a few more of these. 🙂

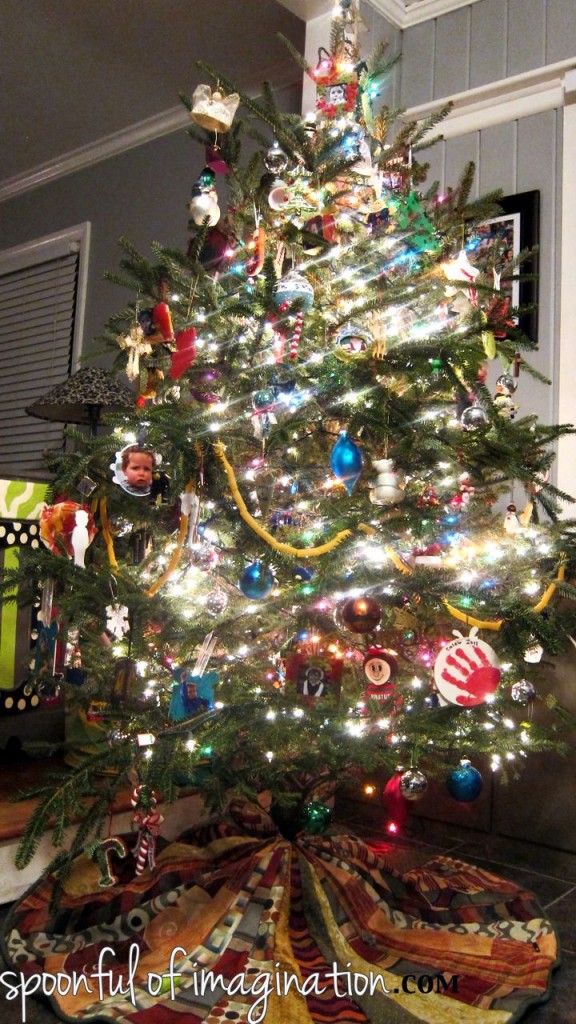
As you can imagine, my Christmas tree’s theme is “kid created.” I think someday I will probably have a more fashionably decorated tree, but I will probably have to have another tree with all my kids’ ornaments too!  I’m sure this one will remain my favorite.

What is the theme of your Christmas tree?  Do you make ornaments with your kids?

I’d love to check out your tree.  If you leave your link in the comments, I will be sure to check it out!  Thank you so much for stopping by!


Linked up at:  Shaken Together, Setting for Four, DIY Showoff, Honey were Home

Share this:

  • Click to email a link to a friend (Opens in new window)
  • Click to share on Facebook (Opens in new window)
  • Click to share on Twitter (Opens in new window)
  • Click to share on Pinterest (Opens in new window)

The Auction

July 31, 2012 By Erica Deuel 10 Comments

Here are the long-awaited pictures of my grandparents’ auction!!  It was so hard to cut down my FULL camera card to these 22 pictures, but I did it.

The morning of the auction, my mom did a toast with her sweet parents!

Aren’t they cute!?!  Editing these pictures made me sentimental all over again!  I’m so thankful I got to go to Ohio and see them and be there for this big event in their lives!

There were so many cool things in this auction!  I got to claim one of these old-time cast irons!  It is now a beautiful book end on my shelf!

I could have claimed a lot, but I held myself back!  How gorgeous is this copper bin?!?

There was stuff in three barns and oozing out on the grounds around.  I never knew they had so much stuff crammed into this cute house.

Yes, that was a church bench!  I go “grandma, where did you get a church bench!?” while thinking to myself  “she is the coolest grandma ever to have a church pew (and where has that thing been hiding)!!”.  She said, “I got it at church!  While the church was remodeling, I got it!”  Ha!  Of course you would get a church pew from a church!?!  If I had lived closer, I would have snatched this thing!  It went for $50!!

So, as you can imagine having two small boys around all this was a bit hard.  They LOVED it all, and wanted to touch it all.  Hence why we threw a lot of rocks down by the creek (removed from all this during the actual auction).  It was really cool to let them experience it off and on all day though!  They couldn’t believe how fast the auctioneer talked!

I think they are messing with old coffee grinders in that picture!  So cool!

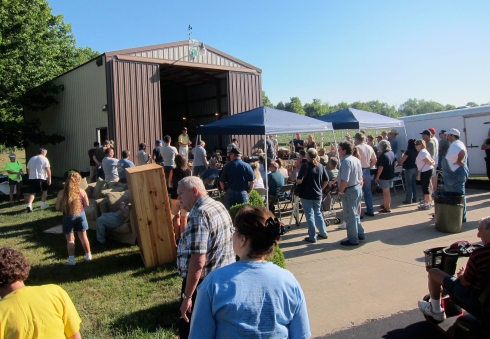
We estimated about 300 people showed up for the auction.  My grandparents strolled around a little, but they mostly sat on their front porch throughout the auction.  I can’t imagine how hard it would be to see all your stuff go and to know some of it was worth more than what it “sold” for.

I love my grandma!  Isn’t she pretty!?!  It’s so sad that Ohio is so far away!!

The first barn held a lot of household items and decor stuff.  The second barn was all my grandpa’s tools and equipment.

Here they were auctioning off my grandpa’s tractor.  Insert tear, tear.

The boys had a blast!  You can see J was more interested in waving to his family than seeing what the auctioneer was talking about.  After the house was auctioned off to the highest bidder, the auctioneer came and talked to my grandparents to see if they wanted to accept the bid.

It was lower than what they wanted, so it is going on the market for sale.  They were a little disappointed that they didn’t get offered for more for the house, but I was proud of them for not just saying yes and giving it away.

My boys were such great sports!  I was so proud of them!!

I love that picture and how it shows info on the auction and also my sweet grandparents taking it all in.  So, do you want to see something my mom and I bid on!?!  We bid on these two beauties.  (They were in the third barn.)

They are old rustic drawers that my grandpa kept screws and bolts in.  We only wanted one, which is good because my cousin wanted the other!!  We got these for $5.  I’m not even kidding.  I guess no one else saw the potential here!!!

My cousin has amazing taste, and  he already has transformed his into a masterpiece!  Amazing job Corbin!!

Did he not do an incredible job!?!  They hadn’t put the hardware back on yet, when I got these pictures, but he said they would.  My little beauty is still sitting out in my garage with most of my other finds.  Check out everything I walked away…

I do love old wood, but I gave those two boards to my wood working brother.  The old window, I’m going to make into a masterpiece to help me homeschool my boys!  I can’t decide what I want to do with the little chair.  I’m pretty excited about it!  I can’t decide if I want to paint the wood or the metal.  One of the two I want to leave alone, but I can’t decide which way to go with it.  What do you think!?!

My old drawers I plan on using for craft supplies.  I can’t decide what I want to do with it either!  There are so many options that keep my head turning and wont let it land on an idea!  Oh decisions!  I love how Corbin added legs to his drawer box, so maybe I will do that too!  I’m going to start by washing the thing and go from there!

Thank you so much for reading about my grandparents’ auction!  I love that I have some pieces of my grandparents’ past to enjoy!  Do you have some old items that are special to you!  I’d love to hear what they are!?!

Share this:

  • Click to email a link to a friend (Opens in new window)
  • Click to share on Facebook (Opens in new window)
  • Click to share on Twitter (Opens in new window)
  • Click to share on Pinterest (Opens in new window)
  • Email
  • Facebook
  • Instagram
  • Pinterest
  • YouTube
YouTube-Channel
Erica Deuel

Subscribe for Weekly Updates!


Most Popular Posts

Painting Flower Pot Party Tips
DIY {easy} Burlap Wreath
DIY Outdoor Checker Board
DIY Paper Butterflies- Spring decor for cheap
School Desk Makeover
Cheap lamp to Industrial Beauty
DIY Outdoor Table
DIY Burlap Flowers
Chiffon Flower Tutorial
Engraved Wood Sign Tutorial (and Dremel Micro)

Categories

  • All About the Kids
  • art journal
  • Blogging
  • Christmas
  • Craft Projects
  • Dancing Zebras
  • DIY
  • Eddy's postcards
  • Embroidery Journal
  • Family
  • Featured
  • Fireside Chat
  • Foster Care
  • Giveaways
  • Guest Posts
  • Home
  • Homeschooling
  • Kid Activities
  • Kid Craft
  • My Heart
  • Our Outings
  • Project Spotlight
  • Send Out Love
  • Shop
  • Sponsored Posts
  • Spoonful Lab
  • Spoonful Tribe
  • Tips + Tricks
  • Traveling
  • Uncategorized
  • Vlog

Favorite Categories

Subscribe for Weekly Updates!

Favorite Categories

© 2023 Spoonful of Imagination, Inc.