 Want to add a pop of color in your house without purchasing anything new? This is a project you can do!
In our last house, we had this small desk lamp in our boys’ bedroom. We haven’t used it in our new house, so its just been sitting in a closet. I loved the shape and it worked so we have just held on to it. If you have boys who occasionally turn the living room into a football field, you know it’s important to keep a few items on the sideline should a picture frame or lamp take a direct hit. Just saying.
Now, that we have the art studio, I am finding a lot of days where I am working on setting up workshops, emailing, and spending more time on the computer. I needed a functioning desk with a lamp.

I pulled out my old lamp and put it back to work. The only problem was it had a lot of white on it, and the lamp shade I wanted to use also had a lot of white. It was easier to change the lamp base than to find another lampshade that fit and looked great. Here is what I did to my lamp base.
First, I used painters tape to cover the light bulb socket and switch section of my lamp.
 Next, I pulled out a couple of my leftover spray paints that I liked and did a light coat of each color all around my lamp.
 I let each color dry completely, before I sprayed the next color. I overlapped the colors a little as I sprayed to create a natural ombre look.
For this project, it was easy to hold the light bulb socket area and rotate the lamp to create the even coat. Please note: To avoid drip downs of paint, it is better to do two light coats of spray paint than to do one thicker/heavier layer.
 It’s always a little more challenging to do spray paint projects during the dead of winter. It’s been hovering around “Brrrr, it’s cold” to “I can’t feel my face” this past month. Which means spray painting is happening in the garage. While it’s certainly warmer than outside it still feels like “I’m losing feeling in my toes” after about 20 minutes. So all that to say, it takes things a lot longer to dry. Be sure to let your lamp dry completely, so you don’t get fingerprints or scratch marks on your new colorful project.
 Once your lamp is dry, add a light bulb and lampshade and you are ready to go! I love the way that my white lampshade looks with this new colorful base. It’s such a fun mix!
Pssstt… did you notice I left the gray layer on the base of my lamp base? I liked that color, so I used it as the first layer and just added more color to the middle and top!
 I’m hoping this little desk and lamp helps me to have a focused workspace. Maybe it will help my kitchen counter from becoming an office.
 Do you remember when I made these rustic mirrors? They may be one of my favorite crafts of all time.
What do you think? Do you have a lamp, basket, or flower pot that is hiding away in a closet, basement or garage that could be brought back to life with a little color added to it? Have fun! Use your imagination and have fun giving old items, new life. This is also a great way to make someone a special and customized gift without spending lots of money.
Thanks so much for stopping by! If you try this project, tag me on social media with #spoonfulproject so I can see your handy work!

 Inspiration can come from just about anywhere. There are times where I go looking for it and then there are times when it just hits me. I love when that happens.
 I love having baskets to throw all sorts of stuff in, yet with three dogs in this house hair balls are continually rolling by on our floors. I thought, “what if I could give this basket legs and save some hair from getting on my blankets?” That is what I set out to do. The first thing I did was spray my basket a pretty color.
 I then searched for some old table legs that I had bought for another project but never got around to completing. I found them, taped the ends off, and sprayed them a pretty gold.
 Next, I measured the bottom of my basket and cut out two squares of plywood to those measurements. They would end up sandwiching the metal bottom of the basket in the next step.
 Once I had my wood cut, I also sprayed both pieces gold to match the legs. I then used clamps to hold one piece of the plywood on the bottom of the inside of the basket. Using the same clamps, I also attached the other piece of wood onto the outside of the bottom of the basket. This basically squeezed them together while holding the wood and basket in place.
 I used my Ryobi Nail Brad to permanently join these two pieces of wood together (with the basket in between). The last step was to attach the legs to my basket. I drilled little holes into the bottom piece of plywood. The legs already had a screw coming out of the them, so I twisted the little legs in, flipped the basket over, and it was done!


 I put this basket in my colorful living room and threw some pillows in it. It is just perfect.
 Our house is so colorful. For other tutorials featured in this picture, you can click these links…
 What do you think?
 I hope you are able to get crafty this week! Find a minute and do something creative. It might just be figuring out a new meal to cook or a better way to organize your desk, but each little time we stretch our creativity, I believe we are better off for it!
 This room just makes me happy.
 Shortly, before we moved to Indiana, I repainted an old dresser to give my J a
  Shortly after we moved into our new house, and started settling in, I remembered my drawers. I dug them out of the garage and gave them a fresh coat of paint. I thought if I added a few little wheels they would make awesome under the bed storage for my boys’ bedroom. This was about 18 months ago…about the time we got our pup. Who is now a full-grown German Shepard mix.
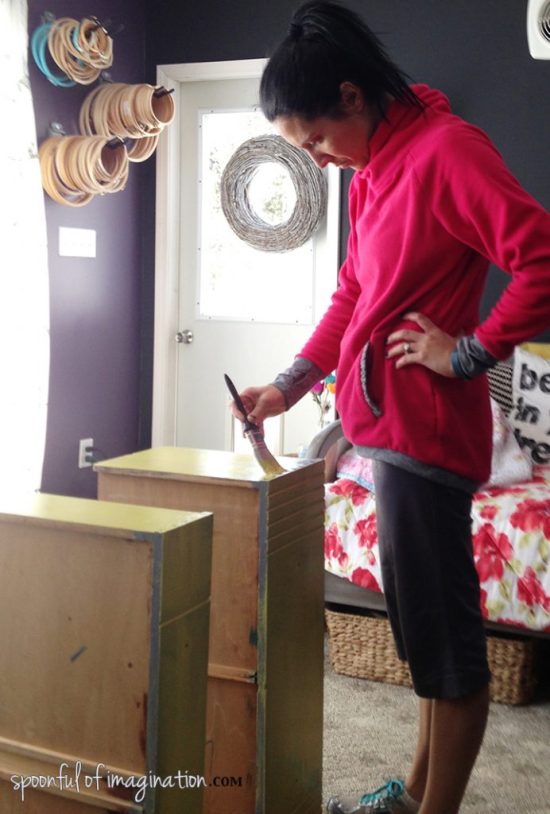

 I ended up paper mache-ing some wrapping paper to the bottom of the drawer and adding new handles, but that’s where the project came to a stall.


 He’s a genius. He placed the shelves right above the screws from the handles so no one would get scraped reaching for something off the shelf. This was a quick project but needed some thought and calculation. He used my Ryobi Nail Brad and whipped this up much quicker than I expected.
 He cut two 14 inch long 1×2’s and attached them to the wall. These provided a sturdy hanging option for the drawer while providing a little bit of space off of the wall. He was able to sink one screw from each of the support boards into a stud in the wall. Since the drawer wasn’t wide enough to span across to studs, he used drywall anchors to attached the other screws.
 Once the supports were in place, I helped him hold the drawer up to the wall. He used the brad nailer to quickly attach the drawer to the supports. Then, he went back and added a few screws for more support.
 Once my drawer was hung, I painted the shelves the same teal as the flowers on the wall for an extra punch of color. I then styled the shelves, replaced my lamp on its new sturdy base, and my nightstand was complete!


 I love how this nightstand is narrow. It doesn’t take up a lot of space between the two beds, which allows for maximum floor space. Yet, it allows for a little lamp to be placed. This is our foster bedroom/guest room, so it is not currently in use. But now we are ready. Guests can place their phone to be charged or a bottle of water right beside their bed at night. I love it.
 I have been on the hunt for lockers to put in our home for years. Seriously! It’s not like they are super hard to find. The problem is that the folks who sell them are often pretty proud of these old rusty boxes that used to hold sweaty gym shorts. Finally, I found these beauties that met my criteria for price and size and I quickly scooped them up.
 My amazing kiddos jumped in right away, when I asked for their help to scrub those old sweat boxes down with some soapy water. I mean seriously, these did come out of an old locker room. Yuck!
 I went ahead and placed the lockers where I wanted them to go. The contemplation game was on. What would be the perfect color to help tie my new lockers into the room?
 I pulled out my tarps. Covered the locker face plates with some masking tape. Then I applied my five colors.
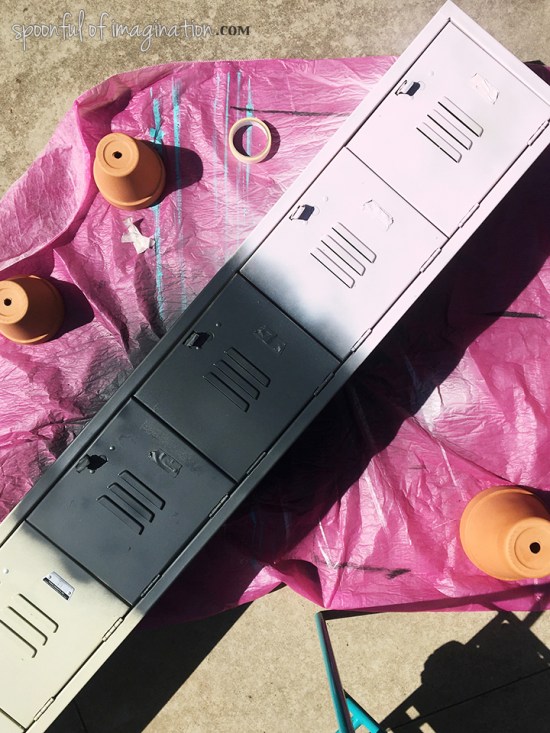 Below is the finished test color results. Once I saw the lockers in place, I had a feeling I knew which color I wanted to use.
 Please ignore all my laundry and look through the doorway to the right. You can see the beginnings of a project I will share with you soon. The colors were all coming together making me want to lean in a lighter direction with the lockers. But, like I said, I turned to Instagram to see what my followers had to say. My followers know I love color, lots and lots of color. They all rallied for me to keep the test colors as-is and go with the multi-colored box of crayon approach to my lockers. I just couldn’t do it. My OCD overruled my Instagram friends. (Sorry!)
  I landed on the light pink and after letting it settle in for a few weeks, it’s official, I love it! This room already has a lot of busyness with my rug and new wall art happening to the right. The solid color ties it in well while it still has a nice soft pop.
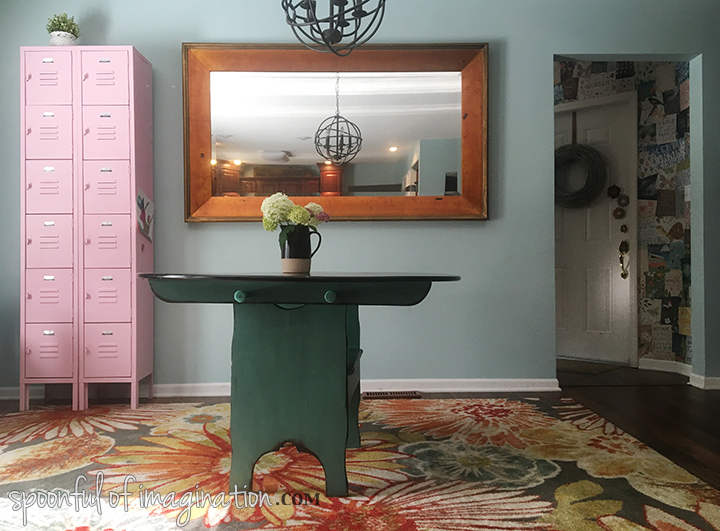 Reagan fell in love when I showed her how she could use magnets to now hang her artwork to the lockers. Which by the way is the primary use for the lockers – art supplies. This little corner is my kids crafting corner. The have all their own supplies and are free to dive into projects whenever they want. Now the locker gives us a little more storage and a fun place to put their work on display.
 I’m not a very patient person but some things end up being worth the wait. I love love love my new lockers even though they took years to find. I also love the color after weeks of deliberation and lots of back and forth.