Disclaimer: The wall decals I received for free. Thank you RoomMates for so generously gifting those to my boys. All opinions are very much my own.
One of the great joys of being a mom for me is creating special places for my kids. I literally dream about it. Taking their interests and joys to heart and using them to inspire a place that they love is so fun. This is my fourth boy bedroom to start and I have learned a few tricks that I want to share with you.
 If you have been following along, you know we just moved from Georgia to Indiana at the end of last year. We have been busily making our new house…home.
The boys’ bedroom has been one of my first rooms to tackle. My inspiration board for this room is truly helping to guide this process. To give you an idea of what I started with, here is a picture of the boys’ bedroom from the first week we were in our house. Also, you can see the test paint colors on the wall in the following picture.

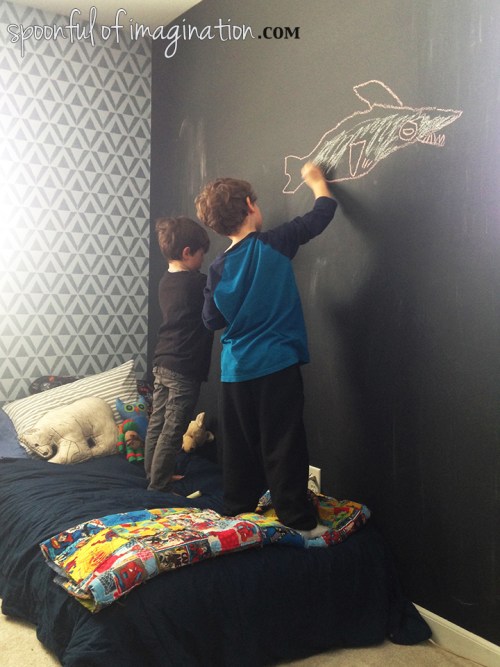
 We have completed a chalkboard wall and a stencil accent wall. I will tell you more about that next week.
This week we checked off one more of the items on our inspiration board. We hung our Teenage Mutant Ninja Turtle RoomMates wall decals. They are amazing. The boys did them pretty much by themselves. So you know that meant re-peeling and adjusting till we got them perfect. These things are easily moveable, which is amazing.

 As soon as they were hung, the boys wanted to pose with their heroes, Raphael and Donatello. They were so proud.


 As I sat watching their joy, I thought about how we are creating this space together. They are loving it as much as me. Although I wouldn’t choose it all (like the loathed posters), I am happy that they are happy with it.
Here are a few tips I have learned from creating spaces for my kids.
1. Have an inspiration board or at least a picture in your head. All too often I have bought little things here or there-thinking that I could “maybe use this somewhere/sometime”. Those little things add up and are often the first things we get rid of when we do a big sweep purge. An inspiration board helps keep you on track.
2. Collect items and don’t be afraid of it taking time to get the space right. My J spent a big portion of last summer collecting bugs, so when these little dragon-fly lights went on clearance at the end of the season, I snatched up two sets. I have been waiting months to break them open. It’s much better to buy something you LOVE than to find things you might use.

3. Homemade items help turn a beautiful space into a special space. I’d much rather err on creating a special place that can be used and honors my child than a picture perfect, magazine worthy room. Embrace that feather collection, sew a handmade pillow cover, adore the handmade gift that they receive, and hang up pictures and their art. The gifts that take time show heart. A lot of these ideas are inexpensive or free too!

 4. Go with your gut. There are times I have questioned myself. I have thought that it might seem weird or that’s not how its done in magazines, if I go with my first instinct. That moment that I hesitate is usually the point I regret. I wanted two accents walls in this room (the chalkboard wall and a stencil patterned wall), and I went for it this time. It might be unusual, but it’s so fun and we all adore it! Mix those patterns, colors, and textures to create something you love. It’s for you or your family, so if you like it…that’s all that matters.
 5. One more thing that I always keep in mind when creating a space, is that paint is cheap. Don’t beat yourself up over it. In the scheme of room design elements, paint is one of the cheapest to buy. I do paint samples most of the time, so I can see what the color looks like dried and in different lighting throughout the day. When it comes down to it though, I just start getting color on those walls. I can always change it, but the hardest part is just getting started.
 I still want to hang some of their art and a few signs I made them, but I am holding off until we get the bunk bed built. That’s the last big thing for this room. I can’t wait to get their mattresses off the floor, but they don’t seem to mind. They will miss these moments once their beds are lofted in the air.

What are your go-to tips when decorating? I still have a few more rooms to go in this house. I’d love to hear your input on how to create a space you love for less!
My hope in sharing the process of my boy’s room, you see that in creating a special space-you don’t have to spend a lot of money or have the best things. Adding a little color, imagination, time, and heart can create a place you and your kids love.
Create something this next week, it just might do your soul good.

 I love how Caleb just hungers to be near and talk to me. He will come in the room literally just to tell me something. He notices the small things and confidently gives out compliments. He has a bold aggressive spirit that just wants to succeed and do it on his own. When he pours himself into something, he is relentless and can succeed at anything. He’s so smart and self teaches himself daily. I often wonder why we ever bother doing school. Most days, he will finish my explanation of a lesson for me.
 1. Caleb is obsessed with sports. We didn’t end up finding a house with a basement, so we knew he would need a basketball hoop in his room instead. He saw one he liked at Walmart, but it would have been like the third or forth one we have had. The little plastic hoop breaks so quickly. Matt’s parents found
  I am also planning to create a little wall gallery with some of their art or things that I have already made them. We are going to hang up their
  We definitely need to hang this
  I painted this sign years ago. It’s funny I showed it on our very first blog. This
  I still like the
  I love the idea of this
  As you can see, we have lots of projects and are definitely dreaming big. Why not!? We only live once. There will be lots of love put into these projects, and I will take you on the journey with us. It will be fun to see if the final reveal has some or any of these elements.
 Do you have or know a little boy that would like this room too? Please feel free to share this post. I’d also love it, if you pinned it to one of your Pinterest boards! Inspiring others to dream big will always be one of my favorites things about this blog.
 It might get messy. It might take a few steps and seem tedious, but in the end you could have one really happy My Little Pony fan grinning ear to ear.
 She had a blast painting her Fluttershy. If you have a new three-year old, you know her painting looked nothing like Fluttershy. Yet, she was proud of it, and it truly was beautiful. I have so many paintings and “pictures” of hers like this. I decided to help her transform her art into a Fluttershy.
 After I printed off my Fluttershy, I taped the puzzle pieces of her together, cut the image out, and laid it on top of Reagan’s painting. I then traced the pony onto the painting, and cut it out.

 Once I had some pencil lines of Fluttershy’s features, I went over them in Sharpie. I ended up cutting out eyes and a wing from a different part of Reagan’s painting, and I glued them onto Fluttershy’s body to give her pony another pop of color and texture.
 Once all the yarn was in place and dry, our Fluttershy was complete! We think she turned out so cute, and Reagan wanted to carry her all over :).
 I had to convince her she was safer to hang on the wall. We ended up placing her in an Ikea frame and did a background matte like I did in this
  So, what about you!? Do you have a My Little Pony fan? You could easily take this concept and turn it into your child’s favorite character.


