 This room just makes me happy.
There is color EVERYWHERE!
I’ve never been afraid of color, but lately I am having more and more fun going bold and mixing prints and styles to create something of my own. In this room, we have handmade and store-bought. There is new and rustic. There is color and then neutrals (or a color that acts as a neutral), and somehow it all works together to create a beauty that I love.
This room’s finishing touch was actually started years ago. Let me explain.
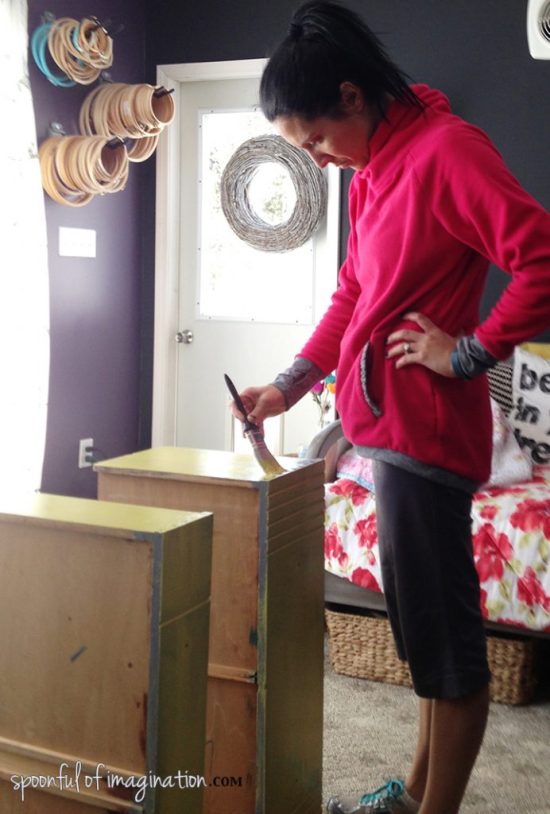
 Shortly, before we moved to Indiana, I repainted an old dresser to give my J a new dresser. As I was getting ready to throw his old busted dresser out, I just couldn’t part with the drawers. It was an old really heavy, painted too many times dresser that needed to go, but the drawers seemed like good boxes. I knew I could use them for something someday. So, as we moved to Indiana, we loaded up these empty, someday project drawers to come with us. Can we say hoarder!?
It was worth it.
 Shortly after we moved into our new house, and started settling in, I remembered my drawers. I dug them out of the garage and gave them a fresh coat of paint. I thought if I added a few little wheels they would make awesome under the bed storage for my boys’ bedroom. This was about 18 months ago…about the time we got our pup. Who is now a full-grown German Shepard mix.

 I ended up paper mache-ing some wrapping paper to the bottom of the drawer and adding new handles, but that’s where the project came to a stall.
My drawers did go under the bed, but they weren’t being used. It was more of just a new, clean place to store my someday project (rather than the garage). They sat here until a few weeks ago when a new inspiration struck. I needed a small, narrow nightstand to go between the twin beds. I wondered, “could I use one of these old drawers as a nightstand?!” I hurriedly pulled one out and placed it between the beds. The size was perfect. But since there is a vent in the same spot, the nightstand couldn’t get pushed up against the wall and be a snug fit. It fell and the lamp broke (nothing a little super glue couldn’t fix). This is where I roped in my talented husband. He added shelves to the drawer and hung it up on the wall for me. 


 He’s a genius. He placed the shelves right above the screws from the handles so no one would get scraped reaching for something off the shelf. This was a quick project but needed some thought and calculation. He used my Ryobi Nail Brad and whipped this up much quicker than I expected.

 He cut two 14 inch long 1×2’s and attached them to the wall. These provided a sturdy hanging option for the drawer while providing a little bit of space off of the wall. He was able to sink one screw from each of the support boards into a stud in the wall. Since the drawer wasn’t wide enough to span across to studs, he used drywall anchors to attached the other screws.
 Once the supports were in place, I helped him hold the drawer up to the wall. He used the brad nailer to quickly attach the drawer to the supports. Then, he went back and added a few screws for more support.
 Once my drawer was hung, I painted the shelves the same teal as the flowers on the wall for an extra punch of color. I then styled the shelves, replaced my lamp on its new sturdy base, and my nightstand was complete!


 I love how this nightstand is narrow. It doesn’t take up a lot of space between the two beds, which allows for maximum floor space. Yet, it allows for a little lamp to be placed. This is our foster bedroom/guest room, so it is not currently in use. But now we are ready. Guests can place their phone to be charged or a bottle of water right beside their bed at night. I love it.
This room has so many surprising fun elements from the wood chairs hanging on the wall all the way to the huge painted flower mural. Having a drawer converted to a nightstand just completes the look. Yes, it might have been cheaper to just find another drawer in Indiana rather than fill up more space in our moving truck from Georgia, but then I wouldn’t have as good of a story.
Have you repurposed anything recently!? I love to repurpose items. Turning our kitchen chairs into a bench is one of my favorite projects to date. I really loved this little dresser that had broken shelves that I turned into a fun piece too.
There are so many possibilities, if we use our imaginations! I’d love to chat with you about your projects! Find me on Instagram, @ericadeuel, and say hi!
Thank you so much for checking in! I will be back with a room round-up post full of links to the various projects soon!

 When I was a little girl, I wanted to be a librarian. Visiting used books stores and using my baby-sitting money to buy books was one of my favorite things to do. Today, I still have a lot of those books. My Baby-Sitters Club series I know is a hot commodity. I just hope Reagan likes those books too or I have saved them all these years…to just save them.
 Supplies needed for each shelf: (The length of wood or the amount of each item is up to how long your shelf may end up)
 The shelf seemed a little crooked at first. Keep in mind you are working with wood that could be warped, so look for the strongest/flattest boards when picking up your supplies. This can take some time and patience. Big box store wood is usually crappy but if you dig through the pile you can find some good pieces. Also, keep in mind the boards may settle a little once there is weight on them. Finally, once all of your shelves are in place and staged, it is very difficult to spot minor imperfections.
 We placed our shelves the same 18″ apart. This step is totally up to you. I wanted room for tall books, decor, and to still see some wall which is how we came up with our distance. Matt completed the same process on the two lower shelves. Once we had the pipes in place, it was easy to tell how long our boards needed to be cut. We cut them and placed them on the pipes to be sure it was what we wanted.
 This is where we realized the pipes we had bought did not look right. We started with the 10″ black iron pipe, but ended up returning them for the 8″. If you buy the 8″ pipes than you wont have the large gap in your shelves. What we also realized is that the threads on the pipe will not screw all the way into the flange or the cap. Below you can see the difference in using the 10″ inch and 8″ pipes. Of course you could purchase 2″ x 10″ wood to give yourself a wider shelf. That’s what I love about this shelf system, it’s totally customizable.
 I was not sure what kind of color I wanted to make the shelves, so we tested a few out. Since this room is a little smaller with only one small window, it tends to feel darker. I painted the walls a light, light blue and decided to keep the shelves light as well. I thought if the walls and shelves were lighter overall, I could add pops of color for fun but still brighten the room up a bit in the overall feel. I ended up going with Rust-oleum’s Driftwood Stain. I love it!
 I used a sponge brush and painted the boards. I let the stain sit for a while and then I used an old t-shirt to rub the excess stain off.
 Once the stain was dry, we put the boards in place. I loved the look, but decided I wanted one more shelf. I opted for it to not go any lower, so the kids were not at arms reach. We did something a little different and ended up turning around the corner and adding another shelf out of the middle of our current series.
 I love how it turned out! I even got most of our books out on the shelves in the process. I plan to switch out the books in the basket (on the floor) with new ones from the shelf or kids room, so our kids can be regularly reading/looking at books but not having to try to get them off the shelf themselves.
 I’m so excited at how fun this little corner turned out while still being very functional. We rocked all three of our babies in that rocker, and now it’s in a room where we hope to love on more kids that come into our home.
 When you walk in our front door, this room is immediately to your right. I love that it looks like a fun, welcoming spot. We all love to sit in there already. Matt called it my library the other day, and my heart smiled. This room will hopefully get lots of use.
 What do you think? Do you have a place in your home that could use some fun, industrial type shelves?
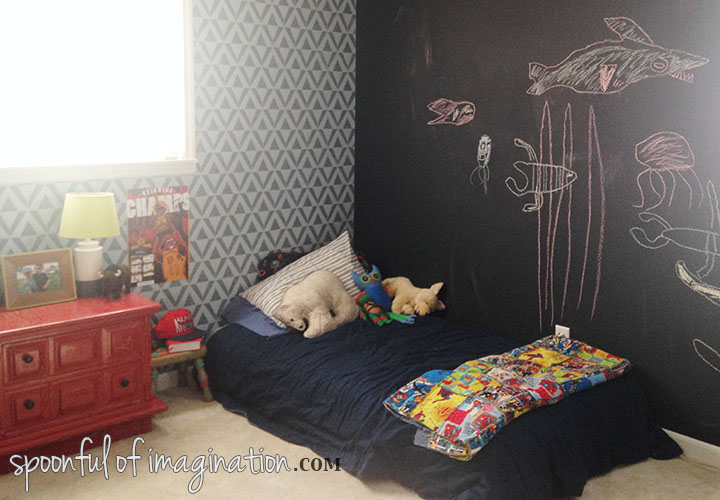
 When I started dreaming of how I wanted to create my Reagan’s new bedroom, I knew I wanted lots of color, texture, patterns, and fun. I pictured fun color with pops of natural elements and black and white contrasts thrown in. What I did not take in account was my daughter having an opinion, and she had one.

 It was really bright. I had to try to envision the end result. I kept thinking this seems like a nursery for a pink ballet themed room. I just kept playing in my head “I love my daughter, I really love my daughter” as I painted every stroke. I fought that picture in my head with what I knew the end result could be.
 I was so excited when I saw that Royal Design Studio Stencils had so many fun, girly stencils. I fell in love with the

 This stencil was so simple in the fact that I did not worry about it looking slanted when I stood back. Based on the pattern there was no fear of my stencil going crooked. What was a little more tricky was lining up the stencils, and that was only because the connecting pieces (petals) were smaller.
 I decided to use gold as the accent color for this stencil because it’s fun and also subtle. I wanted the wall to ultimately look purple but also fun and a true accent wall. The stencil created that look!
 The process wasn’t fast enough for this sweet, exited girl.
 I love how this room can grow with her. It’s so fun now, but it can also last for years. I joke with her now about trading rooms. What I love most though, is she loves it as much as me. She calls her wall her golden flowers.
 As I painted this room, I realized I really didn’t want to spend the paint or time to paint her closet. It was a clean light gray. It looked fine and was in good shape. There was really no need to paint it except that it would have this harsh line that might look like I took the lazy way out in not painting it, whenever the closet doors were open.
 By doing this technique the wall looks intentional (not like a lazy mom), and it’s also a fun element all on its own! I really love it, and now I want to go back and do the same thing in my boys’ bedroom.
 What do you think of all the color and splashes of fun? Does it make your heart go pitter patter as well?
 Painting is therapeutic to me, but I usually do have to do a big build up to start a room. There is something about just getting over that hurdle that is hard for me. I often joke with Matt that I would pay someone to tape off the room and prep it for me. I don’t mind the actual painting, but the prep work is what takes more time and is harder for me. I’m messy, so I have to tape and lay a little paper. Otherwise I’m scrubbing carpet like crazy. I’ve done that in two rooms so far in this house :). Whoops!
 When my stencil arrived, I was impressed with the awesome directions it came with. They gave tips on how to stencil, which end was the top of it, and what pieces of the stencil were your connection pieces to build on when you have to move it. The directions broke it down for me, so literally my fear started to melt. They were great.
 I got that stencil taped up and just went for it! I choose to go with a stippling effect that is much like my
 My hand got so tired. It started slow because I was really cautious to exam every little insert to see if they had the same “heaviness” of paint. It got faster as I became more confident. I got the hang of how much paint to put on the brush, how much looked right in a section, how to dab in the middle and then move out the sides with lighter dabs (so there was less likely a chance of paint oozing below the stencil). It got faster. My technique was to do about three or four stencil placements, before I would take a break. Usually at that point my kids needed me and my hand could use a break. This process took a couple of days. I didn’t work non stop on it because of life and the size of my wall, but I did want to get it done quickly, so my boys could stop camping out on the living room floor.
 One thing that I learned towards the end of my project was to just make it my own. The directions were so helpful, but at the end of the day this was my wall. Well, really it is my boys wall but you know what I mean. I cut my stencil up. I hated to do so, because I knew I loved the wall before it was even done-but it helped!
 This wall was so worth it. I absolutely love it. My boys do too. It really has me rethinking our loft bunk bed idea. I wonder if I can convince them that twin beds are cool after the
  I did go back with a small acrylic paintbrush and touch it up in a few places, but other than that I wanted it to look more stamped, rustic and I think we pulled that off. The boys love playing in their room.
 Have you ever stenciled a wall? I am so glad I tried this. I am now dreaming up Reagan’s bedroom and already have a stencil picked out for it. I can’t wait to start it!
 Thank you so much for checking out my boys bedroom stenciled wall! Please feel free to share a picture from here on Pinterest and be sure to stop by