 In this day and age of online shopping and gift cards, it can be a struggle to make gift giving feel personal. Don’t get me wrong, I certainly send my share of gift cards and I love when I receive them… but this year I am determined to add a personal touch that helps add to my gifts – DIY Gift Toppers.
They are cheap, simple, and fun to make. They will add a pop of color and a personal touch under the tree. Let me show you how to make some of your own.
Start by gathering some wood. If you are like me, you have scrap wood laying all over the place. Otherwise, head to your local lumber store and usually around the back of the lumber section you can find bins of scraps that they will sell to you for pennies on the dollar. If you’d like something more uniform you can go down the trim aisle and select a few long pieces of trim that you can take home and cut. Feel free to go with your own sizing but I was focusing in on pieces that were about 1 inch wide, 6 inches long, 1/4-1/2 inch of thickness.
 Once I had my pieces, I did a quick sanding to smooth down the corners and edges. I pulled out a variety of spray paints. I then gave my wood pieces one coat for a background color. You could go with acrylic paint, but it will probably take a couple of coats.
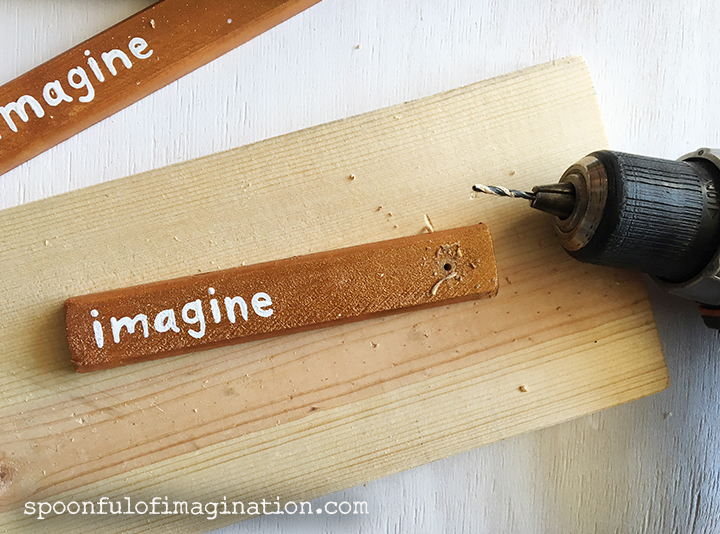
When the background color dried, I then painted some of my favorite words on the pieces using acrylic paint. White lettering worked well on the dark backgrounds whereas I was able to be more colorful with the lettering on the white pieces. This is where you can truly make this your own. Paint your own words or phrases. You could even paint the names of the gift recipient if you’d like. (I intend to hand write the gift recipient names on the back of mine.)

 Once you’ve completed painting, the next step is to drill a small hole for the Gift Topper to be tied onto your gift or to add it’s hanging strap like I did on mine below.
Easy right!?!
 I cut elastic strands in 8-10 inch pieces and then tied them to my Gift Toppers. Originally, I was just going to tie the Gift Toppers to the gift as is. But then it clicked, by adding this little extra step, the Gift Topper becomes part of the gift. It can be later hung as an ornament or decoration around the house.
 If you want one more touch, you can also go back to your finished wood pieces and do a little more sanding or possibly even staining to give them that worn rustic charm.
 I just love these little things, and I’m so excited to put them under the tree. I hope you do too! Please make some and add your own variations and embellishments. Just make sure to share it on social media using #spoonfulproject so we can all enjoy your creation.

 One of my favorite things to do with my kids is to create with them. In these moments, we can sit and talk and jump from being in our own imaginations to dreaming with one another. It’s so fun. It’s often in these moments that we come up with cool ideas like this pom pom bead.
 We got a big pile of pom poms, and the next step is to just attach these two materials!
 We used our hot glue gun. We simply held the bead by the openings so the side of the bead is open. We placed a small dab of hot glue on the bead and pressed the pom pom on top.
 This is such a quick process! Before you know it, you will have a huge pile of pom pom beads! We love how the beads are cheap and quick, yet they create a whole new dimension and texture to our garland! My girl loved stringing these up with her other pieces! It was such a fun and easy sewing project for her!


 What do you think? Would your little one like to create some pom pom beads to sew with too? You could make a garland with just pom pom beads. Or maybe replace the triangle with fabric strips!? With a little imagination, the possibilities are endless.
 Christmas is coming. Can’t you see a long strand of these wrapped around a small table top tree? How cute!
 Inspiration can come from just about anywhere. There are times where I go looking for it and then there are times when it just hits me. I love when that happens.
 I love having baskets to throw all sorts of stuff in, yet with three dogs in this house hair balls are continually rolling by on our floors. I thought, “what if I could give this basket legs and save some hair from getting on my blankets?” That is what I set out to do. The first thing I did was spray my basket a pretty color.
 I then searched for some old table legs that I had bought for another project but never got around to completing. I found them, taped the ends off, and sprayed them a pretty gold.
 Next, I measured the bottom of my basket and cut out two squares of plywood to those measurements. They would end up sandwiching the metal bottom of the basket in the next step.
 Once I had my wood cut, I also sprayed both pieces gold to match the legs. I then used clamps to hold one piece of the plywood on the bottom of the inside of the basket. Using the same clamps, I also attached the other piece of wood onto the outside of the bottom of the basket. This basically squeezed them together while holding the wood and basket in place.
 I used my Ryobi Nail Brad to permanently join these two pieces of wood together (with the basket in between). The last step was to attach the legs to my basket. I drilled little holes into the bottom piece of plywood. The legs already had a screw coming out of the them, so I twisted the little legs in, flipped the basket over, and it was done!


 I put this basket in my colorful living room and threw some pillows in it. It is just perfect.
 Our house is so colorful. For other tutorials featured in this picture, you can click these links…
 What do you think?
 I hope you are able to get crafty this week! Find a minute and do something creative. It might just be figuring out a new meal to cook or a better way to organize your desk, but each little time we stretch our creativity, I believe we are better off for it!
 This room just makes me happy.
 Shortly, before we moved to Indiana, I repainted an old dresser to give my J a
  Shortly after we moved into our new house, and started settling in, I remembered my drawers. I dug them out of the garage and gave them a fresh coat of paint. I thought if I added a few little wheels they would make awesome under the bed storage for my boys’ bedroom. This was about 18 months ago…about the time we got our pup. Who is now a full-grown German Shepard mix.
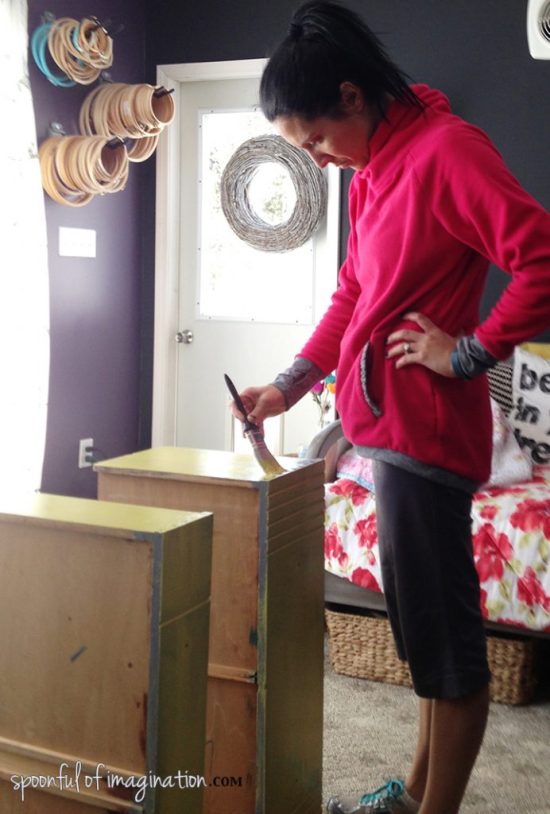

 I ended up paper mache-ing some wrapping paper to the bottom of the drawer and adding new handles, but that’s where the project came to a stall.


 He’s a genius. He placed the shelves right above the screws from the handles so no one would get scraped reaching for something off the shelf. This was a quick project but needed some thought and calculation. He used my Ryobi Nail Brad and whipped this up much quicker than I expected.
 He cut two 14 inch long 1×2’s and attached them to the wall. These provided a sturdy hanging option for the drawer while providing a little bit of space off of the wall. He was able to sink one screw from each of the support boards into a stud in the wall. Since the drawer wasn’t wide enough to span across to studs, he used drywall anchors to attached the other screws.
 Once the supports were in place, I helped him hold the drawer up to the wall. He used the brad nailer to quickly attach the drawer to the supports. Then, he went back and added a few screws for more support.
 Once my drawer was hung, I painted the shelves the same teal as the flowers on the wall for an extra punch of color. I then styled the shelves, replaced my lamp on its new sturdy base, and my nightstand was complete!


 I love how this nightstand is narrow. It doesn’t take up a lot of space between the two beds, which allows for maximum floor space. Yet, it allows for a little lamp to be placed. This is our foster bedroom/guest room, so it is not currently in use. But now we are ready. Guests can place their phone to be charged or a bottle of water right beside their bed at night. I love it.