Hello!! I almost forgot today was my project spotlight day!! Opps!! It would have been bad to lapse only on week two! 🙂 Luckily, I had already edited my pictures and today is not over!
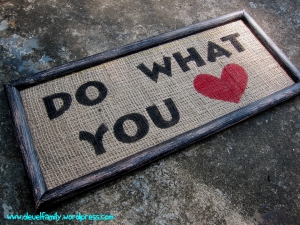
We celebrated Father’s Day a little late because Matt was out-of-town, so today’s post is based on a burlap sign I made him last week for one of his presents.
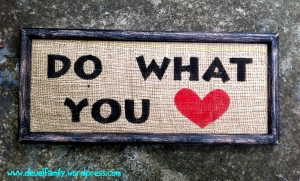
Does it look familiar to any of you??? It was based on this sign from Target…
I saw this sign and I loved it!! It’s such a simple phrase, but it gives such an incredibly powerful message. When we do what we love and use the gifts/abilities God created us with…aren’t we happier? I feel like not only am I happier but I also do my best work when it is doing something I love. I know I can create a sign a LOT better than I can make dinner. I’m just saying 🙂 I love to craft. I do not love to cook, and it shows in my results!
I fell in love with this sign right away but couldn’t bring myself to buy it. It was $20 regularly priced, and it was on clearance for $15.00. I have a hard time buying anything, if I know I can make it cheaper. My sign cost me $2.00. Here is how I did it…
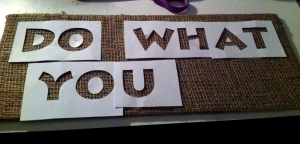
First, I printed off my computer my “stencil”. I have found that even though this step is extra work-it is so worth it! When you print your “stencil” off, you can use any type font and make it the perfect size without spending a ton of money to have a box full of store-bought stencils. So, I printed my font off and then I used tiny scissors to cut each letter out. Don’t worry this tedious step did not feel so bad, since I did it while watching the bachelorette. (Sorry this pic was taken after being used!)
I used some burlap I already had. You don’t need much!! I used the cardboard piece from the frame to glue my burlap to it. That way the background color (that you see through the burlap) is similar color scheme. I laid my stencil down where I wanted it on the burlap and simply used a paint brush to dab (sponge-like) the paint into the stencil slots.
It was so simple! It looked so good like this, I couldn’t bring myself to try to do the red border. I might go back and do that step though. I liked it enough for now, so I simply added it to my $2.00 frame I had bought at a thrift store. (Sorry! I spray painted and sanded my frame before taking these pictures). Since I had all my supplies but the frame, I was able to make this sweet sign for $2.00. You could make it too!
I made my sign a little bigger than the sign at Target, and in the process also made it more horizontal. The possibilities for your sign or how to use these steps in making a unique sign of your own are endless! I’d love to see some pictures if you try this!
I hope you all had a good week and happy weekend!!! Thanks for checking out my Friday project spotlighted craft!


So cute, Erica! Love this!