Spoonful of Imagination

Add it to a Family for Something Beautiful

  • Home
  • Our Family
    • Our Home
  • Courses
  • Shop
  • Contact

DIY Plank Wall

October 1, 2013 By Erica Deuel 13 Comments

DIY Planked Wall

I am not a professional decorator in the slightest bit. Walking in a store and trying to pick out items for a specific room and putting them all together stresses me out. What about you!? However, I do love to craft, so that takes over in my decor. I usually start with a project that begins to give the room character and I just keep adding (and sometimes subtract) until it feels done.

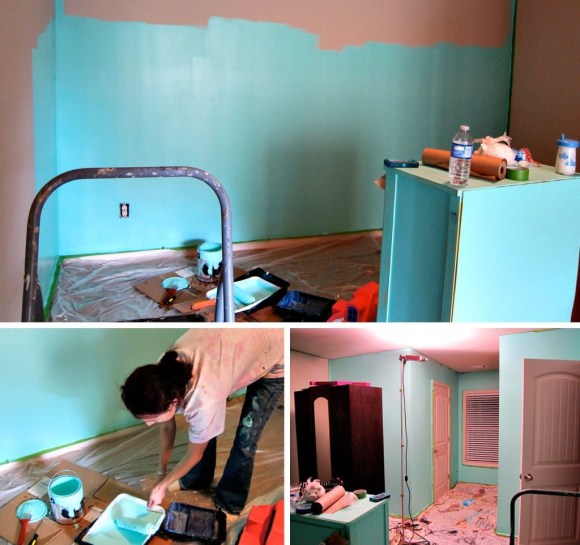
I have one goal when I work on a room – I try to make it my favorite space in the house. I want to walk in every one of my rooms in our house and be able to think to myself “this is my favorite room.” If that is the case, then I feel my house will be warm and welcoming all over.

Currently, the room in makeover mode has been our foster care bedroom. I showed you the dresser I made over, and today I want to show you how we planked a wall. I wanted a fun accent wall, yet did not want to do another chalkboard wall like we did in Reagan’s room and our boys’ bedroom. While at the Haven Conference this past summer I got to experience a hands on workshop for planking a wall. I also met some kind people representing PureBond Plywood and learned a lot about their product. My mind was made up, a plank wall was exactly what this bedroom needed.

PureBond_Pledge

So, Matt and I took the PureBond Pledge and couldn’t be happier about it. This wood is unlike any plywood we have ever used before. PureBond hardwood plywood is a unique real wood product. It is environmentally friendly, formaldehyde free,  and made right here in America. Matt was skeptical going into this project because he hates plywood, but we finished up this project planning our next PureBond project. Here’s a quick video on the project.

If you’d like more details and tips, you’ll find those after the video!

So if you are ready to give PureBond a try, go to The Home Depot and look for their signs around the finished lumber and paneling area. Be careful, there are other plywoods stacked around the PureBond products. We had the wrong wood on our cart at first, and once we found the right stuff, we could literally feel the difference in the wood. The best way to make sure you have PureBond wood is to look for their name stamped onto the edge of the wood.

buying_purebond_wood

For our wall, we bought four 4′ x 8′ boards that were 1/4″ thick. We had the guys at The Home Depot cut them in half so we could fit them in our mini van to get home. We decided to create 6″ planks so the next step was to measure our boards in 6″ strips and cut them on our Ryobi table saw.

measuring_wood_to_cut cutting_plywood

After our boards were cut, we used a stud finder to locate the studs behind the drywall, and we snapped a chalk line where they were located. Since we were attaching the planks to the wall using 1 1/2″ finish nails, we wanted to nail directly into the studs as much as possible. With the studs chalked and a big stack of 6″ planks waiting, we were ready to start our wall.

preparing_to_plank_a_wall

We did not want our wall to have a uniformed pattern where every board and seam matched from wall-to-wall. We hammered one row of boards across the bottom of our wall. We then staggered boards up to create a stair step look.  This created unique spacing for each row of boards as they were attached.

planked_wallGoing into it, it seemed like creating a plank wall was just nailing boards up onto a wall. It sounded easy. Once we got into it we realized it was like a huge puzzle that we were attaching to our wall. I would not say it was hard, but took a little more thought than we initially gave it from the start. We came up with three tips to help you create this wall with a little more ease.

1. Use a quarter to help space your boards. Instead of having the boards literally rest on top of each other, place a quarter in-between the boards as you hammer the top one in place. This will create a little space to help give your wall a uniformed depth and allow for some forgiveness when it comes to leveling the boards. As we found, it’s hard to perfectly cut dozens of 6″ strips. Combo the quarters with a level (next tip) to help keep the wall pretty square.

planking_wall_tip

2. Use a level on every board to get as level as possible. Again with varying cuts you will need to work with your pieces to try and keep it level and square.  (by the way, The Home Depot guys were willing to cut the strips but encouraged us to do it at home. They said that while their cuts are usually within 1/4″ of being correct their saws are rarely squared-up. At home most of our cuts ranged between right-on to 1/8″ off, with a handful of cuts that drifted 1/4″) When we had a board with a slight angle, we’d add the quarter to one end, and use a level to bring the other end up or down ever so slightly to keep the whole puzzle straight. BIGGEST THING to realize, once everything is pieced together and you back up from the wall you will not be able to see your 1/8″-1/4″ blemishes.

use_a_level

3.  Label the wall and measured board when installing your end peices. We were working with 4ft planks on a 12 1/2ft wall. Depending on your planks, wall size and pattern you will most likely need to custom cut boards to fit the end of your rows. Having our saw downstairs in the shop meant measuring the boards, taking them downstairs to cut, and then bringing them back up and trying to find the right placement for each custom cut board. We saved some time and energy on figuring out where all the cut “puzzle pieces” go by writing a number on the wall with a corresponding number on the back of the measured board. So when we got back upstairs ready to nail the planks in place, it was as simple as matching up the numbers.

adult_puzzle

We love how the wall came out. The beautiful grain on the boards add so much character and charm to the room. Originally we were going to cover the boards with a light coat of paint and stain to give it the rustic look we love so much. However, the natural wood is stunning, so right now we are leaning towards finishing it with a natural stain or satin polyurethane to seal the wall and protect it from the little artists around here.

planking_wall_tutorial

The crazy thing is, after all this I can say I accomplished my goal. I still have a number of things to hang on the wall and few accent pieces to go – but this room is currently my favorite room in the house! Seriously. I love it. The warmth of the daylight coming in on the natural wood has a peacefulness to it that makes me want to go in there and just hang out. I begin these projects stressed out and doubting myself. I’m learning though. If I can just find a spoonful of imagination to get it started and get me in my groove, the rest usually comes together pretty well.

Do you love to decorate or like me, is intimidating to get started? What’s your favorite space in your house and why?

If are in Atlanta and you’d like to hang out with me and some other ladies looking to craft together, make sure to check out my next SpoonfulLab. Thanks for stopping by! Have a great week.

signature

Share this:

  • Click to email a link to a friend (Opens in new window)
  • Click to share on Facebook (Opens in new window)
  • Click to share on Twitter (Opens in new window)
  • Click to share on Pinterest (Opens in new window)

DIY Wall Stripes

May 6, 2013 By Erica Deuel 10 Comments

It’s hard to believe I was moving into this house a week ago. It’s been a wild week. In true Erica fashion, I postponed unpacking any boxes to re-paint and decorate my sweet little girl’s room. I’m serious. Trucks unloaded on Monday night, and I was painting on Tuesday. I’m kinda crazy like that. Here’s a quick time lapse video Matt put together of our move-in and part of my paint project. Below the video I walk you through the step by step on how to do your own DIY wall stripes.

I was pretty intimidated with these stripes. For starters, this room is brand new. New carpet, new walls, new paint… and here’s me, the messiest painter in the world, diving in with a large project on day one. But hey, if you are going to make a house a home, you’ve got to make it your own. So why not???

painting a room teal

taped off room to paint

DIY Wall Stripes

Step one: Decide on your stripes. Do you want them to be vertical or horizontal? How wide do you want them to be? I wanted horizontal and I went with 12″ inch stripes. Part of this was determined by our wall. From floor to ceiling it is 8′ feet. Going with 12″ inch stripes would give me eight stripes, four with the color I picked and four of the base coat that was already on the wall. One thing that was messing me up with the measurement was the floorboard trim. Matt convinced me to just count that into my measurement and treat that as part of the first stripe. The reality is the furniture blocks most of the baseboard anyway and this allows the higher up stripes to be even and stand out.

Step two: Measuring. Using a tape measure I ran the tape from floor to ceiling (this is a lot easier with two people) and lightly marked with pencil every 12″ inches. I started these markings close to one end of the wall by the corner. Then using a long level we made markings every two feet or so off the original markings. Make sure to take extra time on those initial measurements as they are so crucial. From there you can trust your level to keep you honest as you work your way across the wall. (If you are going with vertical stripes just take the same concepts and flip them vertical.)

taping lines off to stripe wall

Step three: Tape off your stripes. Following your hash marks you carefully line up the tape down the wall. This may seem obvious, but be sure to keep your tape on the inside of your non-paint stripes. The point there is to make sure that you have left 12″ inches open on the stripes you are going to paint. I then used the tape to add some “x” marks on the stripes I wasn’t going to paint. For real, I’m a messy painter and I don’t trust myself. Matt did have fun adding a ton of those marks to “make the video look cool.” I think I would have been ok with one “x” per line. 🙂 Finally, do whatever taping you need to do to tape off other walls, ceilings, baseboards, etc.

DIY paint striped wall

Step four: Paint! You should now be ready to open up the paint cans and start the fun part – adding color! Paint the coats necessary for your project and follow your paint’s instructions on dry times and re-coating. I’ve been using Disney’s new paint line that I absolutely love. Because I used “Fashionista” which is a bold color, it needed two coats. Several other applications I’ve painted (using their paint) has only needed one coat. I’ll tell you more about that soon. I waited the recommended four hours and then added my second coat.

painting a striped wall

Step five: Peel tape and admire. This is truly the best part of this kind of project, but it makes me so nervous. I’m always worried (when I peel the tape) I’m going to find some kind of disaster that I have to fix. The only time I’ve ever had a real problem here is on a longer term project where I had left the tape on for over a week. Since then I’ve always been sure to peel the tape quickly. The paint is usually dry to touch in 20-30 minutes and that is when I like to peel the tape.

how to paint a striped wall

Tips: When it comes to the measuring, not all walls are going to be exactly 8′ feet. Many houses are often not square and there can be dips and curves that mess up your measurements and perfect lines. Don’t worry about this! Do the best you can to compensate in your measurements but just realize that if your lines are 1/8-1/4 inch off it’s going to be difficult to pick that up when you step back and look at the wall. Once furniture and wall hangings are added into the mix most of the imperfections will never be seen again.

Also, my wall already had a base coat that I was happy to integrate into my stripes. If that’s not the case for you, I would recommend painting the whole wall with your lighter color to create your own base coat. Once it has fully dried you can then follow the steps above to add your stripes with your second color. This will keep you from having to measure out and tape twice.

Do you have any other tips to add to painting your own stripes?

happy girl loves her new room

So, was I crazy to start such a massive project the first day I woke up in my new house? Probably. But it was worth it to see the look on this little girl’s face. Coming later this week will be a full room reveal with more pictures and details. Until then, have a great week!

signature


Share this:

  • Click to email a link to a friend (Opens in new window)
  • Click to share on Facebook (Opens in new window)
  • Click to share on Twitter (Opens in new window)
  • Click to share on Pinterest (Opens in new window)
  • Email
  • Facebook
  • Instagram
  • Pinterest
  • YouTube
YouTube-Channel
Erica Deuel

Subscribe for Weekly Updates!


Most Popular Posts

DIY King Size Rag Quilt {Repost}
The Encanto, Madrigal's House Craft For Kids
The Christmas Tin Can Makeover
Easy DIY Fabric Bookmarks
DIY {easy} Burlap Wreath
Easy DIY Satin Flower
What does a Nature Shelf Collect?
Cheap lamp to Industrial Beauty
DIY Outdoor Checker Board
DIY Feather Wreath

Categories

  • All About the Kids
  • art journal
  • Blogging
  • Christmas
  • Craft Projects
  • Dancing Zebras
  • DIY
  • Eddy's postcards
  • Embroidery Journal
  • Family
  • Featured
  • Foster Care
  • Giveaways
  • Guest Posts
  • Home
  • Homeschooling
  • Kid Activities
  • Kid Craft
  • My Heart
  • Our Outings
  • Project Spotlight
  • Send Out Love
  • Shop
  • Sponsored Posts
  • Spoonful Lab
  • Spoonful Tribe
  • Tips + Tricks
  • Traveling
  • Uncategorized
  • Vlog

Favorite Categories

Subscribe for Weekly Updates!

Favorite Categories

© 2023 Spoonful of Imagination, Inc.