Spoonful of Imagination

Add it to a Family for Something Beautiful

  • Home
  • Our Family
    • Our Home
  • Courses
  • Shop
  • Contact

Girl’s can grout tile too!

July 4, 2012 By Erica Deuel Leave a Comment

A couple of weeks ago, we got new tile laid in two rooms of our house.  It was a really exciting day!!  Well, as most home improvement projects go it got more and more expensive.  In order to save a little money from paying the flooring guys to completely finish the job, we opted to “grout” the floor on our own.  Matt quickly was able to do the one smaller room that we got tiled, but our kitchen has sat ungrouted for weeks now.  With life, trips, and the need for hours to grout, and hours for the grout to set (without getting walked on) we had yet to finish our floors!  For those of you have not had ungrouted floors before, it’s hard to keep clean.  There is no way to sweep up dog hair or dirt because it falls right into the cracks.  The only way to make the floors feel clean is to vacuum (with the hose off the vacuum)…crack by crack.  It is a lil tedious.  

Well, my parents graciously offered to keep my boys for 24 hours, and they created a little summer camp experience for them.  How amazing are they!?!

Matt said let’s knock out our floors and I was PUMPED!!  Yes, I was pumped to spend a kid free evening grouting my floors. 🙂

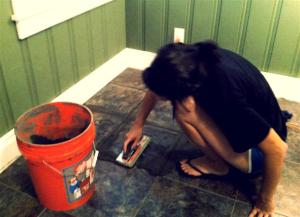
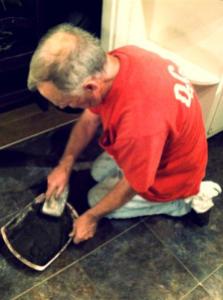
I had never done it!  My husband and awesome father-in-law showed me the ways, and we got to it!  All three of us started grouting at different places in the kitchen.

You know it wasn’t bad at all!  Grouting can seem tedious and intimidating, but it’s not hard at all!  It’s one of those jobs that once you get into it, it doesn’t require much thinking so you can easily talk-and we did!

These are the steps that I did…

1. You simply get a “spatula” full of grout

2.  Spread it across a grout line…pressing it in the crack and making sure to fill it evenly

3.  You then scrap the access grout off

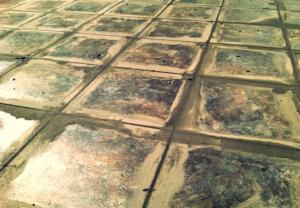
It’s ok if the grout gets all over your tile!  It will wash off later!  There is no need to worry about how dirty the tiles look, or how much grout is left on the tile.

Matt was coming behind me with a light wet sponge across my grout lines to have the grout dry “smooth”.

Once all the tile was grouted it was like 10:45pm and I was exhausted.  I felt bad leaving my working team, but knowing the next day was going to be a FULL one, I thought it was best if I went to bed.  Matt and my awesome father in law decided to clean up a little.  I thought they were going to sponge the tiles lightly to get up a little dust, so our sweet kiddos didn’t walk all over the tiles and track dust all over the house the next day.

I got in bed thinking that these two men are real life super heroes.  I wish my boys would dress up in costumes of their dad and grandpa because they are the real deal.

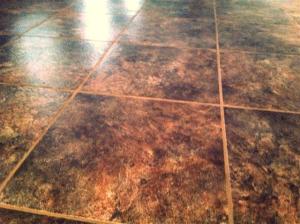
The next morning I woke up to this…

They were more than lightly cleaned.  They were REALLY cleaned and buffed!  I am a blessed girl!  Thank you so much Matt and George for all your hard work!!  AND I learned how to grout!!

My mind is already spinning on what else I can grout :).

Share this:

  • Click to email a link to a friend (Opens in new window)
  • Click to share on Facebook (Opens in new window)
  • Click to share on Twitter (Opens in new window)
  • Click to share on Pinterest (Opens in new window)

My Mother’s Day Gift…drink coasters!

May 14, 2012 By Erica Deuel 4 Comments

For Mother’s Day I made my mom and mother-in-law drink coasters.  I have seen some of these pins on pinterest and been dying to try them out!  One of the pins that inspired me was  Lindsay at “The Cottage Home”.  Her tutorial is beautiful and done with scrapbook paper!  Go check it out!

I fell in love with these things and went crazy making them!  As I saw how cute they were, I added more coasters to my “make” pile!  All of a sudden, I was making over 45 coasters and they were for Mother’s Day gifts, birthday presents, my end table :),  and random gifts!  Who doesn’t like random personal gifts!?!  I thought I would share my process with you!

Start with getting tiles at your hardware store.  I got these from Home Depot for $0.16 each!

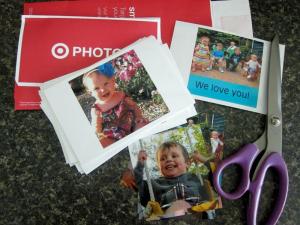
Next step, pick your pictures!  I picked mine out, edited them, and in some cases added some words/phrases.  I also cropped them the size I wanted them to be in Photoshop, so when I uploaded them to Target’s website to print I got them back the exact size I wanted.  It made cutting them out a LOT easier!

You then use Mod Podge to glue each of your pictures onto the tile.

Let the Mod Podge dry completely between each coat.  Lindsay recommended three coats of Mod Podge, so that is what I did!

After the Mod Podge has dried, spray a clear acrylic varnish spray to them.  I did two coats of this step.  I really want them to be water proof!

The final step is to glue felt squares to the back in order for the cute coasters to not mess up your tables.  I used spray Elmer’s Glue here.  I had it and thought it would be quicker.  Note to self (and you), don’t cut corners.  I think a fabric glue would have been better!

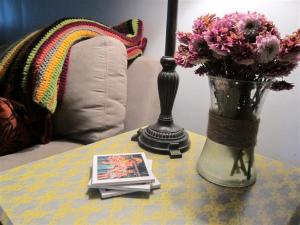
Here are a few of my coasters on display in my house!!  If you ever come to my house and have a drink, DO NOT feel like you have to use these things.  We really aren’t “coaster” people with our furniture.  Nothing we have is nice enough to require them, but they were too cute to not have a set for ourselves!!

Lastly, if yours are a gift too, wrap them up and make them look pretty!

As you can see, they are so cute and make such an inexpensive, personal gift!  I hope you give them a try!  If you don’t want to try it yourself, but want me to make them for you visit my etsy store, dancingzebrasart, and place an order here!

Share this:

  • Click to email a link to a friend (Opens in new window)
  • Click to share on Facebook (Opens in new window)
  • Click to share on Twitter (Opens in new window)
  • Click to share on Pinterest (Opens in new window)
  • Email
  • Facebook
  • Instagram
  • Pinterest
  • YouTube
YouTube-Channel
Erica Deuel

Subscribe for Weekly Updates!


Most Popular Posts

DIY {easy} Burlap Wreath
Painting Flower Pot Party Tips
DIY Paper Butterflies- Spring decor for cheap
Chiffon Flower Tutorial
DIY Outdoor Table
Cheap lamp to Industrial Beauty
DIY Outdoor Checker Board
What does a Nature Shelf Collect?
The Way I Thrift
Spray Paint Ikea Furniture

Categories

  • All About the Kids
  • art journal
  • Blogging
  • Christmas
  • Craft Projects
  • Dancing Zebras
  • DIY
  • Eddy's postcards
  • Embroidery Journal
  • Family
  • Featured
  • Fireside Chat
  • Foster Care
  • Giveaways
  • Guest Posts
  • Home
  • Homeschooling
  • Kid Activities
  • Kid Craft
  • My Heart
  • Our Outings
  • Project Spotlight
  • Send Out Love
  • Shop
  • Sponsored Posts
  • Spoonful Lab
  • Spoonful Tribe
  • Tips + Tricks
  • Traveling
  • Uncategorized
  • Vlog

Favorite Categories

Subscribe for Weekly Updates!

Favorite Categories

© 2023 Spoonful of Imagination, Inc.