Spoonful of Imagination

Add it to a Family for Something Beautiful

  • Home
  • Our Family
    • Our Home
  • Courses
  • Shop
  • Contact

A Handmade Christmas

November 22, 2013 By Erica Deuel 5 Comments

Christmas_craze_prepWhat is it about the Holidays that seems to get earlier and crazier every year!? Don’t get me wrong, I love this season. The colorful decorating, the swarms of family, the Christmas movies, the delicious food, hearing “Baby It’s Cold Outside!” 400 times. It really is a fun time. But it can also be so busy and stressful. I work so hard to not let it go there, but I inevitably have a meltdown or two during this season.

I’ve found that if I can carve time out of the rush and find ways to create I can recapture some of the peace and joy that I think the Christmas season is actually supposed to be about.

What about you? Could you use a night away from the craziness? What about a relaxed night to sit and create with some other ladies? Some of your creations could even cross off a few items from your gift or decor list!?

That’s why I’ve created my next Spoonful Lab – A Handmade Christmas. It may sound like just another thing to do in the midst of a busy time. It’s actually designed to be a really chill environment for you to catch your breath and have fun crafting with some other girls.

Handmade_Christmas_SpoonfulLab_signYou deserve a night out. Grab this one before it slips away!

Some of the ladies from my last Lab were kind enough to share a few words about their experience:

“Already looking forward to the next one!”

“A great way to stir your creative juices in a fun and intimate setting.”

“I had a fabulous time doing something I really love with the best host EVER!!!”

“This would make a great Girls Night Out!”

“Very fun, inspiring and very well-organized, every detail was taken care of and paid attention too! I am sure it made everyone feel very special.”

“Favorite part of the night was the freedom to create after the instructions were given and seeing all the different ideas.”

“I thought it was going to be too much time, but I could have stayed longer because it was so fun.”

“It is a great tutorial for non creative people longing to be crafty.”

“The most fun I have had crafting with new friends and finding old ones there too.”

Spots are limited and we already have a great group of ladies coming to join us. So what are you waiting for? Reserve your seat at Spoonful Lab – A Handmade Christmas today!

Action_ButtonI’m busily making some fun SWAG for you and my friend Sheila at Plum Doodles has contributed something as well. Check out her fun blog for more crafty inspiration! I hope to see you some of you soon!!

stick_star_ornament

signature


Share this:

  • Click to email a link to a friend (Opens in new window)
  • Click to share on Facebook (Opens in new window)
  • Click to share on Twitter (Opens in new window)
  • Click to share on Pinterest (Opens in new window)

DIY Wood Star

December 7, 2012 By Erica Deuel 13 Comments

I am so excited to show you my Christmas mantle today and how I made the big DIY wood star in the center.  It required some scrap wood, wood glue, clamps, wood stain, and a little wire.  I made it free (since I had all those items) and now have a new focal point on my mantel for this Christmas season.  I love it!

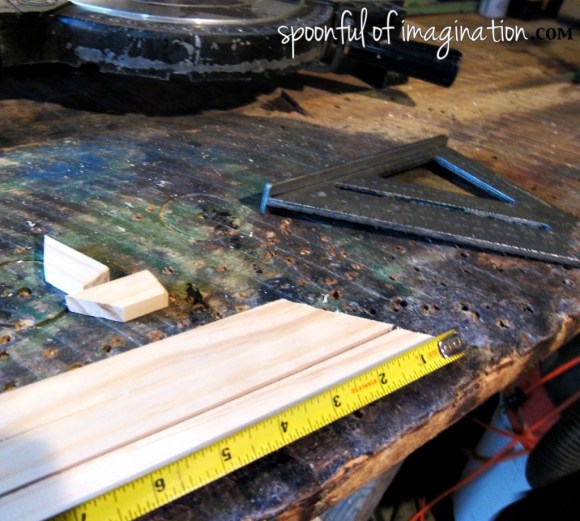
I started with some long pieces of scrap wood.  We cut six pieces each about 30″ long.  Note:  My husband helped me with this project as he does with a lot of projects I dream up.  

It was kind of impossible to get that perfect 60 degree cut where the ends were linked together like a puzzle, so we opted to leave the pointed edge and just lay the lengths of wood on top for an overlap look.

When we were creating the overlap look, we simply used some wood glue to attach the corners and we used a clamp to hold the wood tightly together as the glued dried.  This is a good place to say I made two triangles out of my six pieces of wood, so three pieces of wood each were needed for a triangle.

After the glue had dried on my “triangles,” I stained them.  I painted on a dark mahogany stain onto each triangle and then went back and rubbed it off/in with a soft, old towel.

We then did the glue and clamping step again to attach the two triangles together to form the star.  After that glue had dried, my star was almost finished.  I decided to wrap some wire around the edges to give it another texture and fun touch0.1

I used some garden scissors to cut the wire, and I really like how it added a fun yet subtle addition to my star!  The star is now complete!  I think there are so many ways you can modify this design to create something unique for your house or to give as a gift.  The sizes you can create are endless.  Wood glue is amazing.  You could even spray paint your star instead of staining it.  That would be a quicker step.  I knew I wanted a dark color for my star, so it popped on my gray wall but you could do any color!

I love how my mantel came together.  It is simple yet has a lot of natural, rustic elements that I can not get enough of!

Now to give you a few details about my mantel, so you can create this look too.  My star was inspired by this simple wood sign I made last Christmas.  Love was born in a manger.  I love it and painted it in like two seconds on an old scrap piece of wood.

My vase of red ornaments is actually two pieces of glass.  I have had the big filler vase for a couple of years, but I think I got it for like $5.00 one year at Wal-mart.  The bottom “stand” part is simply a juice cup upside down.  My filler vase is literally just sitting on top to give it some height.  What a cheap way to create a new and versatile look.  Have you ever done this?

My pine cones are from my backyard, and I simply dabbed some white paint on the edges to make them look more Christmas-y.  I got this tip from Erin at DIY On The Cheap.  Thank you my sweet friend!  She has a great tutorial for how to create this look.  Check out her gilded pine cones!

My lanterns are from Ikea.  They were about $4.00 and $7.00 each, and I already had them on hand and actually used them in my fall mantel.  Do you recognize my wood sticks?  They are from my backyard and were used on my thankful tree.  I love how they add some height, yet they are simple and not a harsh eye sore.  I also have a collection of baby food jars that I love to put tea lights. They were perfect to pull out for my mantel so give it some light. They look amazing all lit up, but with three little kids it doesn’t happen till night when they are in bed.  🙂

I had to include one picture with all our bright-colored stockings (two of which are for the dogs)!

Have you decorated for Christmas?  Have you used any natural elements in your mantel this year?  I’d love to see your mantle!  If you have a blog, please leave the link in the comments below, so I can check yours out too.

Thank you so much for stopping by!  I hope you have a great weekend!


Linked up at: Crafty Scrappy Happy, Serenity Now, Red Head Can Decorate, The Lettered Cottage, Ten June, 52 Mantles, DIY Showoff

Share this:

  • Click to email a link to a friend (Opens in new window)
  • Click to share on Facebook (Opens in new window)
  • Click to share on Twitter (Opens in new window)
  • Click to share on Pinterest (Opens in new window)
  • Email
  • Facebook
  • Instagram
  • Pinterest
  • YouTube
YouTube-Channel
Erica Deuel

Subscribe for Weekly Updates!


Most Popular Posts

Painting Flower Pot Party Tips
DIY Paper Butterflies- Spring decor for cheap
DIY {easy} Burlap Wreath
The Encanto, Madrigal's House Craft For Kids
Cheap lamp to Industrial Beauty
School Desk Makeover
DIY Outdoor Table
Repurpose Old Kitchen Chairs
Chiffon Flower Tutorial
Building a Fire Pit

Categories

  • All About the Kids
  • art journal
  • Blogging
  • Christmas
  • Craft Projects
  • Dancing Zebras
  • DIY
  • Eddy's postcards
  • Embroidery Journal
  • Family
  • Featured
  • Fireside Chat
  • Foster Care
  • Giveaways
  • Guest Posts
  • Home
  • Homeschooling
  • Kid Activities
  • Kid Craft
  • My Heart
  • Our Outings
  • Project Spotlight
  • Send Out Love
  • Shop
  • Sponsored Posts
  • Spoonful Lab
  • Spoonful Tribe
  • Tips + Tricks
  • Traveling
  • Uncategorized
  • Vlog

Favorite Categories

Subscribe for Weekly Updates!

Favorite Categories

© 2023 Spoonful of Imagination, Inc.