Spoonful of Imagination

Add it to a Family for Something Beautiful

  • Home
  • Our Family
    • Our Home
  • Courses
  • Shop
  • Contact

Wood Cake Stand

August 9, 2013 By Erica Deuel 6 Comments

unique_cake_stand

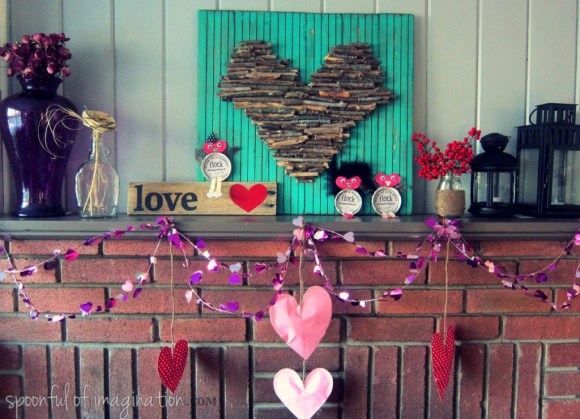
I have an obsession with natural elements. Sometimes I wonder if I really was supposed to build a Swiss Family Robinson tree house, rather than buy this new house. Not really…but can you imagine!? That place has always been a dream to me.

If you remember my log end table, you know I love working with logs and sticks. The latest project I incorporated them in is this unique cake stand. If you have a chain saw (or a dad with chain saw like me), than you can do this project!

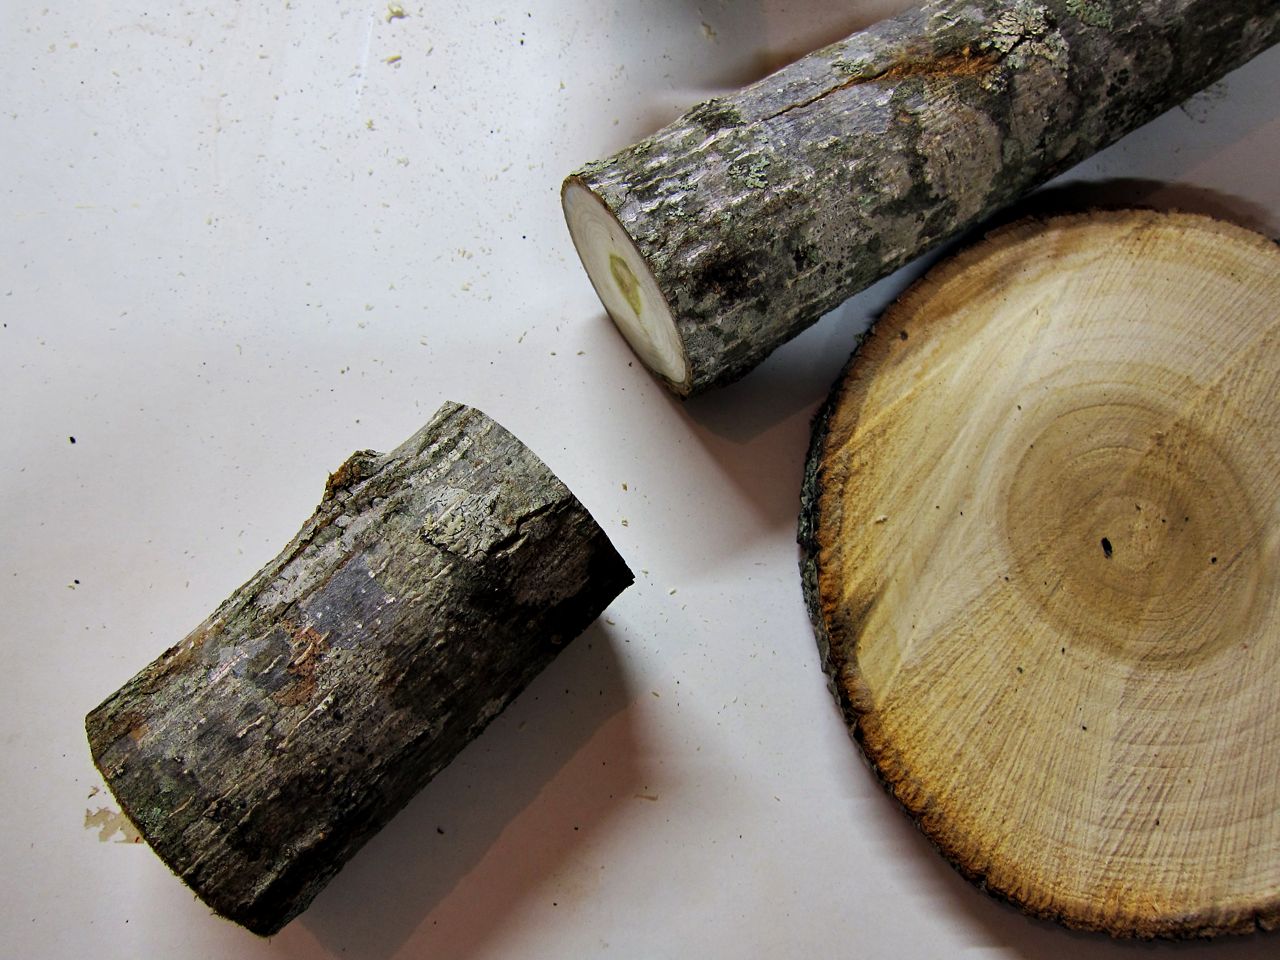
The first step was to have my dad slice me some slivers of a larger piece of wood while I stole a piece of his firewood.

Slice_wood

I picked the sliver of wood that I liked the best and used some of my amazing Haven swag sandpaper from 3M to make the top smooth. Side note: I love this sandpaper and the back no slip grip sold me on this product! They aren’t paying my anything to say that. It is legit. Good stuff.

sanding_wood

I cut my piece of firewood to the height I wanted for my cake stand with my new miter saw (that I will be sharing with you next week).

Tree_woodI then squirted a little wood glue into the center of my wood sliver and pressed the stand tightly into it. I then hammered a small nail in from the top of the cake stand to add some extra strength, and it kept the two pieces tight as the glue dried.

using_wood_glue

Hammering_a_nailMy last step was to stain the top. I used Early American for a nice dark color. It soaked in immediately to the raw wood. There wasn’t much brushing the stain on or wiping it off. It kind of soaked right in and stayed, but it worked!

staining_wood

wood_cake_standOnce the stain was dry, it was done! I love the way it turned out! I must note that I placed these strawberries on the stand for like two seconds for the picture. If I was to really place food there for longer periods of time, I would seal the top with something that is safer for food. I think my stand might end up holding jewelry, but the possibilities are endless!

natural_cake_stand

What do you think!? Do you like adding natural elements to your home too? I mentioned in my Haven conference recap that I wanted to share some of the swag love with one of you! O. Sing, you won!!!  I am so excited you finally won something since you enter ALL my giveaways! I will be in touch!

Thank you for stopping by, and I hope you have an awesome weekend!

signature

Share this:

  • Click to email a link to a friend (Opens in new window)
  • Click to share on Facebook (Opens in new window)
  • Click to share on Twitter (Opens in new window)
  • Click to share on Pinterest (Opens in new window)

Repurposed Furniture Ideas

August 8, 2013 By Erica Deuel Leave a Comment

I was recently asked by Hometalk to curate a clipboard (on their site) full of amazing repurposed furniture projects. I love redoing furniture and changing ways pieces can be used up, so I was excited to do this. One of my favorite repurposed pieces I have done is my recycled old dresser.

Check out the clipboard for some inspiration and ideas, which has links to all kinds of awesome projects posted on Hometalk.

repurposed_furniture

Thanks so much for checking in, and I hope you are having a good week!

signature

Share this:

  • Click to email a link to a friend (Opens in new window)
  • Click to share on Facebook (Opens in new window)
  • Click to share on Twitter (Opens in new window)
  • Click to share on Pinterest (Opens in new window)

Valentines Day Mantel {& a quick DIY}

February 1, 2013 By Erica Deuel 4 Comments

DIY Valentines day mantel

Valentines Day is what my husband and I like to refer to as the Hallmark Holiday.  We are not huge celebrate-ors of flowers being priced twice as high as their normal cost and all the high pressure to show the one you love that you care.  We come from the belief that should happen ALL the time, all 365 days of the year.  Random flowers bought, special notes left, and taking out the trash mean more to me when it is not forced upon.  Can you relate or is Valentines Day something special to you?

Although we are not HUGE Valentines Day people, we do have small kids who love holidays and get really excited about new decorations going up.  So, as a mom and DIY/homeschool blogger I feel to let the holiday go by without doing some special crafts and mentioning them would be a no-no.

This week, I decorated our fireplace mantel from different things we had around our house or cheaply bought/made.  I am going to break it down for you, show you a quick DIY, and I have a SWEET tease at the end.

You might remember my Stick Heart Wall Art, in which I showed you how to make the focal point of my mantel.

wood stick heart

Since I posted the original pictures of this wall art, I have been gathering more sticks and filling in all the gaped holes.  I like it so much better than what it use to be.  Although, it is not quite done.

Next, I left my Ikea lanterns in place and started adding other thing to it.  I grabbed the huge purple vase out of Reagan’s room with dried roses.  I added this old maple syrup bottle in which I stuck in my straw flower I picked up on my Savannah’s girl trip last year.  I wrapped twine around a honey jar I bought (and ate) at the Country Living Fair last fall and stuck some red berries in it that I cut off a bush in my backyard.

valentines day decor

I still love my little Bird’s of a Feather Valentines I made for my kids from old spaghetti jar lids, so of course they had to be up there.  The little love wood sign is not quite complete either, but it is on loan for my mantel.  Once I finish it, it will be a part of a fun group giveaway (that I will be sure to let you all know about).

Lastly, I draped some fun heart garland that I bought at the Dollar Tree and made some fun 3d paper hearts that I hung from it.  I originally was going to sew some felt hearts and stuff them with Poly Fil, but I decided that I didn’t want to spend the time to make such a temporary decor item.  This was my substitute creation.

3d diy paper hearts

Materials:

  • scrapbook paper
  • hot glue gun with sticks (no burning was involved like on my last hot glue gun craft)
  • scissors
  • jute twine
  • pom-pom balls

materials for vday craft

Fold your paper in half (I used 12″ x 12″ sheets) and then fold it in half again.  By doing this “double fold” you will be able to cut out two hearts the same size.

how to cut a paper heart

paper hearts

Cut as many double hearts out you want.  I created four 3D hearts, so I had eight paper hearts cut out.  Once you have cut out your hearts, start gluing them together, but leave a gap open at the top.

glueing craft heart

heart envelope

It will feel like you have a heart envelope.  Stuff a few pom-poms (the size of your pom-pom & hearts will depict how many pom-poms you stuff) inside.

craft heart stuffing

Add a little hot glue, and stick the jute twine (cut the desired length for you) on it and glue your heart shut.

glueing heart

vday heart

valentines day craft

craft hearts

Just complete that process till all your hearts are done!  I think they came out really cute!  They were so much quicker than sewing felt hearts.  When Valentines Day is over I’m going to let my boys rip them open and take out the pom-poms.  They will love it!

3d paper hearts

So, what do you think?  Do you decorate for Valentines Day?  How will you celebrate the day?

valentines day mantel

Now for my little tease!  There was a whole scene and plan my kids were scheming up behind my mantel photo shoot that I can not wait to show you with lots of pictures and a VIDEO-coming this weekend!  Stay tuned!

signature

Share this:

  • Click to email a link to a friend (Opens in new window)
  • Click to share on Facebook (Opens in new window)
  • Click to share on Twitter (Opens in new window)
  • Click to share on Pinterest (Opens in new window)

DIY Headboard

October 5, 2012 By Erica Deuel 12 Comments


I have been wanting to create a new headboard for our bed ever since I finished my king sized rag quilt.

It has been a long time coming, but we finally created one!  (I say “we” because Matt was largely involved.  My projects often involve him.  What an awesome man.)

I love how it turned out and I can’t wait to hang it in our room!!  Would you like how I came up with this piece?  Stayed tuned!  First off, I did lots and lots of scouting on Pinterest for inspiration.  Out of everything I saw, here are four of my favorite boards…

I love the simplicity of this look with the sweet branches.  I thought the stained wood would look good with my bright quilt too.

I loved the way “love” was painted with the stain look, but I couldn’t decide if I wanted it to be such a bold piece.

I loved the way this “love” was painted smaller, but then it seemed like “not enough” for my taste.

So, I was a mess wanting something “simple” and yet “striking”.

I loved this rustic door and “love” mix.  We looked for a while and couldn’t find an old door for cheap.  Junk places realize what they have and price crazy old doors starting at $100?  You can buy new doors cheaper.  I didn’t want to pay that (cheap I know!), and I didn’t have an old barn in the back yard that I could “stumble” across such a treasure.

We have been getting caught up on How I Met Your Mother.  Amazing show if you have not watched it!  Every time I saw Marshall and Lilly’s bed, I wanted it.  I loved the bold color.

I ultimately decided I am a “color” kind of person.  Why not have a fun headboard to go with a fun bed quilt!?!  So, this is what I came up with…

I mixed the simple branches with the word “love” on top of a fun color.  I love the result!  The only thing is my room is currently painted green.

This beauty totally clashes.  🙂  Hence, it gave us another “project”.  We have already bought the paint.  My room is getting a makeover little by little!

Would you like do to this too?  Here are the steps…

We bought six boards at Home Depot – (4) 1×6 and (2) 1×4 .  I laid them out in the order I wanted.  I didn’t want the two smaller boards together.

We measured and trimmed off some of the ends.  We wanted our headboard to be about 80 inches long once we were done.  We cut the boards a little shorter than that, since they are overlapping each other to create the overall 80 inches in length.

We then chiseled, chipped, sanded and hammered to create a rustic, ripped look on the ends of the boards.

Our boys love “project days” and jump right in on their own creations!

Reagan loves all the commotion and everyone hanging out.  It is a blast these days.

Once the boards were roughed up we laid them back down and drew a chalk line, so we would know how to line them back up while attaching them.

Matt attached them with lots of screws and wood glue.  We don’t want any part of this falling on us during the night.

Here is where I got to start playing.  All that hard labor stuff led to the fun stuff.  Life.  I painted a light coat of my teal blue.  Don’t worry about covering it evenly.  It makes sanding later much easier!

I then used a burnt orange acrylic paint to paint the word “love”.

I then painted the branches in a creme acrylic.  This is where I left it for a couple of days.  I had to decide if I liked it, by staring at it.  This occasional walk by and stare session was to make sure I didn’t want to add or subtract anything.

This can be the hard part for an impatient craft-er like me, but it is so valuable.  There would be nothing worse than to totally finish this project and not love it by always “regretting” one step.

I decided I loved it, so I sanded it down.  I wanted the newly painted touches to look more rough like the teal background.

Don’t you love seeing how we work outside in our car port in these pictures?!  My professional wood working brother is usually right there with us, which we take full advantage off to ask all our questions.

Next, it was time to stain!  I love this step.  It’s so quick, yet the effects are huge!

Doesn’t the stain just finish it off?  Check out the sanded image verse the stain image up close…

It makes it look complete in my book.  I can’t wait to hang this up above my beautiful bed!

Up next, we have to paint our room.  This weekend’s project, Matt???

Thank you so much for checking out my Friday Project Spotlight!  I hoped you enjoyed seeing how we created our headboard, and you might be inspired to try it yourself!

We had all the materials except for the wood which was about $50.  Cheap for a headboard!

Let me know if you have any questions we can help you with!

I hope you have a wonderful weekend!

I linked this project up at:  One Project Closer and The Ugly Duckling.

Share this:

  • Click to email a link to a friend (Opens in new window)
  • Click to share on Facebook (Opens in new window)
  • Click to share on Twitter (Opens in new window)
  • Click to share on Pinterest (Opens in new window)
  • Email
  • Facebook
  • Instagram
  • Pinterest
  • YouTube
YouTube-Channel
Erica Deuel

Subscribe for Weekly Updates!


Most Popular Posts

Painting Flower Pot Party Tips
DIY {easy} Burlap Wreath
DIY Paper Butterflies- Spring decor for cheap
DIY Outdoor Checker Board
Cheap lamp to Industrial Beauty
Chiffon Flower Tutorial
DIY Outdoor Table
Repurpose Old Kitchen Chairs
Paint That Captures the Magic and Inspiration of Disney
The Way I Thrift

Categories

  • All About the Kids
  • art journal
  • Blogging
  • Christmas
  • Craft Projects
  • Dancing Zebras
  • DIY
  • Eddy's postcards
  • Embroidery Journal
  • Family
  • Featured
  • Fireside Chat
  • Foster Care
  • Giveaways
  • Guest Posts
  • Home
  • Homeschooling
  • Kid Activities
  • Kid Craft
  • My Heart
  • Our Outings
  • Project Spotlight
  • Send Out Love
  • Shop
  • Sponsored Posts
  • Spoonful Lab
  • Spoonful Tribe
  • Tips + Tricks
  • Traveling
  • Uncategorized
  • Vlog

Favorite Categories

Subscribe for Weekly Updates!

Favorite Categories

© 2023 Spoonful of Imagination, Inc.