 How often do you feel tired in a project or group?
Without even trying, we all get tired or settled in routines and find a comfortable role in a group setting. We often need something to booster us out and awaken us to the creative ideas and excitement around us once again.
I have found that small, hands on, creative warm ups can do just that. A creative prompt can be just what is needed to switch the brain from autopilot and release the ability to play. As John Cleese says, “the most creative people have this childlike facility to play.”
Here’s a quick activity where you can encourage play before your next team meeting or group setting. While it is a pretty non-intimidating activity, it also reinforces we all have a different perspective-and that is what makes a beautiful, well-balanced team!
The first step is to glue a bottle cap to another solid surface. We used scrap wood, but you could use paper, cardboard, or a number of other surfaces.

 Next, we asked our group to see what that circle could be. I didn’t want to give too many examples, because I really wanted to get their perspective on how they saw that circle. My example was to use the bottle cap as an “o” in the word “pop”.
 It was so fun to encourage the artists to just start drawing. This wood slice creation did not have to live in their homes as long as they do. We used paint markers, but you could use pens, sharpies, crayola markers or a number of other writing utensils as well!


 Every artist saw something different in that bottle cap. Even those that saw it as an “o” as well, saw it in a different word. Those that saw it as part of a flower, saw a different type or color of flower.

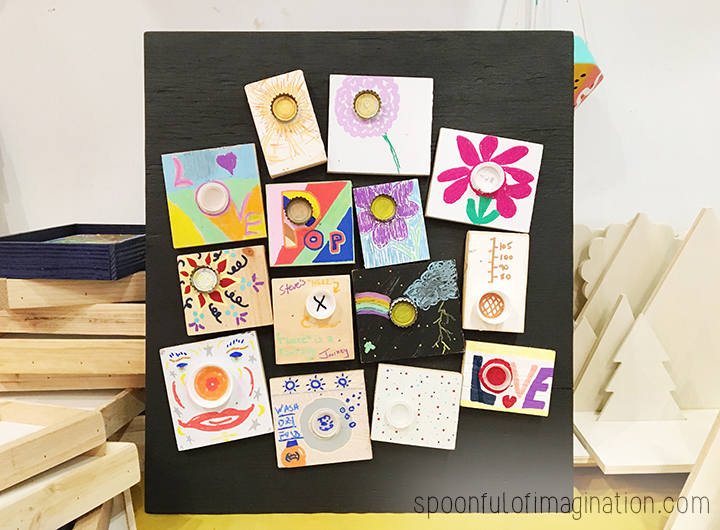 We all have different experiences and outlooks on the world. This quick little activity demonstrated that belief. We then attached all the individual projects together on one big piece of wood. I love how it shows us all coming together to make something beautiful. The collaborative piece can then hang somewhere for everyone to see and be reminded that we have something to offer as individuals that is vital to the bigger picture.
If you want to see this idea in a video form, please check out our video on our YouTube channel, Spoonful of imagination.
Give this project a try and let us know how it goes! Share on social media with #spoonfulofimagination.

 If you paint or have a child that likes to paint, you probably have gone through some paint bottles, right!? For years and years, I have just thrown these little bottles out when they seem to be empty. Now that we have an
 My family uses essential oils, so we have these little
 In the classroom, I stapled on a pipe-cleaner and twisted it up to allow the students to fill it with beads. This added a nice fun texture and hanger to make our wood pieces into hangable signs. You don’t have to do this step to your pieces, but I am a sucker for several textures in my projects.
 This project is all about the process. You can’t totally control what your piece will end up looking like, which takes some of the stress of it being “perfect” away. I encouraged the students I was working with to do small drops at a time. Some of the bottles may be more watered down than others. By starting with small drops you can watch as colors blend together on their own to make new colors.
 Another technique is you can slightly tilt these signs or even stand them up to watch as the paint colors blend and mix to make a stunning abstract piece!
 I don’t think you can ruin this project. Often students thought they were done and then they would add one more color. At this point, it is usually when it became more stunning. As the signs dried, some of the paint colors would shift and sort out a little. So fun!


 We went back and sprayed a
 I love how no matter how many times you do this project, no two signs will ever be the same. Depending on the colors you use and how your paint swirls and mixes together…each piece will be unique. This was such an inexpensive project to implement for a 5th-grade class. They had a blast.
 What do you think? Will you start saving your paint bottles? I think these finished pieces make a great gift for a family member. Christmas is coming. You can create some masterpieces with your kids for all those proud grandparents.
 Sometimes dreaming big can be pricey, right? Even for the DIY creator, dreams take some dollar bills.
 I came up with an idea to let the kids have fun with it, while we are in the transition phase of our room. Why not let the kids paint one of our favorite Bible verses on it? Kids handwriting is the best. Plus, I don’t need to worry about sanding down the stroke marks when we are ready for a change. I will literally just brick over the artwork, when the time comes. It sounded perfect and now we all love it so much….I may never want to brick. Here is how we created our kid’s wall art:
 I printed the words off the computer with the actual amount of words I wanted on each line, so the kids could get an idea of spacing. I used a yard stick and level to draw lines on the wall. I then taped the printout onto the wall and let the kids start copying.

 My boys alternated line by line who was in “charge” of that line. I wanted both of their handiwork on the wall. Reagan wanted to get in on the fun, so we adapted and let her add some hearts. Her touch completed the piece.
 After the words/hearts were in pencil on the wall, we used simple craft acrylic paint to paint over the words. My oldest was able to hold the bottle and paint on his own. My younger two liked me standing there holding the bottle while they steadied themselves on the wall with one hand and painted with the other.


 They did an amazing job! We did space this project out over two days so they didn’t get burned out. The pencil writing was the first day and the painting was on day two. They were so proud and excited to be painting on the wall. My oldest was a little more timid at first saying I could do a better job and he was struggling with it not being perfect. It was a beautiful teaching moment, and I just adore kids hand writing. I wanted it in all the little imperfections and quirks. That is what made it beautiful.
 The wall was really dirty after pencil being smeared all over, as you can see in this picture below. I came back once the kids were all done and erased my pencil lines and as much of the smears as I could. What I could not get up with an eraser a Mr. Clean sponge was able to erase. Since we are covering these walls up someday, there was not pressure on if we were ruining them. We literally can’t.
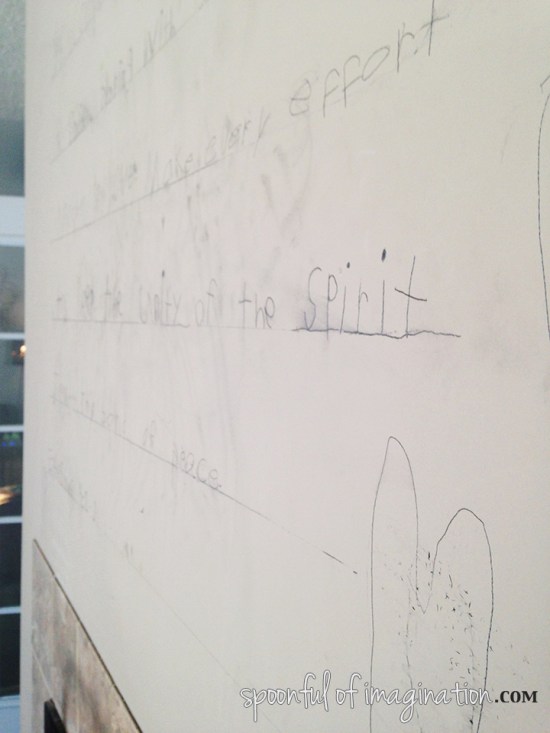
 We had so much fun creating this little focal point. What a fun way to get some truth on our walls as well. It is now one of the first things you see when you walk in our house. It’s perfect.

 I may never want to brick. My little artists won’t be young forever, but I love capturing their art with where they are…whenever I can.
 Have you ever started painting a room and mid project: your child wakes up, nap time is over, the show it over, kids get home, etc?
 She is my fellow crafter. She will color and craft all day, and the moments we get to do it together are some of my favorite moments of being her mom. I knew I needed to include her in the process, but I was not sure quite how. Let’s be honest, I knew there would be crazy drip marks and paint on the carpet (more than my usual mess), if I let her attack the walls. So, I cam up with her own little paint project. I blew up a family portrait of my family’s beach trip (I am one of nine kids) from last summer and got it printed at Staples in their engineer print section. I think it may have cost around $3.00? I used some painters tape to tape it to the wall, pulled out some paint, paintbrush, water, and paper towels and let her go at it. She was so excited!


 She happily worked on and off her project while I painted her accent wall purple. I can’t wait to show you what else I am going to do to this wall. For now, we moved her painting to the closet, so I could paint the rest of her room a light pink. More about that later as well.
  If you’re interested in some of the things pictured above, you can find more info here…