Spoonful of Imagination

Add it to a Family for Something Beautiful

  • Home
  • Our Family
    • Our Home
  • Courses
  • Shop
  • Contact

The Perfect Newborn Burp Cloth (tutorial)

February 3, 2014 By Erica Deuel 6 Comments

DIY_burp_clothsSo many cute things come with babies.

Cute clothes. Cute blankets. Cute bedding. Cute noises. Cute faces. And ohhh the cute baby chub! All my babies had some sweet wrinkles. Loved it. One thing that is NOT so cute about babies is all the stuff that comes out of them. Their mouths for one can leave spit up that smells, stains, and is slimy yuck.

It’s part of the deal though, so we handle it. When I had my Reagan, I came up with this simple flannel burp cloth that I love. It is all I used with her. They still look beautiful today too. She uses them as blankets for her baby dolls.

Three years later, I am still making these burp cloths. Not for my Reagan anymore, but as baby shower presents. They are one of my favorite gifts to give new moms.

I’m going to show you the basic steps for how to create these burp cloths and then give you a few more reasons why I love them (as well as tell you some other baby items that I love to make and give).

When I find a flannel I love, I usually buy a yard regardless. But if you want to make one burp cloth, ask for 1/3 of a yard. I think that size makes a nice fat burp cloth. So many burp cloths are too thin or too short and don’t do the job of protecting you from mayhem.

flannel projectI then iron all around my 1/3 of a yard fabric. I fold about 1/4″ to 1/2″ seem down and iron it to hold it in place. I then fold the fabric over in half and pin all the way around it.

ironing flannel

DIY flannel burp clotheI simply sew around the edge of the now rectangle shape two times. There are foots that you can put on most sewing machine that will sew two lines at once. I just sew around two times. You can also personalize your burp cloth by adding a shape or an initial to sew on as well.

applique burp cloth

sewing_a_burpclothAfter you sew everything in place and remove the pins, it is done! I think this project is so simple, yet a fun way to give a personalized gift. There are so many different flannel patterns available to give this simple project different looks. You can get fun colorful patterns or basic geometric modern styles. Whatever your taste or the theme of a baby shower may be! Of course, I am always drawn to the bright colorful fabrics! 🙂

DIY_flannel_burp_clothsI think this burp cloth is the perfect burp cloth. The fabric is so soft. It is very absorbent. Here is the best part! The bright colors and patterns hide stains! So often the popular white cloth diaper type burp cloths get stained and gross. These flannel burp cloths hide all that and are more forgiving.

perfect_newborn_burp_cloth

handmade_baby_presentI love to add a few personalized homemade items to my baby shower gifts. I usually get something off the registry and then make a few things to go with it. Some of my favorite items to make are fun gift bags, chiffon flowers for the perfect newborn headband, and even simple wood signs.

homemade_gift_bagWhat about you!? Do you love to make items for your baby shower gifts as well?

Thank you so much for stopping by! I hope you have a great week and get to imagine!

signature

Share this:

  • Click to email a link to a friend (Opens in new window)
  • Click to share on Facebook (Opens in new window)
  • Click to share on Twitter (Opens in new window)
  • Click to share on Pinterest (Opens in new window)

DIY Christmas Ball Ornaments

December 16, 2013 By Erica Deuel Leave a Comment

DIY_ornament_suppliesDoes your Christmas tree have a theme? My Christmas tree’s theme is “kid creations”. I am a sucker for all the cute handmade and picture ornaments. My kids paint or create several ornaments every year, and they are my favorite ones on my tree. If you saw my reindeer hands post, you got some tips on how to craft this season (and survive) with little ones. Here is a craft you can try out those tips. My Christmas Ball Ornaments are easy enough for a toddler to make.

Start with some ball-shaped ornaments. I used glass ornaments, but I would think plastic would work really well with this method as well. I cut up a bunch of tissue paper into about 1″ long squares or rectangles. I gave my kids some glue and showed them how you put a dab of glue on the ornament and then stick a piece of tissue paper on it, and let them run with the craft.

Making_ornamentsDIY_Paper_mache_ornamenttoddler_ornament_craftA full collage of paper tissues over lapping one another is ideal, but my J simply wanted to create a row of paper around his ornament and be done. That works too. Reagan used a Q-tip to apply the glue on her ornaments which was easier for her little hands than to squeeze the glue bottle like the boys opted to do.

Once my kids said they were done with their ornaments, I applied glue all over the outside of the tissue paper. This step pushed down all those fly away pieces sticking up and got them to lay flat on the ornament.

tissue_paper_ornamentsOur ornaments were then wet, so I quickly slipped in some string and hung them up to dry. This prevented any part of the ornament getting ruined and not drying onto another surface.

drying__crafted_ornamentsOnce the ornaments were dry, I sprayed them with my favorite clear shiny gloss spray from Rust-oleum. I love the shine that this spray added to our ornaments.

DIY_shiny_ornamentsThe last step was to add some string, ribbon, or embellishments to make them unique and special to you. I added bells and feathers and even a little star with the date to one of ours. Note: I did this step without the kids help. 🙂

DIY_christmas_ball_ornamentsOur ornaments were then done and ready to be given as gifts or hung on the tree! Soooo have you gotten to craft or make any presents yet? I hope you are able to unplug, relish in the normal simple things, and enjoy this season.

Happy week friends!!

signature

Share this:

  • Click to email a link to a friend (Opens in new window)
  • Click to share on Facebook (Opens in new window)
  • Click to share on Twitter (Opens in new window)
  • Click to share on Pinterest (Opens in new window)

DIY Yarn Picture Frame

September 13, 2013 By Erica Deuel 17 Comments

DIY_yarn_frame

I have a hard time throwing left over craft materials away, so I store them and can become quite a hoarder if I am not careful.

Last weekend I made an initialed D out of yarn, and I had this brightly colored yarn left over. I knew it wasn’t enough to make another letter, but there was enough for something fun. I came up with this DIY yarn picture frame. If you can wrap a frame in yarn, you can do this project!

I started with an old picture frame I got at the Dollar Tree, and now I think the frame looks like something out of a boutique. I love it.

I’m going to show you step by step how I did it, so you too can make a fun frame!

Materials:

  • Cheap Frame
  • Yarn
  • Hot Glue Gun
  • Scissors
  • A Picture

string_picture_frameIf you like to be crafty, most likely these are all items you already have on hand too.

Start by taking the back off your picture frame. It needs to be open, so the yarn can wrap through it. Then place a small amount of hot glue onto the frame and stick your yarn on it. It does not matter where you start.

You are going to wrap around the whole thing until you complete the rectangle and are back to this starting point.

embellish_a_picture_frame
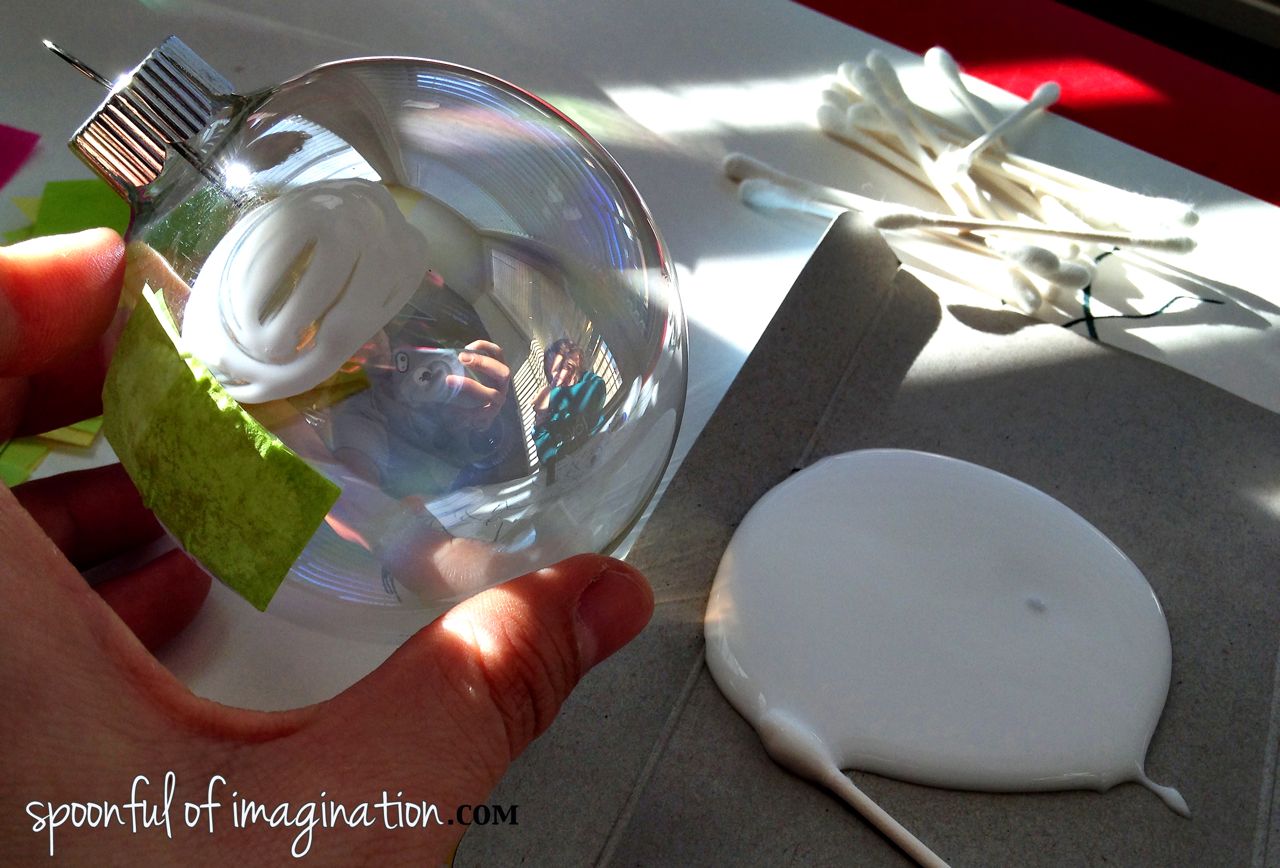
Start wrapping your yarn around the picture frame. I didn’t bother adding any more glue until I reached the corners. I then placed a small amount of glue and laid my string on top. Wait a few seconds to allow your glue to dry, before you start wrapping again. If the glue has not set, most likely it will not hold its place. I did this process a few times to get me around the corner.

String_frameContinue to keep wrapping until you get to the next corner. You then add more glue to get you around that corner-just like you did before. Just wrap and wrap. If you look closely at my corners you can see that I layered some yarn on top of other wrapped strands. Do what ever you need to, to cover those corners well. The string is gorgeous and you will create the same look no matter how many layers it takes to wrap it. The point is to cover up all the ugly brown frame.

DIY_String_frameIf you want, you can wrap your sides and come back and do the corners. I actually liked this way better. Cut your string and re-glue a starting piece onto your frame. Just glue it on the back of the frame, so no little fringe starting piece will show from the front.

DIY_String_frame_tutorial
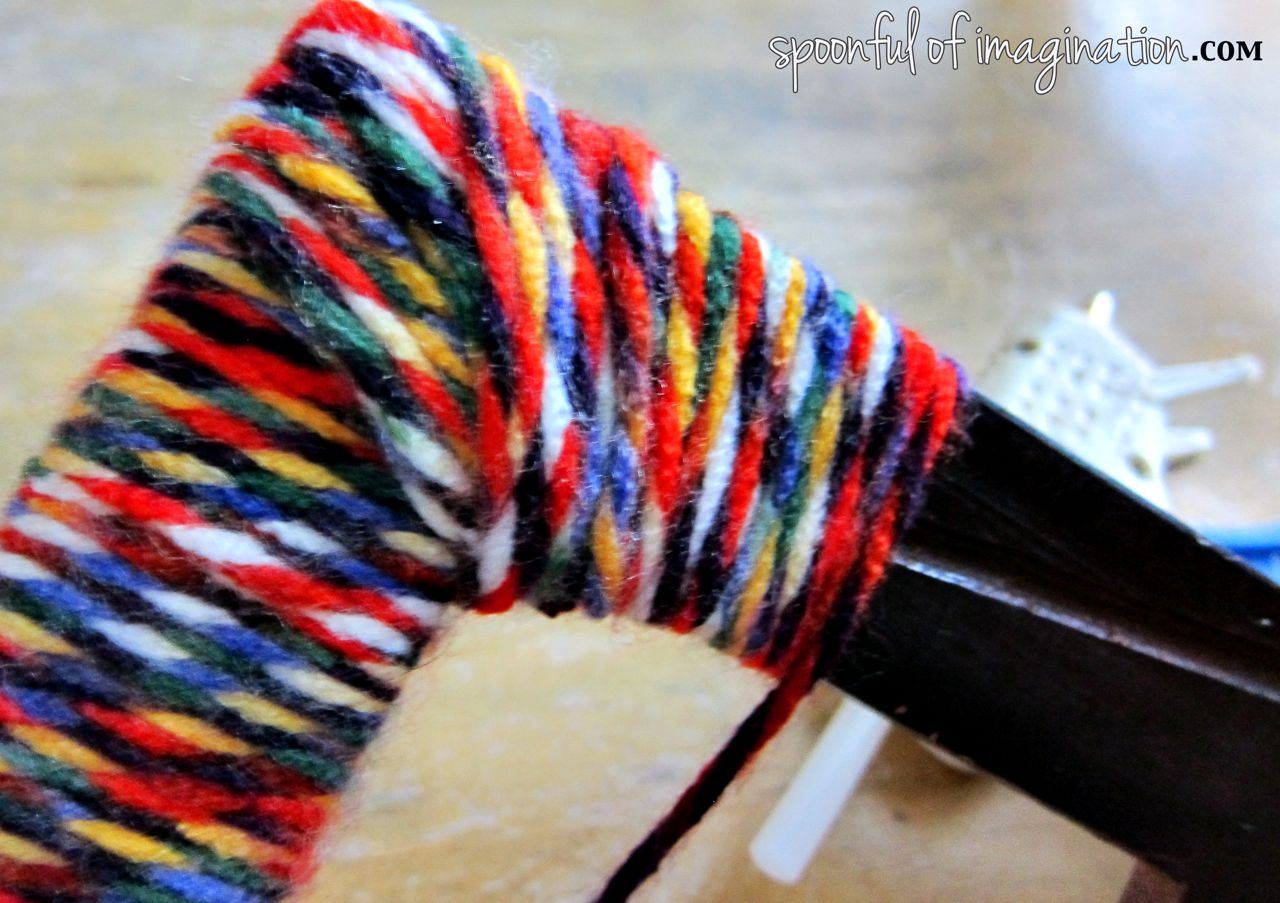
Once I was done wrapping, I thought the yarn frame looked pretty cool by itself. You could hang it up right then as a fun piece to add to a wall collage. I thought a paper mache letter would look cool hanging inside.

Wall_collageI decided to turn my frame into a real frame that can sit on my buffet. I added a small dab of hot glue into each of my corners and carefully set my glass on top. Be careful to align this straight.

DIY_yarn_picture_frameI then set my picture inside and hot glued a few small felt pieces around the back of the frame to hold it into place. The back no longer fit down into the little grove because of all the string. I figured this little system worked, and when I want to switch out the picture, I can just rip off the felt and redo this step.

make_a_picture_frameI love how it came out. I especially love the contrast of my black and white family picture that Someplace Wild took for us this summer with the brightly colored string.

colorful_yarn_picture_frame

shelf_stageing

I think this DIY yarn picture frame would make great, inexpensive gifts. You can personalize this project so much by picking out colors of yarn that apply to who you are crafting for, and insert a special picture that holds a special memory. The holidays are going to come fast, and I am tucking fun crafts like this away to remember for presents. Be prepared fam ;).
Hope you all had a great week and Happy Friday!! I hope you are able to incorporate a spoonful of imagination into your weekend. If you have any questions about this project (or any of mine!), please feel free to reach out to me! I love to hear from you all!

signature

Share this:

  • Click to email a link to a friend (Opens in new window)
  • Click to share on Facebook (Opens in new window)
  • Click to share on Twitter (Opens in new window)
  • Click to share on Pinterest (Opens in new window)

DIY Outdoor Checker Board

June 14, 2013 By Erica Deuel 6 Comments

patio checker board

Have you been spending a lot of time outside lately? Whenever it’s not raining, we have been playing outside or walking down to the pool. One thing that we are definitely enjoying is our back deck. We didn’t have a patio or a deck at our old house, so this deck is like the coolest thing to us. My favorite times are when we use it are in the morning lounging after breakfast with our coffee or at night after dinner. The kids will actually bring out bean bags to sit with us. It’s fun family time with the woods to stare into.

We were given this hand me down old furniture to put out there till we could get some. You know it’s not my favorite, but it’s something and so we are thankful we have it! The one thing that really has been bothering me was the table. It was rocky because of a bent leg. I have been afraid cups would spill or my active toddler would climb on it and somehow fall off and get hurt. It had to go.

bad outdoor patio furniture

On one of our many trips to Home Depot, I saw their 16″ Pewter Stepping Stones. They were $3 and I knew I could do something with them. I stood there staring and it hit me. I would make an outdoor end table with one stepping stone. I think this idea came quickly because of my great love for my Log End Table. I was excited and inspired to turn it into something practical yet fun. I landed on making a checkerboard on top. Here is how you do it!

Materials:

  • 16″ Stepping Stone
  • Kills Paint Primer
  • Outdoor Spray Paint
  • Paintbrush
  • 1.5″ Painter’s Tape
  • Bottle Caps
  • Tree Log

The first thing I did was figure out how many squares are on a normal checker board. Google told me the norm is eight rows by eight columns. I decided the easiest way to measure and try to get those boxes even was to create rows and columns based on the width of my Painter’s Tape. I used the Painter’s Tape
to create my own ruler. Eight little pieces of tape all lines up side by side would equal the width of my checker board. Note: I ended up taping all those little pieces in a row on another long piece of tape, so i could quickly move my make shift ruler around without having to pick up each little piece at a time.

DIY Ruler with Painters tape

I used the ruler to figure out the length of the bottom of my checkerboard and I just eye balled it to go in the center of the stepping stone. I then pulled up my ruler and rotated it to get the side get the length for that side of the checker board, being careful to start the length at the top of the tape on the bottom. Use this method to get the following two sides for your checker board.

making a checker board

Once you have the outline of the checkerboard, tape off the remaining outside of the stepping stone to make it easier on you while painting. Then paint the Kills primer into the center of the stepping stone.

painting a checker board

Use your tape then to start measuring for your checker boxes. I started lining up long strips of tape side by side. I used tape as a placeholder to mark the spot, but as soon as I could I pulled it up and rotated it to the next place (see below). Once Your board is taped one direction, rotate your stepping stone and do the same thing going perpendicular to the tape you just placed.

stripes on a chcker board

homemade checker boardOnce you have your tape down, press over each strip to make sure it is tight. Then use an outdoor spray paint to cover in the squares. I thought about doing a fun color, but ended up doing the basic black. Once that dries, peal up the tape and lay it back down to COVER the black you just painted. You need to do this to create the checker effect. Right now you have 16 black boxes surrounded by the white. By moving the tape grid onto the already painted black you will open up the areas that still need black paint. I’m sorry I forgot to take a pic of this step. Just know that when you peel your tape the first time and wonder, “Oh no, what did I do wrong?” (like I did) you haven’t done anything wrong. You just need to paint one more round of black boxes.

making checker boxesOnce you have painted your second set of black boxes and they dry, your checker board is done! Peal up the side tape and place your board on your tree log-or any other creative item you might want to use as a base! I think even a cinder block might be pretty cool. You can also use whatever you want as the game pieces. I spray painted bottle caps as our game pieces. Note: If you use a stepping stone or something else heavy make sure your base is completely level and very sturdy to avoid it falling off when little ones bump it or lean on it.

checkers

DIY Checker game piecesIf you use bottle caps, spray the insides as well. I will show you further down as to why. I still need to go back and spay paint the insides of mine. We are currently storing our pieces in an old tin cane wrapped with jute rope and some fake flowers stuck in on top to make it look like a center piece.

storing checker pieces

yard checker boardWe are having so much fun already with this little table. I taught my six-year-old how to play the other day, and he might be obsessed now. Sitting outside and enjoying some time and laughs together is one of the highlights of my days.

playing games with your kids

learning how to play checkersEven my little girl is having fun playing her own version of checkers which is pretty cool to watch. She takes the checker pieces out and lines each one up in its own square. That is one to one correspondence and pretty cool to see her thinking and playing an age appropriate version.

one to one corespondenceThe reason I told you to spray the inside of your bottle caps is so you can tell which king is yours. We played that once you were “kinged” you turned your checker over. Well, by the end of our game, we could barely tell which king belonged to us.

queen me in checkersThis project cost literally $3.25 plus tax, since I already had all the other materials on hand.  Such a cheap decor to spruce up your outdoor living and help you enjoy the pretty days this summer. Here is a quick recap if you want to pin or bookmark how to make this outdoor checker board.

how to make an outdoor checkerboard

Thanks so much for stopping by! I hope you have a wonderful weekend and celebrate your dad’s amazingly well this week for Father’s Day!

back yard deck

signature


Share this:

  • Click to email a link to a friend (Opens in new window)
  • Click to share on Facebook (Opens in new window)
  • Click to share on Twitter (Opens in new window)
  • Click to share on Pinterest (Opens in new window)
Next Page »
  • Email
  • Facebook
  • Instagram
  • Pinterest
  • YouTube
YouTube-Channel
Erica Deuel

Subscribe for Weekly Updates!


Most Popular Posts

Painting Flower Pot Party Tips
DIY {easy} Burlap Wreath
Imagine the Possibilities with me!
Repurpose Old Kitchen Chairs
DIY Outdoor Checker Board
The Encanto, Madrigal's House Craft For Kids
School Desk Makeover
DIY Paper Butterflies- Spring decor for cheap
DIY Yarn Picture Frame
Cheap lamp to Industrial Beauty

Categories

  • All About the Kids
  • art journal
  • Blogging
  • Christmas
  • Craft Projects
  • Dancing Zebras
  • DIY
  • Eddy's postcards
  • Embroidery Journal
  • Family
  • Featured
  • Fireside Chat
  • Foster Care
  • Giveaways
  • Guest Posts
  • Home
  • Homeschooling
  • Kid Activities
  • Kid Craft
  • My Heart
  • Our Outings
  • Project Spotlight
  • Send Out Love
  • Shop
  • Sponsored Posts
  • Spoonful Lab
  • Spoonful Tribe
  • Tips + Tricks
  • Traveling
  • Uncategorized
  • Vlog

Favorite Categories

Subscribe for Weekly Updates!

Favorite Categories

© 2023 Spoonful of Imagination, Inc.