 Kid parties can be expensive. Can I hear an AMEN!? Yes. I will pretend I heard you relate. I love throwing my kids’ birthday parties, but everything adds up. Plates and paper goods, games, decor, food, and goodie bags all add up quickly.
Something that I have learned is that if you can combine a few things to act as TWO things you can save some money and stress. What I mean by that is why not have the “game” or “activity” also be the party favor? It not only gives you something fun to do, but also something to send home.
Recently I was asked to prep a craft for my son’s homeschool co-op class to do together. I was all too eager and excited. Crafting with kids is a great love of mine. I secretly wish I could still be in elementary school and do all the fun crafts and activities.
I wanted to come up with a craft that was fun, required a minimal mess, and would last longer than a week on the frig. After seeing my talented friends’ photo message board post, I knew I could alter their idea to come up with this fun party craft. Note: If you like this idea, but want an adult version-PLEASE go check out my friends’ post!
The first step was to take a 2″ x 4″ and use my Ryobi Miter saw to cut it into 4″ segments. This created a nice size square base for our photo holders.
 I then sand the edges of the wood blocks with my Ryobi Sander to create smooth edges.


Next, I spray painted each block a fun color with Rustoleum spray paint. I picked Valentine’s Day colors since this was for a Valentine’s Day class party, but you could paint any color to coordinate with your party theme.
 Once the blocks were dry, I used super glue to attach the clothespins to the wood blocks. After the clothespins dried and were secure, my prep work was done! I now had the base for a fun, perfect kid’s craft!

 I simply gathered some pretty scrapbook paper, glitter glue, stickers, and tape and the blocks were ready to be embellished! I love how the kids can cut, use their imaginations, and create something fun and useful with this craft. These little photo holders would be so cute sitting in their bedroom and be something they can be proud of and use all year (not just as holiday decor).
 I think each picture frame would still turn out so differently, even though the same supplies are being used. You could see each kids’ personality by how they decorate their picture frame. I decorated the front and back of one, to give the class an idea of what you can do.

 These would be a cute way to display those Valentines they receive at a school party, hold reminders/notes, or a school picture. I’m going to take a class picture of my son’s class and print each child out a copy to use in their picture frame holders.
The best part of this craft!? I had most of the supplies. I picked up a 2″ x 4″ piece of wood for about $4, a package of clothes pins for $1, and a handful of sticker and paper things from the Target Dollar bin and I had a fun craft for 16 kids. That’s awesome!
How do you keep kid party costs down!? I love how when we use our imaginations we can come up with some thrifty ideas! I’d love to hear yours!


 If you like to be crafty, most likely these are all items you already have on hand too.
 Start wrapping your yarn around the picture frame. I didn’t bother adding any more glue until I reached the corners. I then placed a small amount of glue and laid my string on top. Wait a few seconds to allow your glue to dry, before you start wrapping again. If the glue has not set, most likely it will not hold its place. I did this process a few times to get me around the corner.
 Continue to keep wrapping until you get to the next corner. You then add more glue to get you around that corner-just like you did before. Just wrap and wrap. If you look closely at my corners you can see that I layered some yarn on top of other wrapped strands. Do what ever you need to, to cover those corners well. The string is gorgeous and you will create the same look no matter how many layers it takes to wrap it. The point is to cover up all the ugly brown frame.
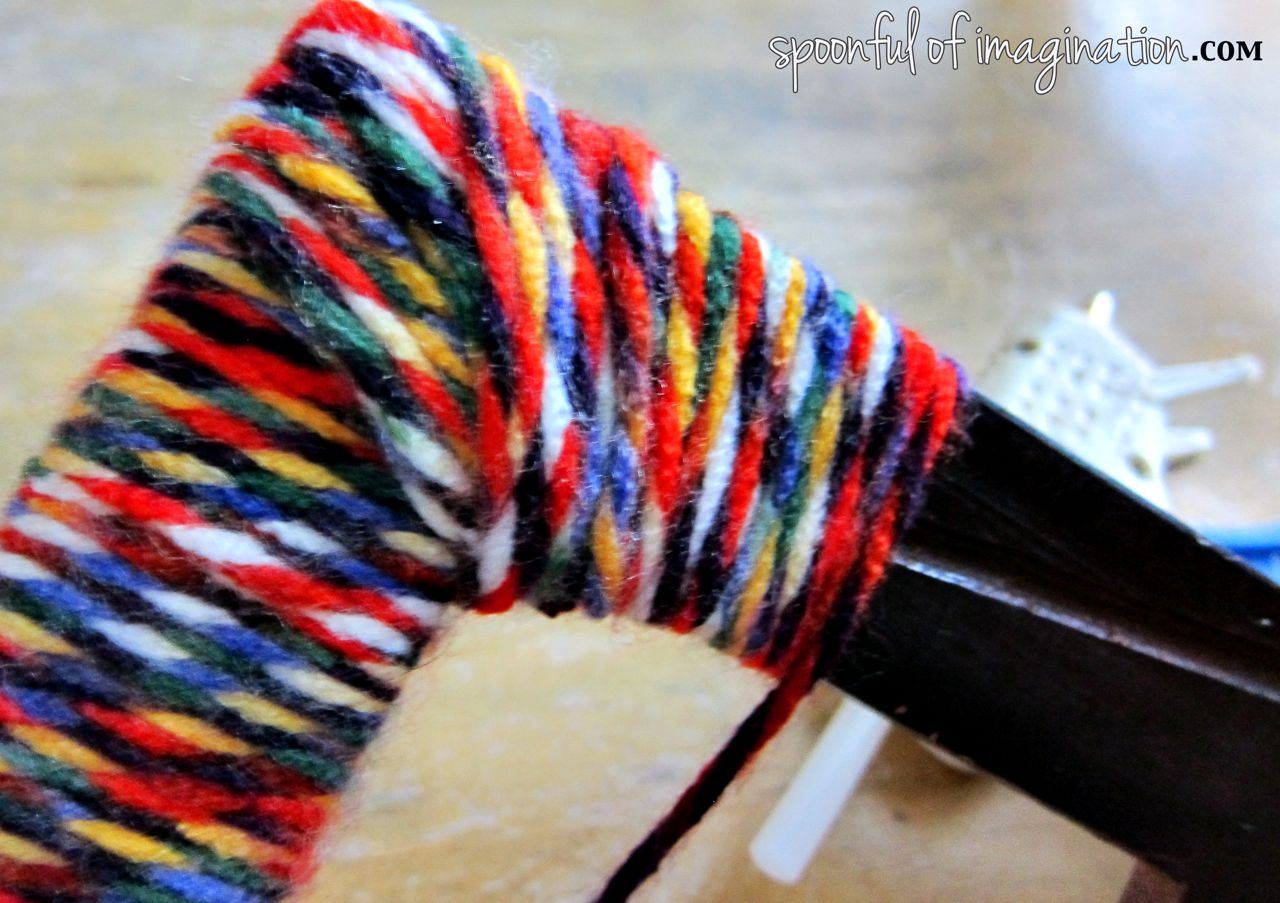
 Once I was done wrapping, I thought the yarn frame looked pretty cool by itself. You could hang it up right then as a fun piece to add to a wall collage. I thought a paper mache letter would look cool hanging inside.
 I then set my picture inside and hot glued a few small felt pieces around the back of the frame to hold it into place. The back no longer fit down into the little grove because of all the string. I figured this little system worked, and when I want to switch out the picture, I can just rip off the felt and redo this step.
 I love how it came out. I especially love the contrast of my black and white family picture that


