Spoonful of Imagination

Add it to a Family for Something Beautiful

  • Home
  • Our Family
    • Our Home
  • Courses
  • Shop
  • Contact

Toddler Picture Books

January 8, 2013 By Erica Deuel 5 Comments

Welcome back to week #2 of it’s All About the Kids link up!  Thank you so much for joining me, and I hope you link up a fun kid related post this week.

There were some great link ups last week!  I loved the post from Dollie on how to Use Puzzles to Teach Geography and the post from Heather on how to have A Snow Day with shaving creme!  Both amazing ideas and fun activities to do with your kids.

The link up that I randomly picked to feature today was The Blessings Jar from Heather at Upside Down Homeschooling.

blessings-jar1Heather is going to keep a jar and write blessings on little of slips of paper as they come in through the year to stick in the jar.  I love this idea, and we will definitely be doing it in our home as well.  Thank you so much Heather for inspiring us to look and appreciate the GOOD things that happen!  Please thank her for this great idea by stopping by her blog to say hi!

Today, I am sharing a toddler picture book I made for my nieces for Christmas.

toddler book

My sweet niece, Charleigh, lives 14 hours away so we only get to see her a handful of times during the year.  She is almost 18 months old, and I want her to know us.  We send pictures and Facetime, but for Christmas I wanted to add a personal touch to her present.  I thought of this cute little book.  I simply got a few pictures developed and ran them through my laminator at home.  I ended up going back and laminating them twice, so the pages are extra thick and protected from little girl drool.  Once I had the pages laminated, I punched a hole in the top of each page and stuck them all on a keyring, so they can be flipped easily.

I loved it so much, I made my niece, Natalie, one as well.  Even though we get to see her quite often, she loves her book because it is people that love her and she loves too.  My brother and sister in law took it out to dinner with them the other night and helped pass the time while they were waiting for their food.  How smart is that!?

photo gifts

homemade toddler book

personalized gift for toddlers

If you read my DIY Ruffle Fabric Bag and Christmas Wrap Up Post, you got to see a few other Christmas presents I made this year.  Did you make anything you gave away this holiday season?

Now, I am so excited to party it up with you all again!  Please link up your newest All About the Kids post!

Spoonful of Imagination


signature

Share this:

  • Click to email a link to a friend (Opens in new window)
  • Click to share on Facebook (Opens in new window)
  • Click to share on Twitter (Opens in new window)
  • Click to share on Pinterest (Opens in new window)

8 Easy DIY Kid Ornaments

December 12, 2012 By Erica Deuel 5 Comments

Today, I have 8 easy DIY kid ornaments to share! They are all really cheap and would make presents for grandparents or proud aunts and uncles! I bet you already have the supplies in your house to make a few of these with your kids.

1.  Wood Block Ornament

I have gotten some sweet comments on these wood blocks on Facebook, so I thought I would share how to make them.  I started with a small piece of wood.  It’s cut roughly about 2.5″ x 2.5″.  I sanded it down, so the edges and corners were smooth.  I then let my boys paint their ornament any color they wanted.  My sweet girl was only 10 months at the time of this craft, so I painted hers a solid purple.  I sized the pictures down on my computer, so they would print a size that would fit on the ornaments.  I cut them, rounded their edges, glued them on, and gave the whole block a good coat of Mod Podge.  I then screwed a little hook in the top and added ribbon and string, and they were done!  We gave ornaments like these to their grandparents last year for Christmas, and I think they were a hit!  Other ways to use the ornaments are to capture a first year marriage (with wedding pic) or a baby’s first Christmas (with a baby picture).  These are both gifts I have given.  I love to add a personal touch to gifts.  There are so many ways this ornament could be given as a wonderful present!  I can’t wait to make new ones for our tree for this year!

2. Paper Hand-print Ornament with Bells

You might remember from my Thanksgiving Turkey post that I am obsessed with hand prints.  For this ornament, I simply stamped their hand onto a sturdy card stock, cut it out, and glued it to a coordinating color card-stock.  I then punched a hole in the top and added some ribbon and bells.  I love that it’s simple, but it captures the “year” of your little ones size hand.  Make sure to date the back!

3.  Painted Plastic Balls

You can get a big tube of plastic ornaments anywhere.  I had a package of plastic balls that I no longer liked to hang on the tree.  I let my kids paint them, and I all of a sudden liked them again.  🙂  We switched out the hooks for pipe cleaners, and they make great ornaments on my boys’ tree in their room.

4.  Paint Pre-made Wood Ornaments

There are a lot of simple but cute wood ornaments you can find on sale at your craft store.  I love to let my kids paint one every year.  It is fun to see their growth in their painting skills to look back at previous years.  I also like to maximize the use of a tacky, kid ornament going on my tree.  I stamp their hand or glue a picture to the back side of these ornaments, if there is room for it.  It is kind of like having an easy scrapbook to pull out every year by having ornaments that contain their art, picture, or hand prints.  I love it.

5.  Paint Pre-made Pottery Ornaments

Right by the pre-made wood ornaments there are usually unfinished clay/pottery ornaments that you can buy.  I also love to do these every year.  After we paint them and let them dry, we go back and give them a good coat of mod podge and they look just like any DIY pottery ornament that you could paint at an art studio for probably about 1/4 the price.  We did this same technique with our pumpkins this past fall.  In that post, I gave you tips on how to paint with little kids.  Yet, you can see from these pictures even with lots of painting practice, it is still tricky.  I had to stop my four-year-old from eating paint after taking one of these pictures.

6. Popsicle Ornaments


I love all the possibilities with popsicle sticks for ornaments.  We have done a Christmas tree and a star so far this year.  I actually love their stars probably more than my star.  I still want to make a popsicle snow flake this Christmas season.  After the glue dried holding the popsicle sticks together, they painted their trees green and their stars yellow.  They then went back and glued buttons on their trees for ornaments and sprinkled glitter on their stars so they would sparkle.  We simply added some pretty rope, and they were done! I then picked a few pictures to cut and paste to the back allowing the popsicle sticks to act as a frame.

7.  Puzzle Piece Ornament

This puzzle piece ornament is another one we did last year.  We got a dollar store puzzle and painted all the pieces red and green.  After they were dried, I let them glue the pieces around a the construction paper “frame” that I had already cut out.  Once that was dry, I glued a picture to the back and hot glued some rope on.  I love the contrast of a black and white photo with the colored puzzle pieces.

8.  Tomato Sauce Lid Ornaments

We go through a lot of salsa and tomato sauce around here, and I have started saving the jars’ lids.  I knew I would come up with a reason to use them, and I did.  I used the same technique I created for my bottle cap necklaces.  I spray painted the backs white, nailed a hole in the top, added string, cut pictures to fit, glued them in, and mod podged over them.  These are still drying, but I plan on writing a quote my kids have said this Christmas season on the back of their lid. I think it would also be cute to write something they “wished” for this Christmas, so you capture what they were asking from Santa.  Another idea instead of inserting their picture is to allow them to draw a picture of their family and glue that inside.  I might have to spray paint some more lids and create a few more of these. 🙂

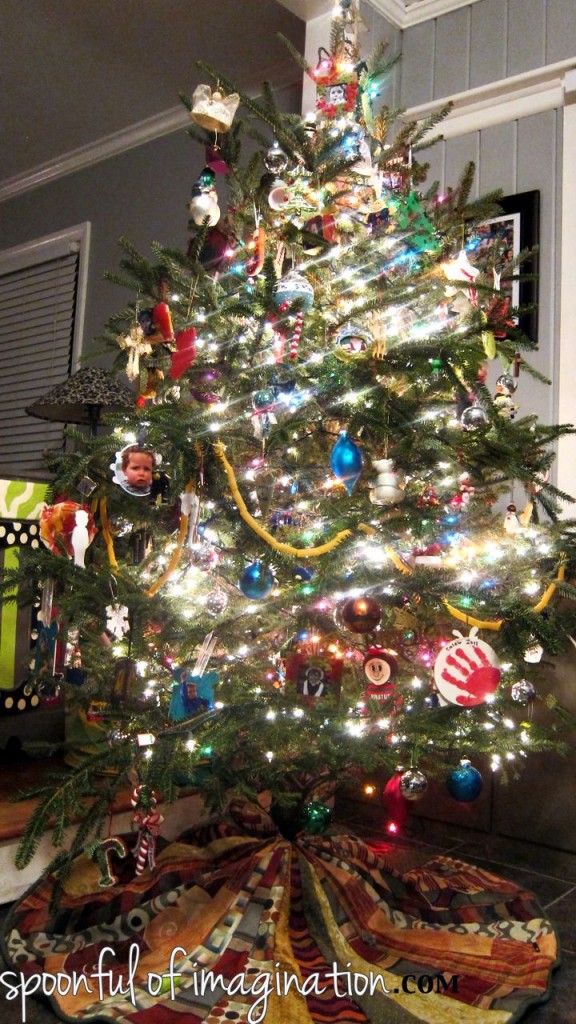
As you can imagine, my Christmas tree’s theme is “kid created.” I think someday I will probably have a more fashionably decorated tree, but I will probably have to have another tree with all my kids’ ornaments too!  I’m sure this one will remain my favorite.

What is the theme of your Christmas tree?  Do you make ornaments with your kids?

I’d love to check out your tree.  If you leave your link in the comments, I will be sure to check it out!  Thank you so much for stopping by!


Linked up at:  Shaken Together, Setting for Four, DIY Showoff, Honey were Home

Share this:

  • Click to email a link to a friend (Opens in new window)
  • Click to share on Facebook (Opens in new window)
  • Click to share on Twitter (Opens in new window)
  • Click to share on Pinterest (Opens in new window)
  • Email
  • Facebook
  • Instagram
  • Pinterest
  • YouTube
YouTube-Channel
Erica Deuel

Subscribe for Weekly Updates!


Most Popular Posts

Painting Flower Pot Party Tips
DIY {easy} Burlap Wreath
School Desk Makeover
DIY Bookends (what you can make for being a hoarder)
Cheap lamp to Industrial Beauty
DIY Outdoor Checker Board
Chiffon Flower Tutorial
The Encanto, Madrigal's House Craft For Kids
DIY Paper Butterflies- Spring decor for cheap
Repurposed Furniture Ideas

Categories

  • All About the Kids
  • art journal
  • Blogging
  • Christmas
  • Craft Projects
  • Dancing Zebras
  • DIY
  • Eddy's postcards
  • Embroidery Journal
  • Family
  • Featured
  • Fireside Chat
  • Foster Care
  • Giveaways
  • Guest Posts
  • Home
  • Homeschooling
  • Kid Activities
  • Kid Craft
  • My Heart
  • Our Outings
  • Project Spotlight
  • Send Out Love
  • Shop
  • Sponsored Posts
  • Spoonful Lab
  • Spoonful Tribe
  • Tips + Tricks
  • Traveling
  • Uncategorized
  • Vlog

Favorite Categories

Subscribe for Weekly Updates!

Favorite Categories

© 2023 Spoonful of Imagination, Inc.