Spoonful of Imagination

Add it to a Family for Something Beautiful

  • Home
  • Our Family
    • Our Home
  • Courses
  • Shop
  • Contact

DIY Heart Memo Board

January 13, 2014 By Erica Deuel Leave a Comment

DIY_Hear_memo_boardImagining is good for the soul. So are beautiful memories and stories that inspire us.

As I was thinking of starting another year and wanting to shine love the best I could, I tried to imagine and think of a way that my family could be in constant conversation about how we can show, see, and feel love.

It is easy for our world to be all about us. We feed our needs. We buy what we want. We take care of ourselves. Yet, our world has so much pain and hurt. I am finding the moments I push outside myself and give of my time, heart, and talents I can be used and see parts of the world that are bigger than me. I want my kids to experience and see how much they are blessed. To do so we need to be talking and looking for ways we are blessed and how we can bless others.

I came up with this simple heart memo board as a way we can constantly have our eyes open and hearts vulnerable. Before I tell you anymore about how we will be using our memo board exactly, let me show you how I made it.

I started with two 1″ x 1″ boards. I used my Ryobi Compound Miter Saw to cut them into six pieces. They measure (1) 12″, (3) 13″, (2) 24″. I also cut one of the ends of my two 24″ pieces and two of my 13″ pieces at a 45 degree angle, so they would fit together nicely at the points of my heart.

using_miter_sawOnce I got all my pieces cut, I used my new Ryobi Corner Cat Finish Sander to sand the ends of my wood pieces to get them smooth and remove any split pieces.  This was my first time to use my Ryobi sander and I LOVE it. It is light and powerful. Until now, I have mostly hand sanded projects because the last time I used an electric sander it was heavy, and had an electrical cord that was constantly in my way. I can’t rave about this sander enough. I was enjoying using it so much that I almost forgot to stop and take some pictures.

DIY_wood_heart

ryobi_sander I think I have forever been converted from manual sanding. After I finished sanding my pieces, I placed the wood in its heart shape. I pre drilled a small pilot hole into all my joints. Added a touch of wood glue at each joint. I then screwed them together and painted my new finished wood heart with wood stain.

screw_gun

wood_stainOnce the stain was dry, I got my other supplies together. I used jute webbing, scissors, and a staple gun.

wood_heartI stretched a piece of webbing across from one side of my heart to the other and stapled it in. I left a slight gap and placed another row of webbing up on the wood heart and stapled it in as well. I did this same technique all the way to the top of my wood heart.

using_a_staple_gun

jute_webbing_projectOnce I got all my horizontal rows in, I cut off all the fringe ends of webbing that were hanging over the sides of my wood heart. I then started weaving rows of webbing in and out of my other rows. Note: I had to remove some of my first staples to be able to get this second layer of webbing weaved in. If I had thought of it, I probably should have cut all my pieces and placed them where they were to go (having weaved), and did the stapled step last. This would have prevented having to remove any staples and re-staple.

weaving_a_heartOnce I had weaved webbing through my whole heart, my memo board was complete! I love the simple design, yet the huge way this project could inspire and help my family be in constant conversation about bigger things than what we should eat for dinner. Although I do love to talk about food, since Matt is an amazing cook.

DIY_Heart_memo_board

With this heart memo board we are going to write on little cards and clip to the board anytime we experience something like an answered prayer, seeing God move and provide, ways we were encouraged as we were used, our sweet foster children’s names, how we were marked or changed by something, etc. It’s meant to represent and capture heart level stuff. I hope we have eyes to see and hearts to take the time to capture, process, and write down the ways we feel our heart stirred in 2014. At the end of the year, I want us to re-read each card as we take them off and place them in a scrapbook of some sort.

photo 5-14Thank you so much for checking in and reading about my heart memo board. Do you have a way to constantly be capturing all that your heart feels? I am not good with journaling and I have a horrible memory, so I pray this little system helps me and my family.

On another note: I will be sharing more of our family’s continual foster story on IG (as ericadeuel) as we go through this. Please feel free to follow me there for more intimate parts of our journey and life than I may open up to in my usual DIY posts.

signature

Share this:

  • Click to email a link to a friend (Opens in new window)
  • Click to share on Facebook (Opens in new window)
  • Click to share on Twitter (Opens in new window)
  • Click to share on Pinterest (Opens in new window)

Girl’s Craft Night + Baby Shower

February 6, 2013 By Erica Deuel 5 Comments

paint chip baby shower banner

The other night I got a chance to throw a little girl’s night + craft night + baby shower all in one event with my friend Erin.

We had a blast planning it together for our good friend Dana, and it ended up being such a fun night.  It was low key, and the perfect blend of girl time, crafts, good food, awesome friends, celebration of life, and pajamas.

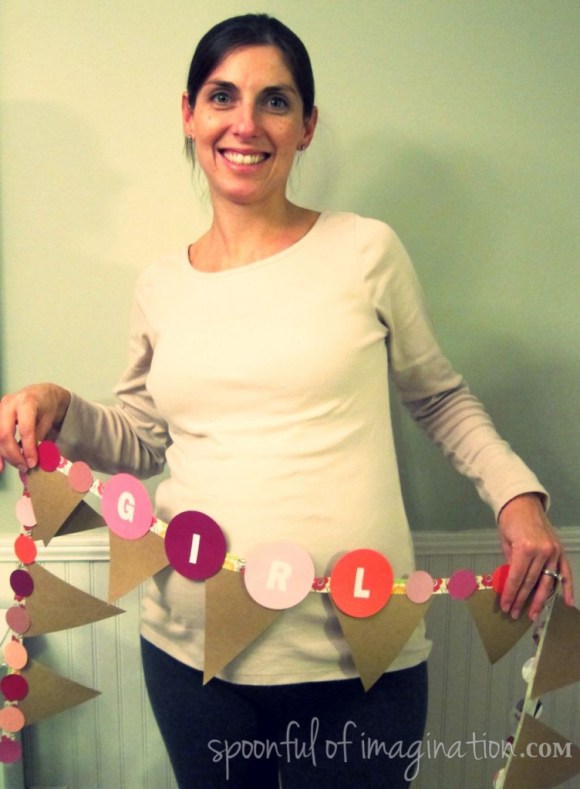
Here is a series of pictures from our night with steps on how to make the sweet “girl” banner I made for our party.

erin and me

hosting a baby shower

Erin and I were anxious for our friends to arrive, so we took a few pictures of ourselves while we waited.  This kept us from eating all the pretty food before they arrived.

girl baby shower food table

After everyone arrived, we ate and ate some more, while catching up.  The guest of honor is a candy lover, just like me.  We are kindred spirits with our sweet taste buds, so I loved having the task of bringing the sweets for the party.  I’m not much of a chief, but I can bake some cookies and buy some candy.  Thank you Erin for making the fresh creme cheese and dill dip plus the awesome tortilla roll ups.  She had the hard stuff.

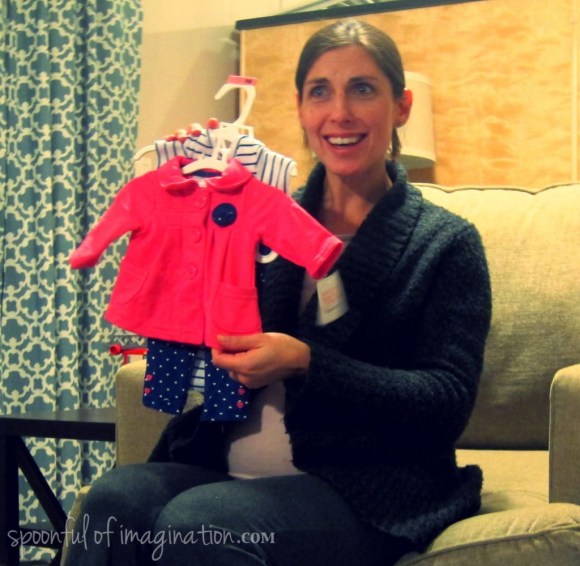
After we ate, Dana opened her presents, and it was so fun to see her reaction to girly items!

opening baby shower presents

Dana has two boys and is pregnant with her little girl, Jane.  We all found out her baby’s name that night, and it was so fun squealing with excitement for her.  I love it.  I love that she has the same gender and close in age kids as me too.

I have been busily making Dana some hair bows, and last week I showed you how to make the DIY Burlap Hair Bow I made for her.  Well, I used that hair bow and others that I had made to form a sweet bouquet to use as a decoration for the shower.

baby shower bouquet

For the shower, we had everyone bring a frame that they would want to turn into a hair bow holder or a memo board.  The bouquet was pretty for the shower, but now that the shower is over all those hair bows needed a pretty way to be stored.

For exact details on how to create one of these chicken wire frames please read about my Pallet Memo Board.  For this night, I brought a series of wire cutters, my staple gun, and the chicken wire and we got to work helping one another.

chicken wire materials

girls craft night

crafters teamwork

girls craft night project

It can be a two person job to hold the wire down (from curling up on you) and stapling.  Courtney (featured on the left in above pictures) was a great assistant to all of us.  This was my favorite part of the night as we all sat around in our pjs and talked, laughed and crafted.  I can’t believe I didn’t get a group shot of us all together, but I did manage to get most of our frames in a shot together.

chircken wire frames

I love creating with friends and I love creating for friends.  It was so fun to craft together, and I also really enjoyed preparing for the night.  I made the fun “girl” banner out of paint chips.

DIY Baby Girl Banner

In short, this is how you too can make this banner!

1.  Gather some supplies

  • paint chips
  • hole/circle punchers
  • stickers to spell “girl”
  • hot glue gun with glue sticks
  • ribbon
  • scissors
  • brown card stock paper

DIY girl banner

2.  Punch circles out of the paint chips.  I used my big circle puncher to punch four large circles out, as those would be the circles I spelled “girl” out on.  I used the smaller circle puncher to punch a lot more circles out to use along the top of the banner (on either side of “girl”).

3.  Glue the four large circles in the center of your ribbon and glue smaller circles up and down the ribbon on either side of it.  I just put a small glob of glue on the ugly side of my paint chips and stuck it on the ribbon.  You don’t need much glue.

4.  I then used white stickers to spell “girl” on my banner, and cut out some big triangles out of the brown card stock and glued them on the other side of my ribbon.

pregant photo shoot with a banner

belly with baby girl sign

That’s it!  The banner is done!  How gorgeous is my model here!?  Dana wears pregnancy so well!

We had such a fun night honoring Dana and her sweet baby and just being with each other.

Have you ever had or been to a more informal baby shower like this one?  I loved being in comfy clothes and having a girls night rather than an early Saturday morning function.

pregnant mommy with shower hosts

I’m so blessed to have these girls in my life!  Now, Ms. Jane!  Hurry up and get here!  We are all anxious to meet you!

The banner you could turn into a birthday banner or really any celebration decoration!  What kid related outing or craft did you do this week!?  I adore all the entries from last week, but the one that had me giggling was the one about fire!  My friend Heather has boys that my boys would adore playing with, if there were not so many miles in between our homes.  Check out her great post on “Why shouldn’t we look at the Sun?” and link up your own post!

cultivated lives sun


signature


Share this:

  • Click to email a link to a friend (Opens in new window)
  • Click to share on Facebook (Opens in new window)
  • Click to share on Twitter (Opens in new window)
  • Click to share on Pinterest (Opens in new window)

Pallet Memo Board

July 9, 2012 By Erica Deuel 4 Comments

On Saturday, we hosted a family kitchen shower for Matt’s cousin, Seth, and his fiance, Jennifer.  It was a lot of fun to celebrate this sweet couple!  I love family gatherings…and even hosting them!  Crazy I know!  There is something so special about celebrating life!  In preparation for shower, Matt and I made a memo board to be used as an activity, and it ultimately was part of our shower present.

I finally created something with a wood pallet!!  I am thrilled!!  I have been dying to get my hands on a project with pallet wood for probably a year now!  Here is our project…

The first step was prying four boards off of this pallet which I saved from my neighbor’s trash.  Ummmm let’s just say that was hard work, and my brother happened to see me struggling with it.  He may or may not have saved me from some cursing and blisters by completing this first task for me.  Thanks Tony! 🙂

Next, I measured where I wanted the boards to be cut and we cut them!

My amazing husband than started by gluing the boards together and reinforcing them with some dowel rods through the corners.

Next, on the back we hammered panel connectors along the seam of the fused boards.  Adding the chicken wire was the next step.  If you have ever used this stuff, you know it is hard to cut without getting scraped up!  Cutting the chicken wire the desired size and then stapling it into the wood…always leaves your fingers scrapped up.

We screwed some boards over the chicken wires edge.  This step had a two-fold purpose.  One, it covered the chicken wire’s edge up, so as to prevent more injuries.  Second, the extra wood panels helped reinforce the wood staying together.

One thing we learned with pallet wood is it is really hard stuff! It might be from being wet and dried so many times outside, or maybe they out some kind of sealer/treatment?  Either way, this pallet wood was hard and tough to hammer and drill into.

I than sanded the frame, and it was complete!!

Since this is a family shower, and it’s all people who the engaged couple love and are close to..I thought it would be fun to do a more personal “game”.  Everyone was supposed to write their recipe for a good marriage on a card and clip it to this board.

The cards weren’t read aloud, so people could be as honest as they want.  My heart was that people would encourage this sweet couple and give advice that could help them in life and especially the first year of marriage, which is typically pretty hard.  I of course forgot to write mine while playing hostess.

I have no idea what was written on those cards, but I hope it was good stuff!!  This board is pretty big.  I LOVED it!  I’m so glad I didn’t end up painting it-which I toyed with in my mind for a little while.

Jennifer loves rustic, vintage type decor.  That is the theme of their wedding, and I can’t wait for it in September!  All three of my kids are in it!  🙂  She loved this frame.  I am so glad because it was hers!  The other part of their shower gift will be shown with more shower pictures in my Friday Project Spotlight post.

We had a great weekend and I hope you did too!!  happy Monday!!

I linked this project up over at Southern Hospitality.  Check out all the thrifty finds/projects!  I also linked it up at Delightful Order.

Share this:

  • Click to email a link to a friend (Opens in new window)
  • Click to share on Facebook (Opens in new window)
  • Click to share on Twitter (Opens in new window)
  • Click to share on Pinterest (Opens in new window)

My Creative Spot (part 2)

May 8, 2012 By Erica Deuel 2 Comments

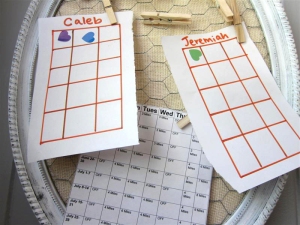
As promised, here is what is currently clipped to my memo board.

The two charts are a behavioral system we picked up from Caleb’s teachers at school.  They use it in the classroom.  When our kids are obedient on the first request, do something unusually nice/thoughtful, are encouraging, or have good “quiet times” we give them a sticker.  (Waking up with dry pullups/underwear is also a current sticker get-er) Once their chart is full of stickers they get to pick something out of my prize box.  I also take stickers away for being rude, disrespectful, not obedient, etc.  They HATE to lose stickers.  This has really helped our family.

It has eliminated some of the asking for things at stores.  If they see something they like, I sometimes buy it and stick it in my prize box, so they have to “earn” it.  It has really helped with nagging/ begging for things.  They know they get prizes by earning them.

I am constantly adding new dollar store/Target dollar section stuff to the box so they never know what is inside.  It’s exciting.  I also am VERY tempted to buy stuff out of the dollar section that I want to do with my kids and just give it to them.  I think, “its only a dollar”, but that was rearing some spoiled attitudes.  This has been good for me too.  I  can still buy the items I want too, but it holds me back from giving them away for just any reason.

Our charts change sizes.  It makes it fun for me :).  Some times they are longer than others.  Some days I am more pron to give lots of stickers than others.  Either way though this is something that we constantly have going on and it has helped us.  Thank you to Caleb’s amazing teachers for this gold nugget!!

My half marathon training sheet might also be hanging here.  I was going to train for the Alien Roswell run on August 18.  It’s at night and looks amazing!  Its now looking like we might do a family trip over that time, so I probably wont be able to do it.  I might still train for it anyway.  I turn the big 3-0 this year, and I would really like to run a half marathon before 2013.  It’s a goal.

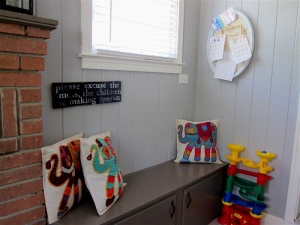
Our house is almost 70 years old, so it’s small and has lots of fun “characteristics” as in this built-in bench.  I think it’s suppose to hold firewood, but it definitely holds paint cans for us.  I love these three pillows my sister-in-law brought back for me from her World Race.  My house is all about color.  It’s my box of crayons!

That sign I made off one I saw on Pinterest.  As much as my OCD sometimes struggles with letting the house “go”  it’s a needed part of being a good mommy. This sign is a good reminder to me!

Thanks for checking out my creative corner!

Share this:

  • Click to email a link to a friend (Opens in new window)
  • Click to share on Facebook (Opens in new window)
  • Click to share on Twitter (Opens in new window)
  • Click to share on Pinterest (Opens in new window)
  • Email
  • Facebook
  • Instagram
  • Pinterest
  • YouTube
YouTube-Channel
Erica Deuel

Subscribe for Weekly Updates!


Most Popular Posts

Painting Flower Pot Party Tips
DIY {easy} Burlap Wreath
DIY Outdoor Checker Board
DIY Burlap Flowers
Cheap lamp to Industrial Beauty
Chiffon Flower Tutorial
DIY Paper Butterflies- Spring decor for cheap
DIY Outdoor Table
DIY King Size Rag Quilt {Repost}
Engraved Wood Sign Tutorial (and Dremel Micro)

Categories

  • All About the Kids
  • art journal
  • Blogging
  • Christmas
  • Craft Projects
  • Dancing Zebras
  • DIY
  • Eddy's postcards
  • Embroidery Journal
  • Family
  • Featured
  • Fireside Chat
  • Foster Care
  • Giveaways
  • Guest Posts
  • Home
  • Homeschooling
  • Kid Activities
  • Kid Craft
  • My Heart
  • Our Outings
  • Project Spotlight
  • Send Out Love
  • Shop
  • Sponsored Posts
  • Spoonful Lab
  • Spoonful Tribe
  • Tips + Tricks
  • Traveling
  • Uncategorized
  • Vlog

Favorite Categories

Subscribe for Weekly Updates!

Favorite Categories

© 2023 Spoonful of Imagination, Inc.