 Today, I have a funny little tale about a lamp.
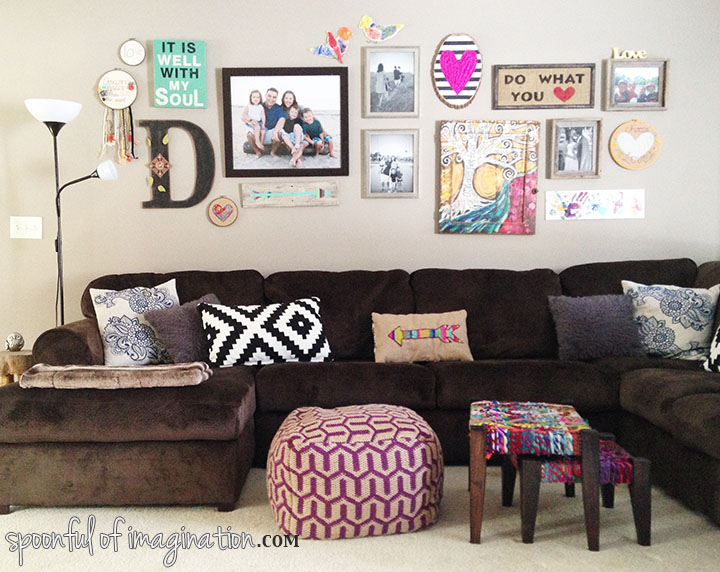
Before I get to the lamp, I must say it started with an empty room. We moved into this house, and we had a blank slate. We’ve been tackling it little by little and rooms are coming together. The living room has been one of the slowest rooms since we left our old couch and loveseat in Georgia. This room needed seating.
So, a couch was added.
A gallery wall was added.
 Yet, it was missing something.
This room needed a lamp. One that could sit on the edge of that couch.
It’s no secret one of my favorite things to do is to embroider (especially at night while talking to my boo). I needed a lamp next to the couch to make that possible. There is not much space between the couch and the doorway for a table, so it needed to be a floor lamp.
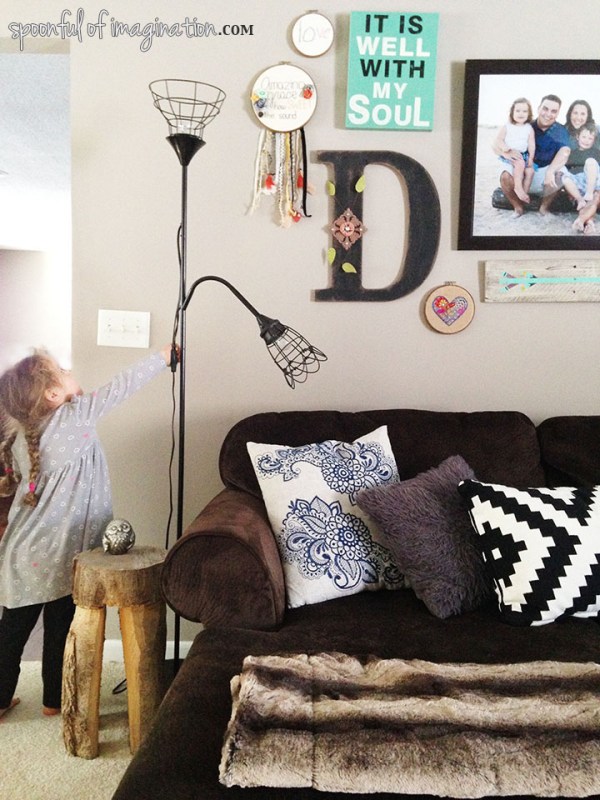
The only lamp we had on hand was a cheap plastic shade lamp, so I put it there for the time being. It got the job done, but it didn’t look right.
 I felt like it was trying to take over my gallery wall or at least be apart of it. The big white shades were distracting. I wanted something that did the job, but maybe a little more aesthetically. This lamp had to go.
 Then I fell in love with a lamp in a store front here in our little town. I thought it was a perfect match. After weeks of trying to get to the store, I finally got in only to find out that the lamp was not for sale. So sad.
I left determined to create my own. Why did I not think of that first? I wanted an industrial type lamp. To me, a wire shade was more subtle than a stark white. I found several shades on-line that would work, but ended up buying two from Lowes. Instead of getting rid of my current lamp, I was going to revamp it.
 I came home with new shades and light bulbs excited to try the switch.
 It was that easy. They were a perfect fit. Immediately I knew it was the right lamp. I didn’t have to get rid of it after all. The recycled lamp gave off light, yet it did not look like an addition to my gallery wall, but if it did-I would be ok with that.
I like the wire look better. I think these two shades and clear light bulbs immediately turned a cheap lamp into a fun piece that will be talked about.

Do you like metal and the industrial look too? If this idea is something you would like to try let me give two fair warnings.
1. Taking the shade off creates a light that is not softened. It may feel harsh because it is so bright. To help offset this, you could get a lower wattage bulb, a vintage yellow bulb, or only use one of the lights at a time.
2. The metal shade is a lot heavier than the plastic shade. So, the lower light kind of stays in the down “reading-light” position you see. My Caleb says it looks like a wilted flower because if you try to reposition it higher-it just falls. This was ok for me, since it is the perfect height to read a book or embroider.
If these two features don’t bother you, you will love the light as much as me!
 I think the handmade lamp perfectly compliments my colorful, art filled wall.
As someone who loves to create, why did I not think of making my own lamp from the very beginning? I guess sometimes the slow process allows us to experience some things along the way. I hope you get to imagine and try something new this week!

 I love how Caleb just hungers to be near and talk to me. He will come in the room literally just to tell me something. He notices the small things and confidently gives out compliments. He has a bold aggressive spirit that just wants to succeed and do it on his own. When he pours himself into something, he is relentless and can succeed at anything. He’s so smart and self teaches himself daily. I often wonder why we ever bother doing school. Most days, he will finish my explanation of a lesson for me.
 1. Caleb is obsessed with sports. We didn’t end up finding a house with a basement, so we knew he would need a basketball hoop in his room instead. He saw one he liked at Walmart, but it would have been like the third or forth one we have had. The little plastic hoop breaks so quickly. Matt’s parents found
  I am also planning to create a little wall gallery with some of their art or things that I have already made them. We are going to hang up their
  We definitely need to hang this
  I painted this sign years ago. It’s funny I showed it on our very first blog. This
  I still like the
  I love the idea of this
  As you can see, we have lots of projects and are definitely dreaming big. Why not!? We only live once. There will be lots of love put into these projects, and I will take you on the journey with us. It will be fun to see if the final reveal has some or any of these elements.
 Do you have or know a little boy that would like this room too? Please feel free to share this post. I’d also love it, if you pinned it to one of your Pinterest boards! Inspiring others to dream big will always be one of my favorites things about this blog.
 This is the best time of year to be outside in my book. I literally find myself wanting to take a picture every day of the clouds. You know I love fall, so I won’t gush too much. Something key to enjoying the outdoors is having a comfortable space to watch the kids, relax, sit, and just be.
 Pretty plain right? Not a mess, but definitely not inviting. We have had amazing feedback on our house. If there is a complaint it is the size of the backyard. I am hoping this little makeover helps it sell.
 I had an old bench and chair sitting in my basement gifted from a friend who knew I could do something with them. I used a beautiful color of Rustoleum spray paint and went to town on them. It took less than two cans of paint with a few light layers drying complete between each coat.
 Please forgive me for not wearing a mask, we were outside and it was quick light coats, but you should wear a mask. Let’s not even mention that I’m doing this in my PJ’s… thanks!


 I had a log that I had taken from my parents’ wood pile sitting in the garage. My initial idea was to create a little wood log end table with it, like the one I did for
  I bought a few plain boring planters, primed them, and then spray painted the bottom half hot pink. I intended to go back and paint the tops black, but I forgot about that until seeing these pictures. 🙂 Opps!
 Mums do a lot to make a space feel happy and friendly. I love the color they add as well! Next, I bought a few hanging plants on clearance at Wal-mart for $2.50 each. Matt rigged up an old yellow chain, and we hung them up from our deck. If you are wanting some fun white lights for outdoors, run to Wal-mart. I bought four boxes for $5.00 each. They are fun, white lights that can be used indoors or outdoors. I want to go back and get more. They are in the Christmas section. I’m not being paid to say this at all. What a great deal though, right!? My last set of white lights I bought for
  I found this cute kitchen rug at Wal-Mart as well. You might remember I bought a few when I made
  I’ve made a lot of wreath’s, but this cute one for $3.00 at Target got me. It was cheap, cute, and I don’t care if it gets rained on and ruined. It didn’t take me any time.
 We are loving our new area. It is so bright and cheerful. It’s a much better seat to enjoy looking out at the woods and watching my kids play.

 Of course this makeover got me thinking bigger. I’d love to put a big wall art to hang above the bench and some metal sheets to cover the under deck to make it waterproof. Hopefully though someone else will fall in love with this house (including this area) and I will be blessed to not have to keep creating at this house.
 We were pretty sad that no one at the open house fell in love with this space and gave us an offer. I know God has a plan, and we are trying to persevere until we know it. What is the craziest thing you have ever done to sell a house? Did you ever makeover a space quickly too!?
 I hope I can keep these flowers alive until the house sells. Otherwise everything else created here, can go with us to Indiana. I did this in a about 8 hours with four kids in tow. You can do so much more than you think, if you just go for it.


