I am so excited to share today’s Project Spotlight with you! A few weeks ago, I fell in love with a white feather wreath at Target. I stood there staring at it, trying to decide if I should buy it. It cost $19.99, and I decided to pass it by and try to make it myself.
Today I am going to show you the technique I came up with to make this DIY feather wreath, and it only cost about $4.00 to make! That is less than 1/4 the price at Target, and it really was so easy!
Here is what you will need to buy: one styrofoam wreath and white craft feathers. I already had my hot glue gun with glue sticks, but if you do not have those items, you will have to buy them as well. I got my foam wreath (normally $4.47) at Hobby Lobby with a 40% off coupon. I also got my white craft feathers there, and they were 30% off this week. So, the normal $1.99 a package of white craft feathers cost me about $1.30 each. I completely used both packs.
I started by adding a big drop of hot glue to my wreath.
I added a feather and pressed my thumb on the spine of the feather to prevent getting burned. I just want to briefly say here, I am so sorry for my messed up/old finger nail polish in all these pictures. How embarrassing. 🙂
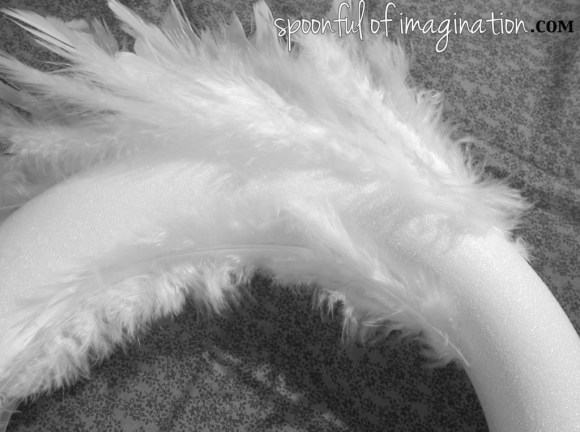
I went about five or six feathers across the styrofoam of the wreath.
Those feathers were my first row. I then started my next row about an inch lower on the styrofoam. This allowed for lots of overlap but spread the feathers out a little, so I didn’t need as many.
I found that the five or six feathers across allowed for some “wrapping” on the sides of the wreath. They started to go towards the back but also the back still had a bare streak, so as not to waste feathers that would not be seen. Play with the amount of feathers you need. Depending on the size of your ring of styrofoam and feathers you may need more or less. The important part is to just cover the sides well because you don’t want any styrofoam to be seen at any angle your wreath ends up being displayed and seen.
You then just keep adding rows and rows of feathers doing the same steps until you are about to where you started.
From there you do your best holding/bending the first row of feathers back so you can stick glue in there behind them and glue those final rows. It was a bit tricky managing it on my own, but it can be done!
After you get those last rows done, you are done! You have just created a professional looking wreath for less than 1/4 the price!
I love it!! I think it looks Christmasy yet also wintery. Even after the rest of your Christmas decorations come down, this pretty wreath could stay up till the spring!
I think these wreaths would make amazing Christmas gifts for friends or family. I think they would also make fun hostess gifts or a nice wedding/house-warming present. The ideas are endless, and they are gorgeous and CHEAP!
I stuck my wreath up on my mantle with a little star I found at the Dollar Tree last week. Today we are getting all of our Christmas decorations down out of the attic and I can’t wait to really deck my halls with this beauty! I’m sure I will be back to show you my results!
Have you started decorating for Christmas? Can you see yourself making this wreath? Thanks so much for stopping by and I hope you have a wonderful weekend!
Linked up at: DIY Show Off, The C.R.A.F.T. Blog, Little Inspiration, Homeschool Creations, and Shaken Together


