 Do you have a hallway light that bothers you? Over the years we have lived in a few houses that had hallway lights that some may refer to as “boob lights”. They didn’t really bother me till this house.
My favorite spot on the couch literally looks down the hallway and stares at one. That boob light had to go, yet I was having trouble finding another light that served the same purpose. I needed a light that did not hang low. The kids would swap at it going down the hallway-plus it would block my picture collage wall, so pendants weren’t an option. Every fixed light that I searched for looked highly similar to the one I was trying to replace. My option was to find something and turn it into a DIY project. I did just that.
I had collected an old chicken feeder shortly after moving into this house. While we were painting the living room, I decided it was time to switch out the light and I would try to use the chicken feeder to create my new light. It would be the perfect shallow light, similar size, and it had a much cooler look.

 We had a couple of light cords from Ikea that weren’t being used. Using some of Matt’s electrical expertise, we were able to utilize the wiring and junction box from the old light to power our new light while holding it securely to the ceiling.


 The next step was to measure the spacing of the screws from the junction box in the ceiling to the base of the chicken feeder. Once we had measured the correct width apart, we drilled holes into the bottom of the feeder, so that it could be attached to the junction box. (The sharpie markings are unrelated to the measurements)

 After drilling those holes, we drilled more holes to create room for zip ties and the light cord to go through the chicken feeder and hold the new lights securely in place.


 Once we had the lights securely in place, Matt attached the electrical cords to the old ones in the ceiling while properly insulating and attaching the light to the junction box . If you are not experienced with electrical work, you should hire this part out or find a friend who is experienced.
We placed LED light bulbs in the light sockets and powered it up. At first glance, the lights were too harsh and bright-especially for the hallway. We decided we wanted some sort of filter or diffuser. Going to the hardware store, we found a scrap piece of plastic used for common fluorescent light fixtures. The full 2×4 sheets were only $6. They charged us $2 for the scraps. Using utility scissors we cut a circle the size of our chicken feeder and stuck it in over the light bulbs. The wire grate held it in place.

 It was perfect. It hid the light bulbs and acted like a soft filter. With this new light we have light, yet it doesn’t block my photo wall and it’s not an eye sore while I sit on the couch.
 I love the little added creative touch this light has added to our home. All those small little tweaks that make a home your own, are so fun. It makes my heart smile. If we are honest, this picture below is how my view on the couch looks pretty often.
 I’ll take that view. Kids are so fun.
 What do you think of our new little light?
Have you ever made a light fixture before? What’s something you have repurposed for a fun design element in your home?

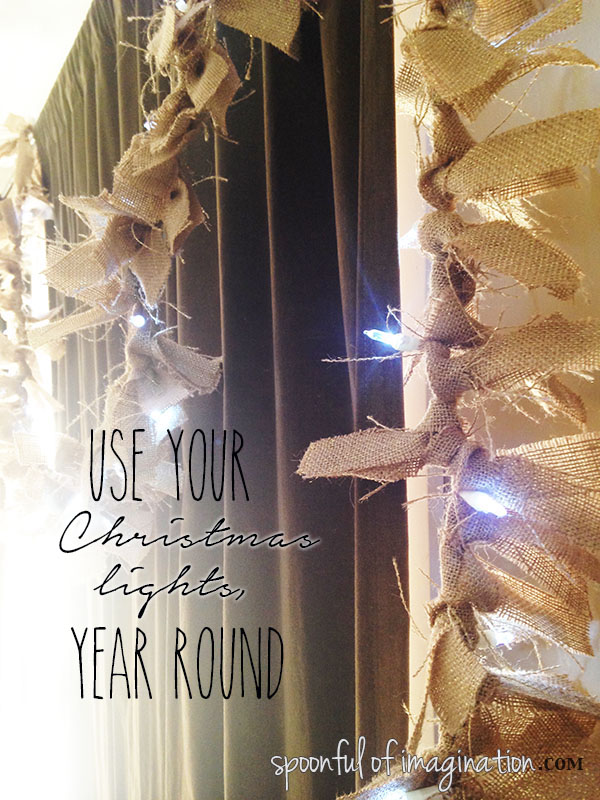 Do you miss your Christmas lights?
 The next step is to fold one of the pieces of fabric in half and place it behind the strand of lights. Then loop the ends of the fabric around the strand of lights and pull through that top fold in your fabric. The strand of fabric will have tied itself onto the light strand.
 That is the primary step! From there it is just repeating of cutting strips and tying them on. I like to create a really full garland, so I place three to four strands of fabric between each light. I think by doing this the electrical wire is really covered well.
 This one I am showing you, I mixed burlap with a creme fabric. I made it for a friend at Christmas. I have not found a good place for my lit garland yet, but you may remember seeing it in last year’s Valentine’s Day mantel. Once Christmas was over, I literally switched out Christmas elements and replaced it with winter ones and then just added Valentine’s Day decor like the
  Another inexpensive way to make this lit garland would be to use an old sheet and rip strips of fabric. I made one with this idea to list for sale in my shop. I added a little string to it for another texture. You could add ribbons, strings, beads, feathers, etc., to yours!
 I love how the fabric and little lights add a lot of fun to a space. Home decor doesn’t have to be expensive. I tried this garland in my kitchen and was tempted to keep it. The added texture creates some warmth that I just love.
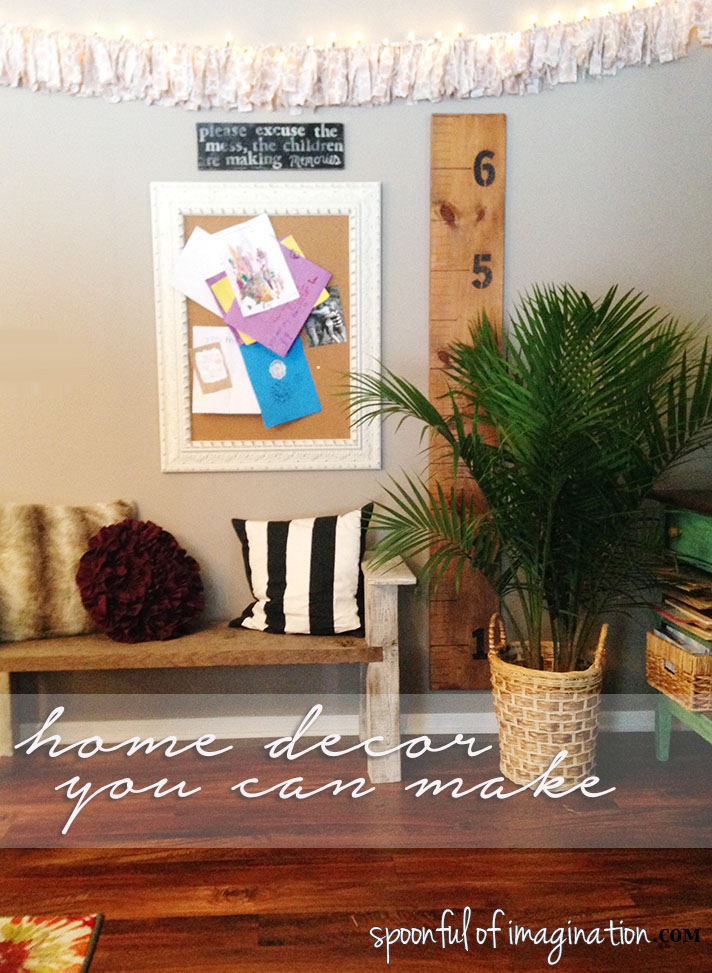
 I think it even looks pretty when it’s not lit! Wouldn’t this be so cute in a little girl’s room?
 What about you!? Do you have a thing for these fun little lights too? How do you create soft light in your home? I’d love to hear! Find me on Instagram (ericadeuel) and chat with me!