Spoonful of Imagination

Add it to a Family for Something Beautiful

  • Home
  • Our Family
    • Our Home
  • Courses
  • Shop
  • Contact

The Graffiti T-shirt

May 29, 2013 By Erica Deuel 5 Comments

little girls alphabet tshirt

Sometimes the basics are just the best. A soft comfy t-shirt + the alphabet = a wonderful item for any little ones wardrobe!

My little girl sings the ABC’s all the time. That song and “Twinkle, Twinkle Little Star” are her two favorites. I made this graffiti type design shirt for her, and she and I both love the results. I love the faintness of the design. It’s subtle by striking. You only need a few items to make a screen print type shirt like this one and here they are:

Materials:

  • T-shirt
  • FabricMate Chisel Tip Fabric Marker, Black
  • Alphabet Stencils
  • Piece of cardboard (to insert shirt while designing)
  • Iron (to heat set design)

materials to screen print

I found my t-shirt on clearance for about $4.00. It was soft and I knew it would be a great basic piece for my daughter’s wardrobe or I could spice it up a bit. I decide to add a little subtle but fun life to it with the alphabet. This DIY shirt is so easy and really can be done quickly and modified for so many other designs.

The first step I did was bend an old cereal box to go inside my shirt. This way my design did not bleed through to the back of the t-shirt.

Next, I laid out my alphabet stencil onto the t-shirt. I needed to see if my stencil would fit or if my letters were going to be too big. They fit! Depending on the size shirt you have will depend what kind of size stencil looks best.  The important part is to just configure the placement of the letters that will fit per line across the chest of your t-shirt.

stencil a tshirtOnce you have your stenciled layed out like you like it, carefully move it to the side of your t-shirt. That way you will remember how you liked it lined up, but you can adjust as you go with one letter at a time being painted on.

alphabet tshirt

Carefully hold your stencil down and your t-shirt stretched and take your paint pen and start filling in the letter stencil. It is important to say here, to follow the instructions of your paint pen. My paint marker said to pre-wash my t-shirt, allow my design to dry for 24 hours, and to heat set the ink to preserve the design. If you use a different kind of paint pen/marker be sure to follow the instructions to get the best results. I love the paint marker I used. It transferred the color ink nicely and didn’t leave a hard, stiff result that would make the t-shirt uncomfortable to wear.

stenciling a tshirtOnce you fill in that first letter, place the next stencil and start filling it in as well. I didn’t want my design to be straight across and perfect, so I placed my stencils slightly higher or lower and tilted different angles ever so slightly all the way down the alphabet. I think it creates a more graffiti look and is more forgiving in not having to be “perfect.”

the letter aKeep adding stencils and filling in the letters. I didn’t worry about filling my stencil in to be a solid black filled letter. I liked the look of it being a little more worn.

stencil the alphabetOnce I finished my alphabet, my t-shirt was almost done! I waited 24 hours for it to dry, gave it a quick iron to help set the design, and it was done! I love how quick and easy this craft was. I made my daughter a fun t-shirt for less than $7 ($4.00 shirt + $2.70 marker). I now want to make a bunch of shirts with fun quotes and maybe even a Minnie Mouse silhouette like the sign I created for her bedroom. There are so many possibilities!

DIY screen print tshirt

make your own screen print type shirtI adore my little model! She was so excited about her shirt. Here’s a few pics that capture her fun personality…

DIY shirt for little girl

She’s a blast! Have you ever painted a t-shirt and actually worn it? The only shirts I had ever painted till this one had been done as a kid with acrylic paint and always left a hard stiff feature to the design that made the shirt uncomfortable to wear. There are so many fun fabric type markers and paints now that prevent that effect. The possibilities to becoming a clothing designer are at your finger tips! 🙂

signature

Share this:

  • Click to email a link to a friend (Opens in new window)
  • Click to share on Facebook (Opens in new window)
  • Click to share on Twitter (Opens in new window)
  • Click to share on Pinterest (Opens in new window)

The Day My House Went Up For Sale

February 22, 2013 By Erica Deuel 6 Comments

I didn’t think I would get to post today, but here I am. My house went up for sale today. After two long weeks of decluttering, projects, and cleaning, today felt so good.  We are done, and the rest is up to God as he continues to lead us on the path he has for us.

After relaxing all day and snuggling on the couch with my kids for a movie tonight, I just found myself in a quiet clean house. The kids are asleep and Matt had to work tonight, so I was up to myself to find something to do. What did I do? I broke out the craft supplies and made a messy project. Crafting in a clean house is one of my favorite things to do. The two things (clean house + crafting) have got to be antonyms and not allowed to be connected in a sentence.

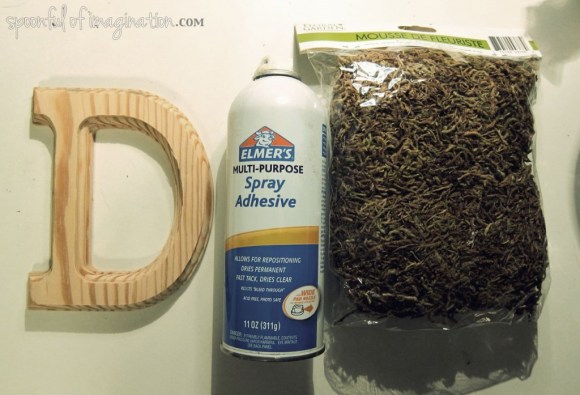
DIY moss letterI pulled out some supplies and decided to make a moss initial letter for one of my “staged” shelves. Who uses spray glue indoors on a moss messy project the day they put a clean house up for sale? Insane DIY Bloggers do.

I was smart enough to turn over my rug to use as a backdrop (but still a rug-why not a drop clothe?!) and lay down a piece of scrap paper to do my project on. I simply sprayed my letter and started applying moss all over it.

moss initial letter

After the first layer was covered, there were some holes in the moss where I could see the wood. I simply sprayed right over it again and pressed in some more moss.

fill in the holeI filled in all the holes and my moss letter was done! This was such a quick project!

moss initial

It might not have been the smartest thing to do in a clean house that has two showings lined up first thing in the morning, but don’t you think my shelves needed this little D? Maybe. Just maybe…it will be this mossy D that sells my house.

staged shelves

book shelves (that are staged)

There was a hole in my shelf and this simple project fixed it, so the day my house went up for sale…I made a mess of it. It’s nothing a little vacuum job can’t fix.

vacumming a rug

Would you make a mess in your clean house on purpose!? Can you relate to feeling like an insane crafter and laughing at yourself? Please tell me I am not the only crazy one!

Tomorrow, I am so excited to share with you my house. There is nothing like putting your house on the market to make you take great pictures of your house to complete your “house tour.” Thank you for stopping by and I will be back tomorrow with lots of pictures of my house!

signature


Linked up at Snap Creativity

Share this:

  • Click to email a link to a friend (Opens in new window)
  • Click to share on Facebook (Opens in new window)
  • Click to share on Twitter (Opens in new window)
  • Click to share on Pinterest (Opens in new window)

Happy Thanksgiving Banner

November 17, 2012 By Erica Deuel 3 Comments

Yesterday, I whipped up a quick Happy Thanksgiving banner.  I wanted to share it with you all, so you too could make one!  I started by printing two letters per a piece of paper.  I simply picked a font I liked and picked a size that allowed two letters to print per a page.

I cut each letter out by cutting a triangle shape around it.  I didn’t measure or worry about each triangle being the same.  I think the difference and variety adds character!

I have been holding onto our old bed skirt from when we upgraded our bed to a king and got new bedding.  It is a dark corduroy skirt, so the use of it on my Thanksgiving banner was perfect!  It adds a fun fall touch.  I simply cut out enough triangles (also not measured or exact), so that each letter had a corduroy triangle to go behind it.

I had some fun trim that I used to sew the letters to the corduroy triangles.  I love the gold contrasting on the creme paper and dark fabric.  After I sewed them all together, this banner was done!  It was so quick and cheap, and it will add a fun festive decor element to our thanksgiving celebration this next week!

I love how it came out, but I decided to add some turkeys we created this week in our homeschool.  The kids stamped their hands, cut out their hands, and painted eyes and legs to make their hands turkeys.  They then went back and glued feathers onto their hands to create a more artsy/realistic turkey.  They had a blast making them, and I thought they added a special touch to our banner.  I used clothes pins to attach the turkeys to our banner, so the banner can be recycled next year, and we can replace the turkeys with “new” turkeys.  These turkeys can retire to my kids’ scrapbooks.

I loved how it looked outside hanging in the trees, but we opted to hang our banner in our kitchen where we can enjoy it all week long.  Have you made a thanksgiving banner?  We are hosting Thanksgiving for the first time ever this year.  Would you rather host or go to someone’s house for the holidays?  I hope you are having a good weekend!

Share this:

  • Click to email a link to a friend (Opens in new window)
  • Click to share on Facebook (Opens in new window)
  • Click to share on Twitter (Opens in new window)
  • Click to share on Pinterest (Opens in new window)

Summer Stuff (with pictures)

June 16, 2012 By Erica Deuel 1 Comment

Highlights from our summer so far (literally the last few weeks)

*legoland: Our boys are obsessed with legos right now! They have been wanting to go for weeks, and they loved it!

*zoo: I took the kids for a few hours before picking Matt up from the airport the other week. They wanted to do the playground more than seeing the animals:). Do you think we go too often!?! #seasonpass

*aquarium: We got season passes! The kids loved going! We’ve already gone twice now!  Plus, Centennial Park is right next door!!  It’s so nice to let the kids run there (after having to stay close and not run in the aquarium) before driving home!

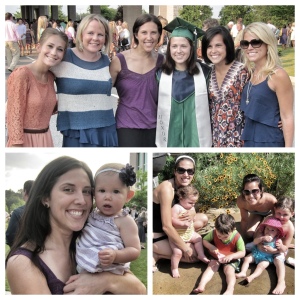
*my sister, Joni’s high school graduation: I’m so proud of her!! She’s going to UGA in the fall!

*time with my sisters in town: Annie and Olivia came in town for Joni’s graduation. We literally were at the my mom’s pool five days in a row to hang out! So fun!

*hanging with my nieces: Two of the cutest girls I know!! I can’t believe they are both turning one so soon!

*our air conditioner broke: There were a few really hot days around our house, but God so graciously provided us with a replacement!!  There were a number of pool days in there too 🙂

*I think there’s been six family member birthdays!?  Haha I feel like I am always trying to think of a gift to buy or make that would be sweet and special.  Coming from a big family definitely keeps me on my “deal” look out while shopping!

*running: since a bird, her nest and four eggs have taken home in my jogging stroller…I’m getting to enjoy some runs without pushing my cute kids! Haha although the run is easier, I kind of miss that time with my kids!?!  Here are some pictures from my Memorial Day run with my sis and niece.  We might have bought tanks from Old Navy to be our “race shirts”…cause we are fun like that! 🙂

*the pool: the kiddie one and my mom’s pool, have both been enjoyed!! Caleb is obsessed and would swim all day everyday if he could! I love it!!

*water spray grounds: I love that this is right by our house! I should probably get a membership there too!:)

*sewing: I have been working on two rag quilts! Here are a few pictures of one I made for Emily’s Reese.

*playmates with new MOPS friends: I have been so blessed by this group in the last few months!!

*two college students coming in town for the summer to work with us and Broken Voices: there’s a team atmosphere and our kids love, love all the excitement of people coming and going all day.  One of Katie’s first jobs was organizing the office!  What a horrible task, and she did an amazing job.  She’s incredible!

*we got new floors in two rooms! They are gorgeous! No more dog “accident” stained carpet!  Here are two of my cuties dancing together on the new floor!

*we went to the lake for a day/night with some close friends who live in Iraq: It was so good to see them and get extended time to catch up!

*Traveling:  Matt and I both have been traveling!  Our poor kids are all out of whack from having solo parents on duty at different times.  Matt was gone for a week, I was gone for five days, and now Matt is gone for another week.  Can’t wait till Matt is HOME and our next trip will be a FAMILY trip all together!!  Whenever one of us leaves, we write each family member a note and hide it somewhere in the house.  The kids literally run looking for their letters.  It is so sweet.  The person leaving usually finds hidden letters in his/her luggage too.  It’s so good to know you are loved and missed:)  We usually put a recent picture of us with that child/spouse at the top of the letter.  Plus, we write about whats going on and any new milestones we are so proud of.  I guess these letters could be like a collection of love letters that are like our family diary?!  Here is our sweet set of letters from Matt’s first trip away.  I save all these in a shoe box…one day I hope to make a book with them!!

Whew, that is a lot and I couldn’t be more excited that it’s only the beginning of the summer and there is more fun to come!!  I hope you are all having a wonderful summer too!!

Share this:

  • Click to email a link to a friend (Opens in new window)
  • Click to share on Facebook (Opens in new window)
  • Click to share on Twitter (Opens in new window)
  • Click to share on Pinterest (Opens in new window)
  • Email
  • Facebook
  • Instagram
  • Pinterest
  • YouTube
YouTube-Channel
Erica Deuel

Subscribe for Weekly Updates!


Most Popular Posts

Painting Flower Pot Party Tips
DIY Outdoor Checker Board
DIY {easy} Burlap Wreath
Cheap lamp to Industrial Beauty
School Desk Makeover
DIY King Size Rag Quilt {Repost}
DIY Paper Butterflies- Spring decor for cheap
Chiffon Flower Tutorial
DIY Outdoor Table
DIY Bookends (what you can make for being a hoarder)

Categories

  • All About the Kids
  • art journal
  • Blogging
  • Christmas
  • Craft Projects
  • Dancing Zebras
  • DIY
  • Eddy's postcards
  • Embroidery Journal
  • Family
  • Featured
  • Fireside Chat
  • Foster Care
  • Giveaways
  • Guest Posts
  • Home
  • Homeschooling
  • Kid Activities
  • Kid Craft
  • My Heart
  • Our Outings
  • Project Spotlight
  • Send Out Love
  • Shop
  • Sponsored Posts
  • Spoonful Lab
  • Spoonful Tribe
  • Tips + Tricks
  • Traveling
  • Uncategorized
  • Vlog

Favorite Categories

Subscribe for Weekly Updates!

Favorite Categories

© 2023 Spoonful of Imagination, Inc.