Spoonful of Imagination

Add it to a Family for Something Beautiful

  • Home
  • Our Family
    • Our Home
  • Courses
  • Shop
  • Contact

Colorful Desk Lamp Tutorial

February 7, 2018 By Erica Deuel Leave a Comment

Colorful Desk Lamp TutorialWant to add a pop of color in your house without purchasing anything new? This is a project you can do!

In our last house, we had this small desk lamp in our boys’ bedroom. We haven’t used it in our new house, so its just been sitting in a closet. I loved the shape and it worked so we have just held on to it. If you have boys who occasionally turn the living room into a football field, you know it’s important to keep a few items on the sideline should a picture frame or lamp take a direct hit. Just saying.

Now, that we have the art studio, I am finding a lot of days where I am working on setting up workshops, emailing, and spending more time on the computer. I needed a functioning desk with a lamp.

Colorful Desk Lamp Tutorial

I pulled out my old lamp and put it back to work. The only problem was it had a lot of white on it, and the lamp shade I wanted to use also had a lot of white. It was easier to change the lamp base than to find another lampshade that fit and looked great. Here is what I did to my lamp base.

First, I used painters tape to cover the light bulb socket and switch section of my lamp.

Colorful Desk Lamp TutorialNext, I pulled out a couple of my leftover spray paints that I liked and did a light coat of each color all around my lamp.

Colorful Desk Lamp TutorialI let each color dry completely, before I sprayed the next color. I overlapped the colors a little as I sprayed to create a natural ombre look.

For this project, it was easy to hold the light bulb socket area and rotate the lamp to create the even coat. Please note: To avoid drip downs of paint, it is better to do two light coats of spray paint than to do one thicker/heavier layer.

Colorful Desk Lamp TutorialIt’s always a little more challenging to do spray paint projects during the dead of winter. It’s been hovering around “Brrrr, it’s cold” to “I can’t feel my face” this past month. Which means spray painting is happening in the garage. While it’s certainly warmer than outside it still feels like “I’m losing feeling in my toes” after about 20 minutes. So all that to say, it takes things a lot longer to dry. Be sure to let your lamp dry completely, so you don’t get fingerprints or scratch marks on your new colorful project.

Colorful Desk Lamp TutorialOnce your lamp is dry, add a light bulb and lampshade and you are ready to go! I love the way that my white lampshade looks with this new colorful base. It’s such a fun mix!

Pssstt… did you notice I left the gray layer on the base of my lamp base? I liked that color, so I used it as the first layer and just added more color to the middle and top!

Colorful Desk Lamp TutorialI’m hoping this little desk and lamp helps me to have a focused workspace. Maybe it will help my kitchen counter from becoming an office.

Colorful Desk Lamp TutorialDo you remember when I made these rustic mirrors? They may be one of my favorite crafts of all time.

What do you think? Do you have a lamp, basket, or flower pot that is hiding away in a closet, basement or garage that could be brought back to life with a little color added to it? Have fun! Use your imagination and have fun giving old items, new life. This is also a great way to make someone a special and customized gift without spending lots of money.

Thanks so much for stopping by! If you try this project, tag me on social media with #spoonfulproject so I can see your handy work!

Share this:

  • Click to email a link to a friend (Opens in new window)
  • Click to share on Facebook (Opens in new window)
  • Click to share on Twitter (Opens in new window)
  • Click to share on Pinterest (Opens in new window)

Buying vs Making

June 26, 2013 By Erica Deuel 2 Comments

buy verse makeAs a DIY enthusiast you’d think I always make stuff rather than buy it. Many times this is true. However, I have found there’s more to it than just what you pay at the register.  In this post I discuss Buying vs Making.

What is the value of your time? Do you ever find yourself thinking “this ______ just cost me ______ amount of time?” I do. I often think it when I’m doing something I really don’t like and have a million other things I would rather be doing. Being a stay-at-home mom, as many of you already know, is more than a full-time job. Add in the desire to be consistently creating new projects, and whew, time is scarce. More and more I’m trying to value my time and think smart when working on new projects. The truth is if I spend a few extra dollars on a project that enables me to complete that project quickly and move on to the next, then those extra dollars are getting a good return on the investment.

Other times, I find items on sale that turn out to be as cheap or cheaper than making it myself. Isn’t that like cheating? Again, if you are anything like me and value your time and have a to-do list a mile long, then no. Check something off of your list so that you can move to something you really love or care about. This recently happened for me.

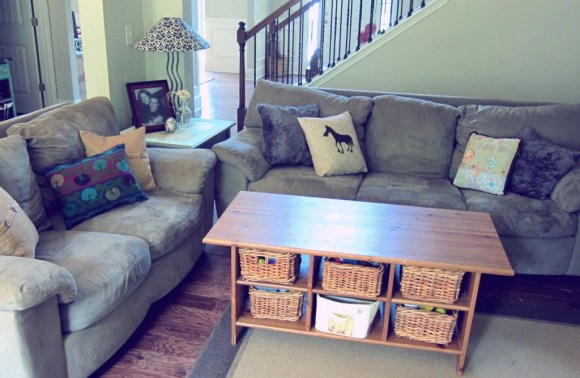
Ever since Matt made me our bench for the foyer (and it stole some of my couch pillows), I have had on my to-do list the need to make more pillows for our living room. I love pillows. I love making them and buying them. They are such a cheap thrill that can totally create a large impact in changing the feel of a room. Even though I do enjoy making pillows, making four would take me a lot of time.  I was browsing Hobby Lobby the other day and found something, which was a purchase, that saved me significant amounts of time.

cheap throw pillowsIn Hobby Lobby’s upholstery fabric aisle they have a section of premade curtains and pillow covers. When I happened to be in this aisle a few weeks ago, those items were 50% off! That made the cost of pillow cases $3.50-$4.00. What a deal! If I had bought pretty fabric, a thinner fabric to use as a liner, and a zipper I could not have made a pillow cover for less. I was so impressed and excited.

This is not a sponsored post. I just love Hobby Lobby and wanted to share that sometimes it is cheaper to BUY something than to MAKE it. The cost of supplies is one thing but the amount of time I saved is really the bigger savings.

make cheap throw pillowsI had some feather pillows literally stacked in a closet waiting to have covers put on them. I scored these Pottery Barn pillow inserts at a Goodwill months ago. They were in almost brand new condition. I brought my pillow inserts home and covered my pillows and all of a sudden I had four brand new pillows on my couch at a minimal cost of dollars and time.

new couch pillowsI do want to make some embellished fun pillows to add to this collection, but having some basic yet pretty pillows there now feels so good. Did you know that Hobby Lobby sold premade pillows? I picked the fun fur one (that my kids fight over using) and the basic burlap/canvas with button covers but there were so many more to choose from. They even had chevron in lots of colors.

cheaper to buy verse makeNow that I freed up all this time knocking out my pillows I’m ready to head back to Hobby Lobby to get supplies for the next item on my list! What are you all working on this week? Any big projects??? What are ways you fight to not only save money but also time in your projects? Thanks so much for stopping by!

signature

Share this:

  • Click to email a link to a friend (Opens in new window)
  • Click to share on Facebook (Opens in new window)
  • Click to share on Twitter (Opens in new window)
  • Click to share on Pinterest (Opens in new window)

DIY Burlap Flowers

May 27, 2013 By Erica Deuel 5 Comments

diy burlap flowers

I don’t know about you, but I wasn’t born with a green thumb. Most flowers and plants probably see me as the Grim Reaper. “No please, anyone but her!!! Don’t let her take me home!” they scream as they see me and my shopping cart approaching. Kids, no problem. Pets, piece of cake. Put a plant or flower in my care and you might as well say your goodbyes.

So if you are anything like me (or you are in the mood for a cute DIY burlap flower craft) then today’s post is just for you! The flower arrangement, you can’t kill! Sound good? Ok, here’s what you need to get started:

Materials

  • Scissors
  • Burlap
  • Dowel Rods
  • Hot Glue Gun
  • Wool Felt Balls

cutting burlap pieces

The first step is to cut your burlap petals out. I cut strips about five inches wide. Taking the strips I then cut those every four or five inches so I ended up having a stack of burlap squares. From there I eyeballed cutting flower bases out. They don’t all need to be the same. Just make sure they all have the same amount of petals. I cut mine to have four petals. Once you have cut your burlap petals, you are ready to start piecing everything together to make the flowers.

craft supplies

Take one burlap petal piece and hot glue one of the wool felt balls into the center.

DIY burlap projectNext, put a small drop of hot glue on each petal to attach them to the side of the wool ball (as shown below).

wool felt ball and burlapThen hot glue another petal burlap piece below the first one. Turn it so the petals are rotated in between the petals of the first burlap petal piece.

making a burlap flowerHot glue each petal down, and hold each one for a few seconds to make sure the petal seals and the glue sets. Be careful of the hot glue as it squeezes through the burlap.

hot glueing burlap project

burlap and color

Keep adding layers of petals over and over until your flower is as full as you want it to be.

burlap and color ballOnce your flower is as full as you want it to be, take another petal and cut a slit in the middle of it.

burlap flower petal

Stick one of the dowel rods into the hole, and put a huge glop of hot glue on top of it. Then place your finished burlap flower on top, and hold it down for several seconds.

hot glueing burlap

making burlap flower

burlap flowerThen take a small scrap piece of burlap and hot glue it around the edge of the dowel rod and the flower. This step helps strengthen the attachment of the two as well as make the flower look better.

burlap flower stem

burlap flower stemsYour flower is then done! You can make as many flowers as you want! I love that you can take this idea and make lots of different sizes or use the technique to make more than just bouquets. I think the flowers would look cute to make napkin rings, wreaths, or as an ornament to lots of different baskets or buckets.

cute flowers you can makeI put my flowers in a pretty clay vase on the buffet in my dinning room. If you like these burlap flowers, you might like another burlap flower I created and used on hairbows.

buffet decorSo, what about you!? Do you have a green thumb or like the idea of fake flowers too??

signature

Share this:

  • Click to email a link to a friend (Opens in new window)
  • Click to share on Facebook (Opens in new window)
  • Click to share on Twitter (Opens in new window)
  • Click to share on Pinterest (Opens in new window)
  • Email
  • Facebook
  • Instagram
  • Pinterest
  • YouTube
YouTube-Channel
Erica Deuel

Subscribe for Weekly Updates!


Most Popular Posts

DIY {easy} Burlap Wreath
Painting Flower Pot Party Tips
DIY Paper Butterflies- Spring decor for cheap
Chiffon Flower Tutorial
DIY Outdoor Table
Cheap lamp to Industrial Beauty
DIY Outdoor Checker Board
What does a Nature Shelf Collect?
The Way I Thrift
Spray Paint Ikea Furniture

Categories

  • All About the Kids
  • art journal
  • Blogging
  • Christmas
  • Craft Projects
  • Dancing Zebras
  • DIY
  • Eddy's postcards
  • Embroidery Journal
  • Family
  • Featured
  • Fireside Chat
  • Foster Care
  • Giveaways
  • Guest Posts
  • Home
  • Homeschooling
  • Kid Activities
  • Kid Craft
  • My Heart
  • Our Outings
  • Project Spotlight
  • Send Out Love
  • Shop
  • Sponsored Posts
  • Spoonful Lab
  • Spoonful Tribe
  • Tips + Tricks
  • Traveling
  • Uncategorized
  • Vlog

Favorite Categories

Subscribe for Weekly Updates!

Favorite Categories

© 2023 Spoonful of Imagination, Inc.