 Do you love Christmas crafts as much as I do!? It seems that no matter how many I make, the following year I want to make more! Creating holiday crafts is one of my favorite holiday traditions and stringing together a fun garland is a fun way to add to the seasonal decor. In years past, I have made other festive garlands. I think this year’s is my all time favorite.
You know it is no secret that I love wood projects, and I am cheap. Last week, I showed you a scrap wood project as a gift topper. This week we are using scrap pieces of wood to make a festive garland. I save all my scrap little pieces from signs and projects for my kids to build and play around with. One day, I saw that the bucket was getting full and inspiration struck.
 How pretty are those colors all mixed up together!? I decided to drill a small hole in the center of each piece. This would allow me to later thread wire through to create a garland.


 Once I had a big pile of scrapwood drilled and ready to go, I attached one to the end of a strong wire to tie off the end of my garland. I then asked for little hands to thread the pieces on. My Jeremiah helped me. I wanted the pieces to be random without any order of size or color. Having a child help with this creative step is fun.


 We quickly realized that having all the pieces stacked neatly on top of one another was using up a lot of wood and our garland was getting heavy QUICKLY! We stopped. We took everything off and threaded our wire through a needle and then strung 1″ felt balls after every few pieces of wood. This really helped the wood pieces separate, give another texture, and help lighten the weight of the garland.
 I LOVE how it came out. I immediately started sending pictures to friends who I know also have lots of scrap wood. It’s just too fun not to share.

 A couple tips if you do this project,
- Use strong wire. Your garland does get heavy.
- Don’t hang your garland somewhere where it will get messed with a lot. There are rough edges to the unsanded pieces. Again, it can get heavy. Less moving and messing with it will help keep the garland from breaking.

 We didn’t even have our tree decorated yet, and I was hanging my garland up and snapping pictures. Making something you are proud of is a crafter’s highlight. What do you think!? What colors would you hope your garland would be? We are decorating our house with more bright colors this year than in years past.
If you do this project, we would love to see it! Share it on social media using #spoonfulproject so we can all enjoy your creation.

 In this day and age of online shopping and gift cards, it can be a struggle to make gift giving feel personal. Don’t get me wrong, I certainly send my share of gift cards and I love when I receive them… but this year I am determined to add a personal touch that helps add to my gifts – DIY Gift Toppers.
 Once I had my pieces, I did a quick sanding to smooth down the corners and edges. I pulled out a variety of spray paints. I then gave my wood pieces one coat for a background color. You could go with acrylic paint, but it will probably take a couple of coats.
 Once you’ve completed painting, the next step is to drill a small hole for the Gift Topper to be tied onto your gift or to add it’s hanging strap like I did on mine below.
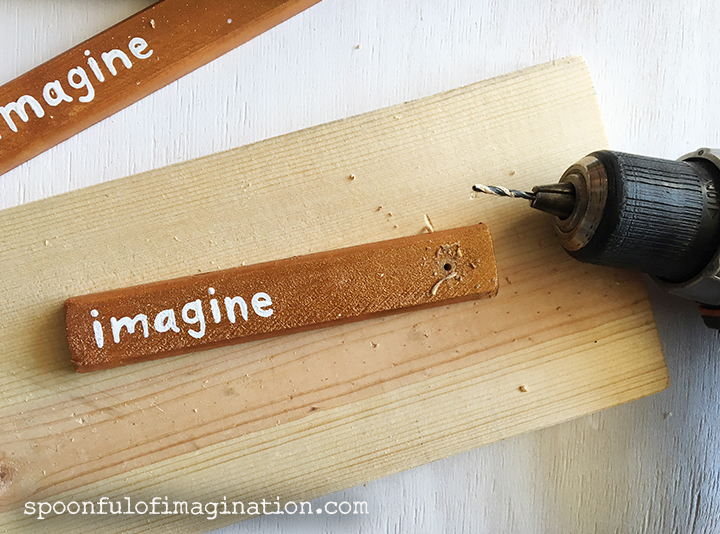 I cut elastic strands in 8-10 inch pieces and then tied them to my Gift Toppers. Originally, I was just going to tie the Gift Toppers to the gift as is. But then it clicked, by adding this little extra step, the Gift Topper becomes part of the gift. It can be later hung as an ornament or decoration around the house.
 If you want one more touch, you can also go back to your finished wood pieces and do a little more sanding or possibly even staining to give them that worn rustic charm.
 I just love these little things, and I’m so excited to put them under the tree. I hope you do too! Please make some and add your own variations and embellishments. Just make sure to share it on social media using #spoonfulproject so we can all enjoy your creation.


