 With Valentine’s Day just around the corner, it’s time to spread some love and celebrate the special people in our lives! Whether it’s your significant other, family members, or cherished friends, there’s no better way to show you care than with heartfelt finds.

Creating Heartfelt Creations
I’ve made some new creations around my favorite shape for the shop-hearts! Each heart-themed item I hope warms the hearts of loved ones.
I love how the heart design/shape is a quick way to represent love, kindness, and joy. For this Valentine’s Day, I hope you are inspired to celebrate love in your own unique way. Whether it’s a special gift you’ve found or a heartfelt DIY creation, every gesture counts to show love to those you care about.

3 Ways to Show Love Within a Family
As we are in our busy basketball season as a family, it feels like we are all going in different directions and just scrambling to keep up with schedules daily. Even in this season, I want to be intentional with showing my family they are important to me. Often it is little gift pick ups or adding their favorite snack to my groceries. It is also just going back to the basics, so let’s take these ideas listed below, as going back to the basics for both you and I.
- Express Gratitude: Say “thank you” and show appreciation for even the smallest acts of kindness or assistance. When I only have to ask one time for the trash to be taken out, that means a lot. In the same way, when we get the text that a kiddo is ready to be picked up from a team dinner, and my 16 year old jumps up to be the chauffeur without being asked…I am super thankful, so I say it.
- Help Out: Pitch in with household chores or tasks without being asked, showing that you’re willing to lend a hand and make life easier for everyone. All my kids/husband are way able to pack their own school/work lunches, but I still do it. I know it means something to them, and I have the time. I just have written into our family values that is my love letter to them everyday. They know it. I don’t write cute lunch box notes anymore, but the lunch itself is their note.
- Share Laughter: Find moments to laugh together, sharing jokes, funny stories, or just enjoying each other’s company. Lazy weekend days are my favorites. I look forward to them. Matt and I are drinking coffee in what we call our “snow room” and one by one a kiddo wakes, slips in, and we just are hanging out as we start our day.
There’s no better feeling than spreading love and making someone smile. I hope you too are able to be find windows to be intentional with those you love this Valentine season. If you need a card or small gift to help you, I have some good ones listed online.
In it with you,
Erica

 Valentine’s Day is right around the corner. What a great opportunity to either make a little handmade gift (or purchase a little handmade gift) to show someone you love that you care! In this post, I am going to show you how I made some wood slice valentine art, and you can do the same!

 I love buying samples of my paint colors before I paint a new wall in our house.
 The wood slices were still a little textured so I had to be careful to get my smooth lines. I used a small brush and some craft acrylic paint.
 Painting the hearts was my favorite step, but waiting for them to dry was my least favorite step. I was so excited to stylize them up and get some product shots.


 There are so many fun color options you could do with this same idea and simple steps. I think a neon version would be so fun too!
 If you need some encouragement in your journey today, I am here to say…you have a strong heart.
 It’s the week of hearts.
 I started with a bunch of cardboard boxes. I cut off the box flaps and use those pieces to then cut into heart shapes.
 After I painted my hearts and they were completely dry, I used Elmers glue to attach them to one another. I used blue Elmers Glue, only because it was the first glue I found. Any school glue or hot glue would work!
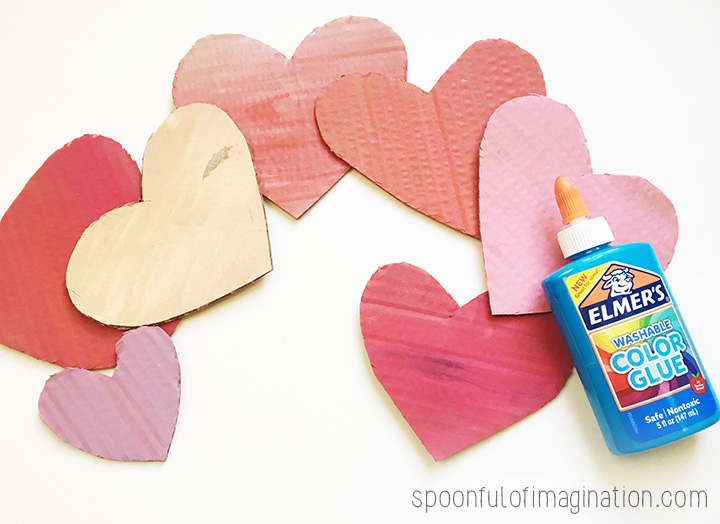

 You can probably tell by the pictures I created a base with the bigger hearts and then the smaller ones on top. It helps create a thicker, 3d shape and gives it some depth.
 After I made my wreath, I thought this could be such a fun quick class party craft.
 Are you making Valentines with your kids for a class party this week?
 My daughter is really creative. I gave her some paper, heart stickers, pipe cleaners and a hot glue gun and she ran with the supplies and made these all on her own. I stood back and watched her dream up fun valentines for each of her friends.
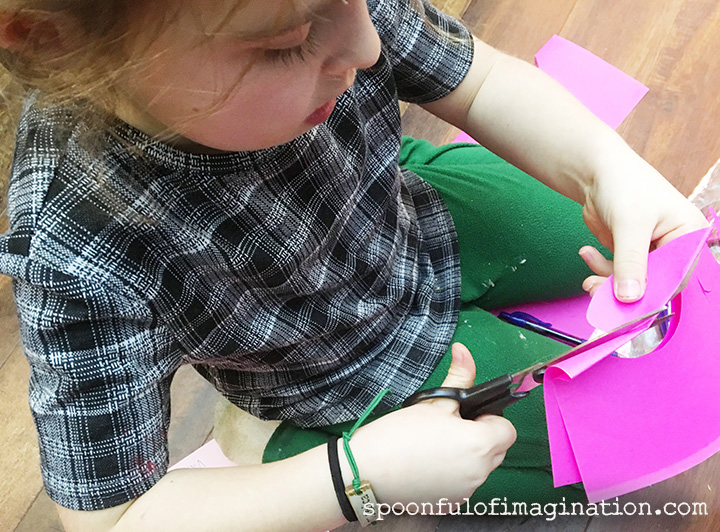


 I don’t know about you, but I don’t buy fruit roll-ups a lot. There’s something about that red, waxy substance that just doesn’t seem like food. Now, this was a fun opportunity to buy something my girl views as a “treat” yet it’s not candy. She’s going to be eating a ton of candy at her class party anyway…why not let her have/give something she enjoys as a special treat, but that’s a little bit different for some extra fun!?
 I love that she glued her valentines to her fruit roll-ups to look like the guy was holding the fruit roll up or standing on it. Seriously. She is so creative!
 She worked really hard on these little characters and is so excited to give them to her friends this week! If you have some paper on hand, this could be an easy valentine to whip up with your kids this week.Part of the fun of creating with your kids is just the opportunity to sit and talk with one another. Enjoy!