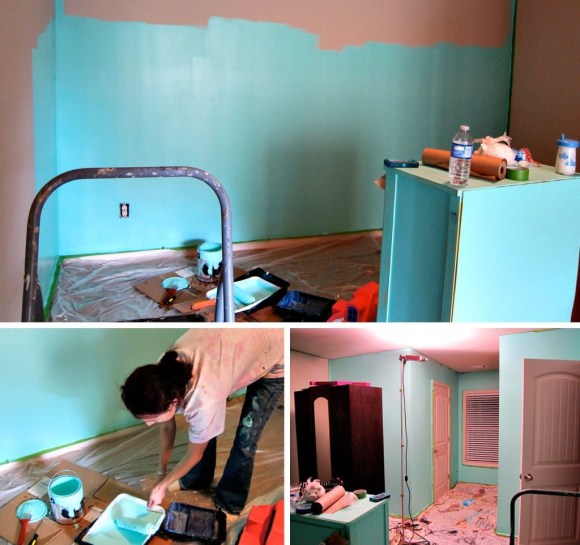
It’s hard to believe I was moving into this house a week ago. It’s been a wild week. In true Erica fashion, I postponed unpacking any boxes to re-paint and decorate my sweet little girl’s room. I’m serious. Trucks unloaded on Monday night, and I was painting on Tuesday. I’m kinda crazy like that. Here’s a quick time lapse video Matt put together of our move-in and part of my paint project. Below the video I walk you through the step by step on how to do your own DIY wall stripes.
I was pretty intimidated with these stripes. For starters, this room is brand new. New carpet, new walls, new paint… and here’s me, the messiest painter in the world, diving in with a large project on day one. But hey, if you are going to make a house a home, you’ve got to make it your own. So why not???

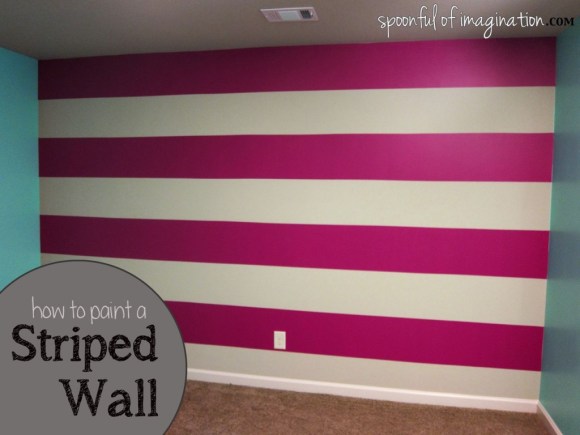
DIY Wall Stripes
Step one: Decide on your stripes. Do you want them to be vertical or horizontal? How wide do you want them to be? I wanted horizontal and I went with 12″ inch stripes. Part of this was determined by our wall. From floor to ceiling it is 8′ feet. Going with 12″ inch stripes would give me eight stripes, four with the color I picked and four of the base coat that was already on the wall. One thing that was messing me up with the measurement was the floorboard trim. Matt convinced me to just count that into my measurement and treat that as part of the first stripe. The reality is the furniture blocks most of the baseboard anyway and this allows the higher up stripes to be even and stand out.
Step two: Measuring. Using a tape measure I ran the tape from floor to ceiling (this is a lot easier with two people) and lightly marked with pencil every 12″ inches. I started these markings close to one end of the wall by the corner. Then using a long level we made markings every two feet or so off the original markings. Make sure to take extra time on those initial measurements as they are so crucial. From there you can trust your level to keep you honest as you work your way across the wall. (If you are going with vertical stripes just take the same concepts and flip them vertical.)

Step three: Tape off your stripes. Following your hash marks you carefully line up the tape down the wall. This may seem obvious, but be sure to keep your tape on the inside of your non-paint stripes. The point there is to make sure that you have left 12″ inches open on the stripes you are going to paint. I then used the tape to add some “x” marks on the stripes I wasn’t going to paint. For real, I’m a messy painter and I don’t trust myself. Matt did have fun adding a ton of those marks to “make the video look cool.” I think I would have been ok with one “x” per line. 🙂 Finally, do whatever taping you need to do to tape off other walls, ceilings, baseboards, etc.

Step four: Paint! You should now be ready to open up the paint cans and start the fun part – adding color! Paint the coats necessary for your project and follow your paint’s instructions on dry times and re-coating. I’ve been using Disney’s new paint line that I absolutely love. Because I used “Fashionista” which is a bold color, it needed two coats. Several other applications I’ve painted (using their paint) has only needed one coat. I’ll tell you more about that soon. I waited the recommended four hours and then added my second coat.

Step five: Peel tape and admire. This is truly the best part of this kind of project, but it makes me so nervous. I’m always worried (when I peel the tape) I’m going to find some kind of disaster that I have to fix. The only time I’ve ever had a real problem here is on a longer term project where I had left the tape on for over a week. Since then I’ve always been sure to peel the tape quickly. The paint is usually dry to touch in 20-30 minutes and that is when I like to peel the tape.
Tips: When it comes to the measuring, not all walls are going to be exactly 8′ feet. Many houses are often not square and there can be dips and curves that mess up your measurements and perfect lines. Don’t worry about this! Do the best you can to compensate in your measurements but just realize that if your lines are 1/8-1/4 inch off it’s going to be difficult to pick that up when you step back and look at the wall. Once furniture and wall hangings are added into the mix most of the imperfections will never be seen again.
Also, my wall already had a base coat that I was happy to integrate into my stripes. If that’s not the case for you, I would recommend painting the whole wall with your lighter color to create your own base coat. Once it has fully dried you can then follow the steps above to add your stripes with your second color. This will keep you from having to measure out and tape twice.
Do you have any other tips to add to painting your own stripes?

So, was I crazy to start such a massive project the first day I woke up in my new house? Probably. But it was worth it to see the look on this little girl’s face. Coming later this week will be a full room reveal with more pictures and details. Until then, have a great week!


