 Do you love recycling trash into treasures as much as we do!?
Art doesn’t have to be expensive. Using things you might normally throw away as art supplies is one way to create in an inexpensive way! Soup cans are one of our favorite recycling materials to repurpose into a fun craft. It is sturdy and strong and be a great base for something else.
Today, we are excited to show you how you can turn those cans into marbleized storage canisters.
![]() The first step is to collect your soup cans. We have gotten in the habit of just saving all our soup cans, so when a project idea arises, we are ready with cans on hand. I take the paper wrapper off our soup cans and run them through the dishwasher with our dishes to get clean. Once you have your dry cans, you are ready to create! We spray painted our cans white to have a nice matte base coat for this project.
The first step is to collect your soup cans. We have gotten in the habit of just saving all our soup cans, so when a project idea arises, we are ready with cans on hand. I take the paper wrapper off our soup cans and run them through the dishwasher with our dishes to get clean. Once you have your dry cans, you are ready to create! We spray painted our cans white to have a nice matte base coat for this project. 
 While the tin cans were drying, we collected our spray paint cans and filled a bucket with water. For each can, we choose two different spray paint colors. We added one color at a time.
All you have to do is spray the water with your spray paint color. The spray paint sits on top of the water. You then lay the can on top of the water and the paint will adhere to the can like a sticker might grab onto your hand. After one color was added, we simply looked at the can, maybe rotated it a little to figure out what side needed some more color, and did this step again with the second color of paint.


![]() The can comes out of the water looked marbleized and super fun! After you get the hang of it, you can play with how much spray paint you spray on top of the water to create a more thick or less thick look on your can. We had so much fun doing all four of our cans that we prepped!
The can comes out of the water looked marbleized and super fun! After you get the hang of it, you can play with how much spray paint you spray on top of the water to create a more thick or less thick look on your can. We had so much fun doing all four of our cans that we prepped!

 After the cans were dry, we used ours to hold art supplies. You could do the same or turn it into something else! A wind chime, flower pot, vase, or candle holder are fun ways to use your new canister too.
  You can personalize this craft using colors that fit your taste or the size can that fits your need best.
Sometimes it is easier to understand the steps to a project to see it actually happen. To see this craft in video form, you can watch the process on our YouTube channel here.
We love how quick, colorful, process art base, and inexpensive this paint technique can be! We had so much fun doing it to the tin cans that we bought some inexpensive raw wood candle sicks to paint this way too!
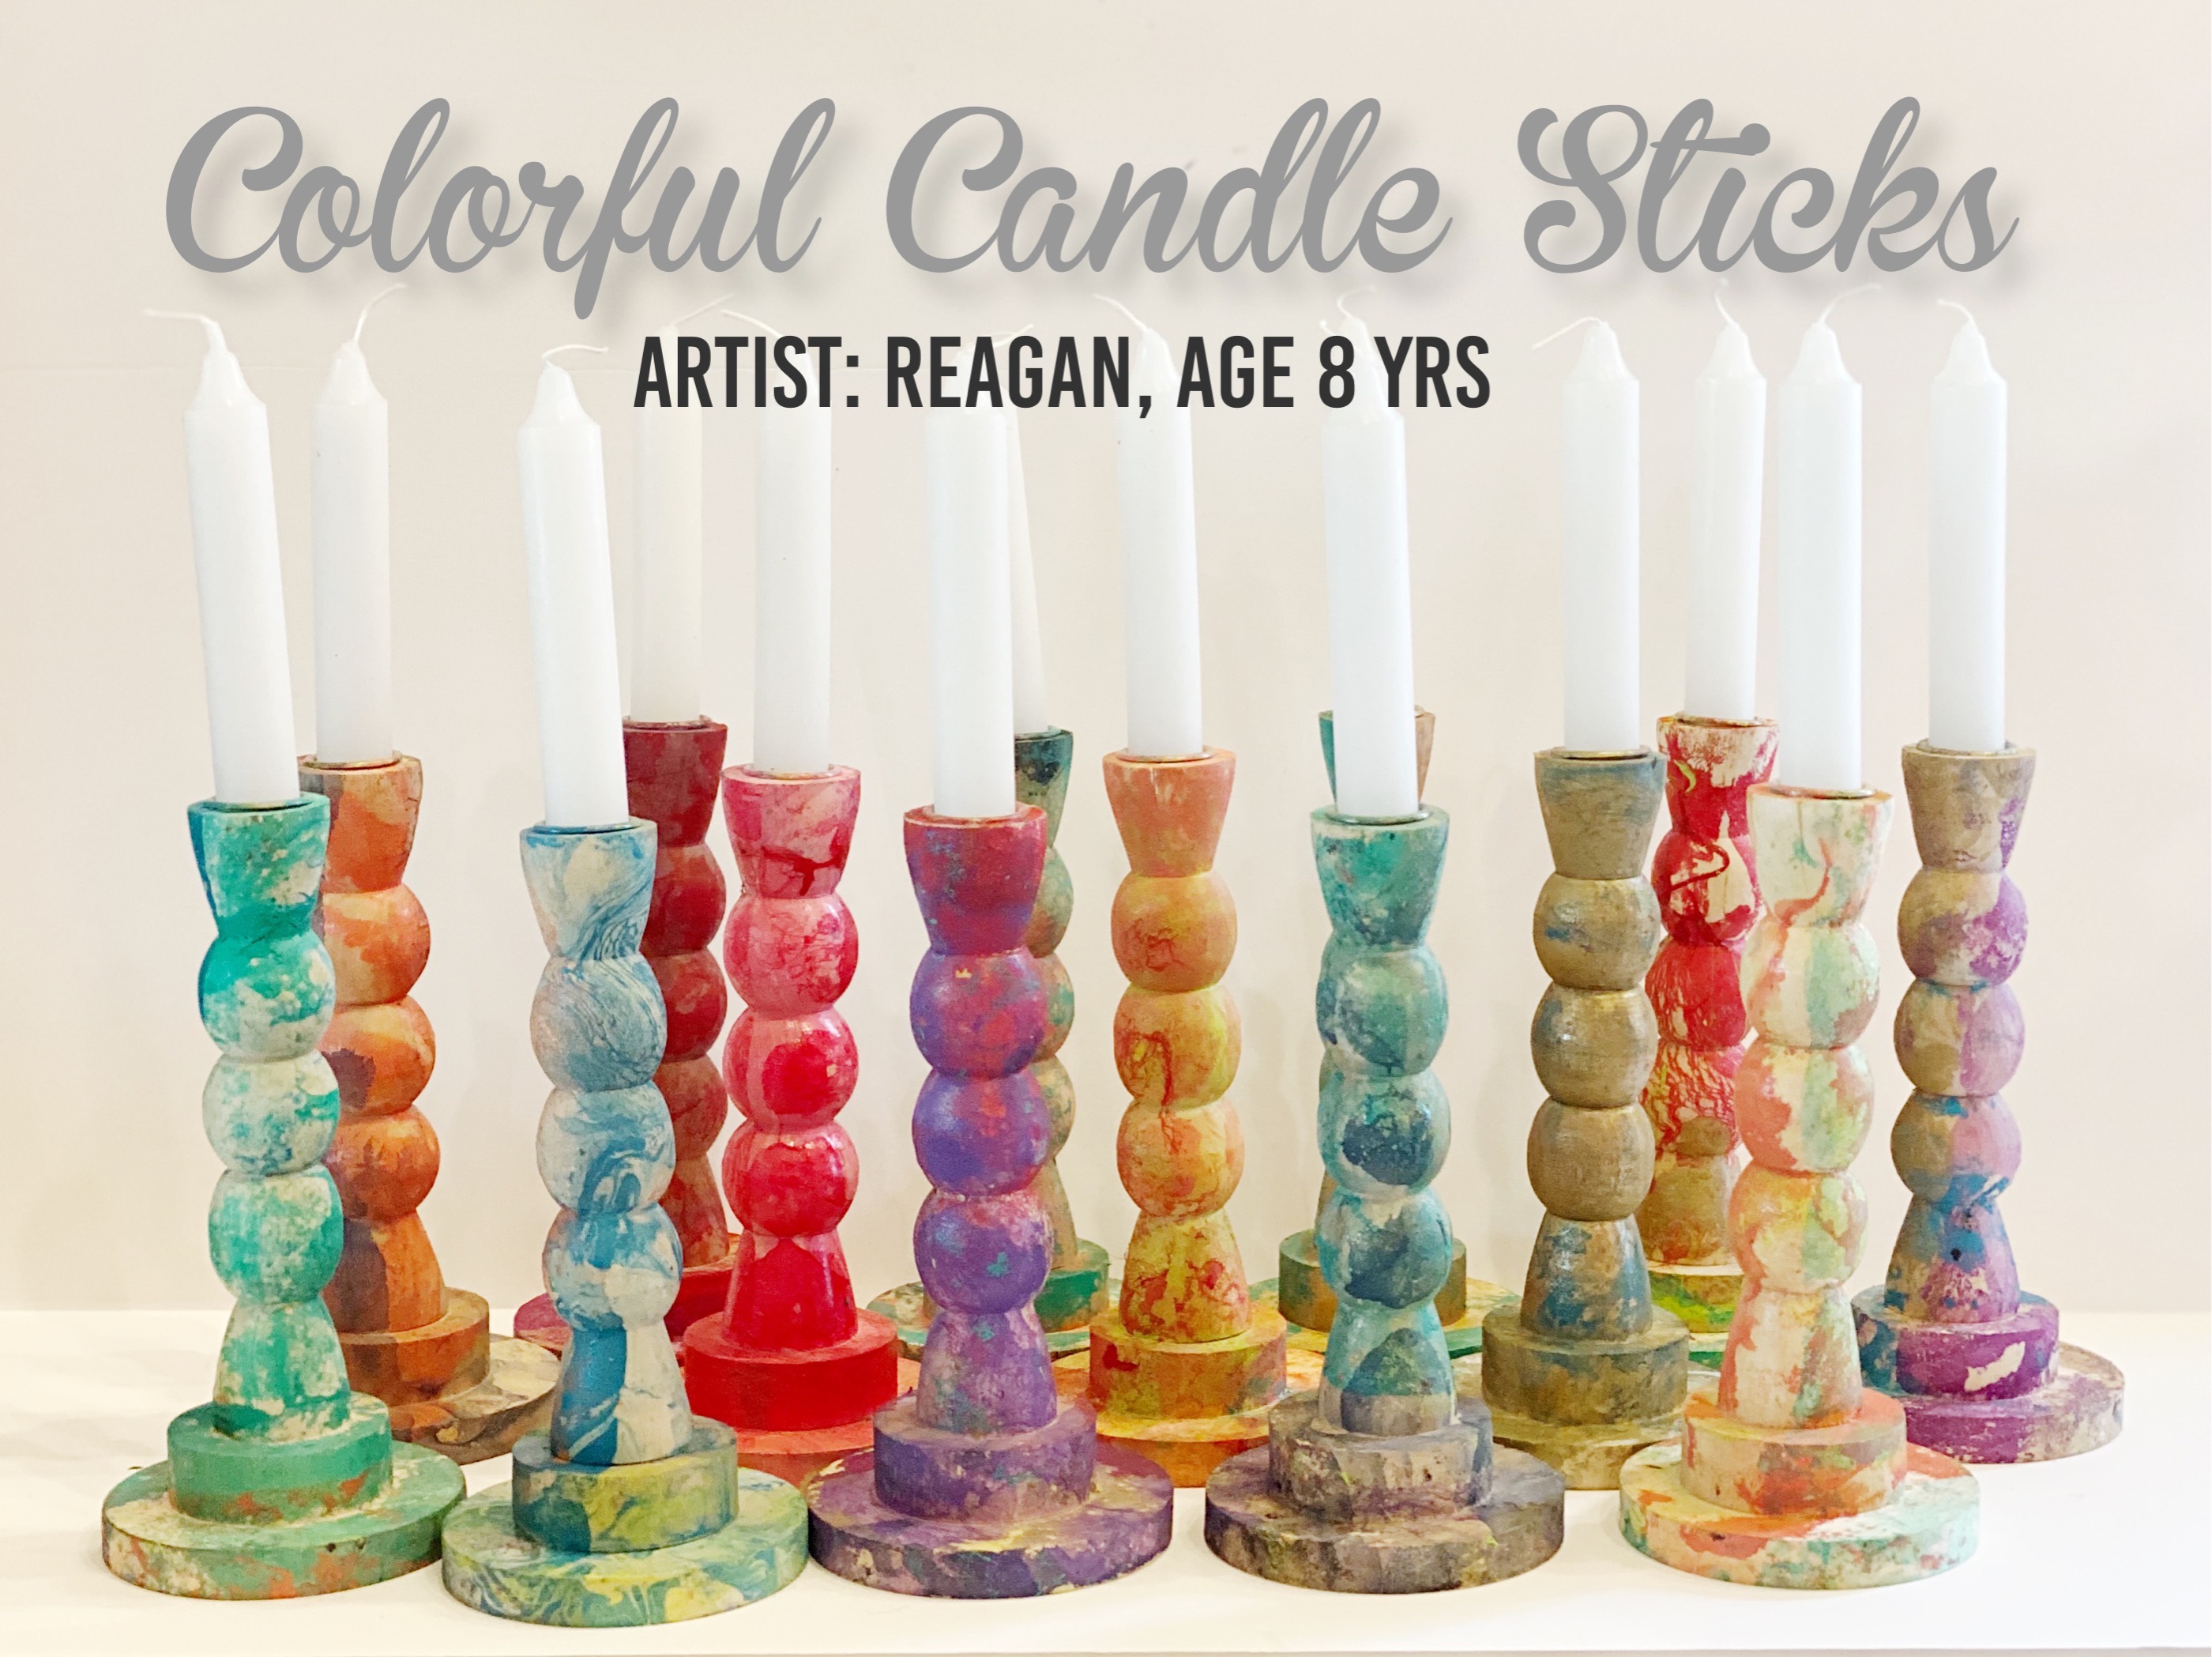 How fun are those!? We think they look like they belong on shelves in World Market or Anthropologie. We found some white candle sticks that make the colors pop even more, and we are going to use them as Christmas presents for family this year!
What do you think!? Will you try this paint technique? Do you like making Christmas gifts too!? We’d love to hear from you! Find us on social media by tagging us with your pictures #spoonfulofimagination
Thanks so much for stopping by!


 So many cute things come with babies.
 I then iron all around my 1/3 of a yard fabric. I fold about 1/4″ to 1/2″ seem down and iron it to hold it in place. I then fold the fabric over in half and pin all the way around it.
 I simply sew around the edge of the now rectangle shape two times. There are foots that you can put on most sewing machine that will sew two lines at once. I just sew around two times. You can also personalize your burp cloth by adding a shape or an initial to sew on as well.
 After you sew everything in place and remove the pins, it is done! I think this project is so simple, yet a fun way to give a personalized gift. There are so many different flannel patterns available to give this simple project different looks. You can get fun colorful patterns or basic geometric modern styles. Whatever your taste or the theme of a baby shower may be! Of course, I am always drawn to the bright colorful fabrics! 🙂
 I think this burp cloth is the perfect burp cloth. The fabric is so soft. It is very absorbent. Here is the best part! The bright colors and patterns hide stains! So often the popular white cloth diaper type burp cloths get stained and gross. These flannel burp cloths hide all that and are more forgiving.
 I love to add a few personalized homemade items to my baby shower gifts. I usually get something off the registry and then make a few things to go with it. Some of my favorite items to make are
  What about you!? Do you love to make items for your baby shower gifts as well?
 Personalized gifts are some of my favorite to give and receive. For weeks I have been wanting to show you this Batman game that Matt and I made for our Jeremiah’s birthday. It was a team effort, and our J loved it!
 At this point I jokingly asked Matt if he would like to paint Gotham City for me as I had a birthday to do list a mile long that I still needed to do. To my delight he said YES! He far surpassed my idea. He not only painted Gotham City, he painted fun elements along the board and gave a “purpose” to the game in getting Batman from his Batcave to Gotham City.
 He would Googled pictures on his phone as he replicated his own. He did a great job painting the elements, but you could also print them out and use glue and mod podge to attach them to your game board.
 Once he was done painting the game board, I used my Rustoleum clear shiny spray on the entire board to act as a protectant. Matt came up with the cards on his own. They are fun and funny. I love to play this game!
 J had a wonderful birthday. I think this game (and playing it back to back to back) with him made him feel loved and put a huge smile on his face!
 He still enjoys playing it all these weeks later! Have you ever made a game board before? I actually hung a little hook on the back of this game board and keep meaning to find a place to hang it up as “art” when it’s not in use.
 For more Batman party inspiration, you can see the invites and Batman garland I made