 Do you love Christmas crafts as much as I do!? It seems that no matter how many I make, the following year I want to make more! Creating holiday crafts is one of my favorite holiday traditions and stringing together a fun garland is a fun way to add to the seasonal decor. In years past, I have made other festive garlands. I think this year’s is my all time favorite.
You know it is no secret that I love wood projects, and I am cheap. Last week, I showed you a scrap wood project as a gift topper. This week we are using scrap pieces of wood to make a festive garland. I save all my scrap little pieces from signs and projects for my kids to build and play around with. One day, I saw that the bucket was getting full and inspiration struck.
 How pretty are those colors all mixed up together!? I decided to drill a small hole in the center of each piece. This would allow me to later thread wire through to create a garland.


 Once I had a big pile of scrapwood drilled and ready to go, I attached one to the end of a strong wire to tie off the end of my garland. I then asked for little hands to thread the pieces on. My Jeremiah helped me. I wanted the pieces to be random without any order of size or color. Having a child help with this creative step is fun.


 We quickly realized that having all the pieces stacked neatly on top of one another was using up a lot of wood and our garland was getting heavy QUICKLY! We stopped. We took everything off and threaded our wire through a needle and then strung 1″ felt balls after every few pieces of wood. This really helped the wood pieces separate, give another texture, and help lighten the weight of the garland.
 I LOVE how it came out. I immediately started sending pictures to friends who I know also have lots of scrap wood. It’s just too fun not to share.

 A couple tips if you do this project,
- Use strong wire. Your garland does get heavy.
- Don’t hang your garland somewhere where it will get messed with a lot. There are rough edges to the unsanded pieces. Again, it can get heavy. Less moving and messing with it will help keep the garland from breaking.

 We didn’t even have our tree decorated yet, and I was hanging my garland up and snapping pictures. Making something you are proud of is a crafter’s highlight. What do you think!? What colors would you hope your garland would be? We are decorating our house with more bright colors this year than in years past.
If you do this project, we would love to see it! Share it on social media using #spoonfulproject so we can all enjoy your creation.

 There are so many projects that I have wanted to share, but moving has kicked my butt. So many projects but so little time! Slowly but surely this house is becoming home, and I am excited to start showing you all we have been working on.
 I started by threading my needle and feeding the styrofoam balls on to the string. I used a couple of difference sizes, and I like the variety that element adds to the finished look.
 Once I had a number of styrofoam balls threaded onto my string, I was ready to start hot gluing the fabric on. I cut the fabric into about one inch wide strips and placed a dab of hot glue onto the ball and pressed one end of the fabric into it. I simply then wrapped the ball in the fabric strip, added another dab of glue and placed the opposite end of the fabric strip into it. It was that easy! Two things to keep in mind.
 If you keep those two things in mind, then you just keep repeating that step until every ball is completed. I hung this garland up at Christmas with a string of lights. At first we had our stockings tied up on it and then our Christmas cards clipped to it. I wish I could find those pictures, but I think they got deleted while trying to find more space on my phone.

 I hope you are having a good week! Thank you so much for reading my blog. I am continually thankful for you all to help me have this special outlet in my life.
 Do you miss your Christmas lights?
 The next step is to fold one of the pieces of fabric in half and place it behind the strand of lights. Then loop the ends of the fabric around the strand of lights and pull through that top fold in your fabric. The strand of fabric will have tied itself onto the light strand.
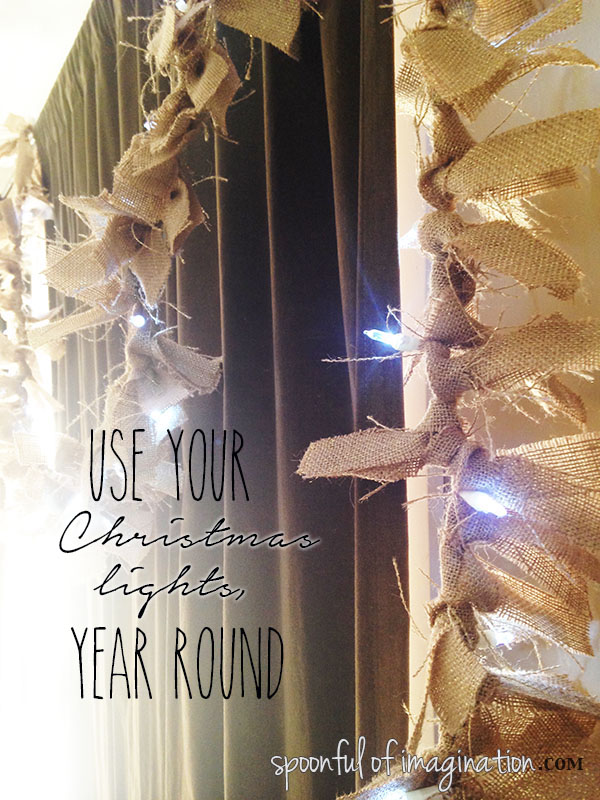
 That is the primary step! From there it is just repeating of cutting strips and tying them on. I like to create a really full garland, so I place three to four strands of fabric between each light. I think by doing this the electrical wire is really covered well.
 This one I am showing you, I mixed burlap with a creme fabric. I made it for a friend at Christmas. I have not found a good place for my lit garland yet, but you may remember seeing it in last year’s Valentine’s Day mantel. Once Christmas was over, I literally switched out Christmas elements and replaced it with winter ones and then just added Valentine’s Day decor like the
  Another inexpensive way to make this lit garland would be to use an old sheet and rip strips of fabric. I made one with this idea to list for sale in my shop. I added a little string to it for another texture. You could add ribbons, strings, beads, feathers, etc., to yours!
 I love how the fabric and little lights add a lot of fun to a space. Home decor doesn’t have to be expensive. I tried this garland in my kitchen and was tempted to keep it. The added texture creates some warmth that I just love.
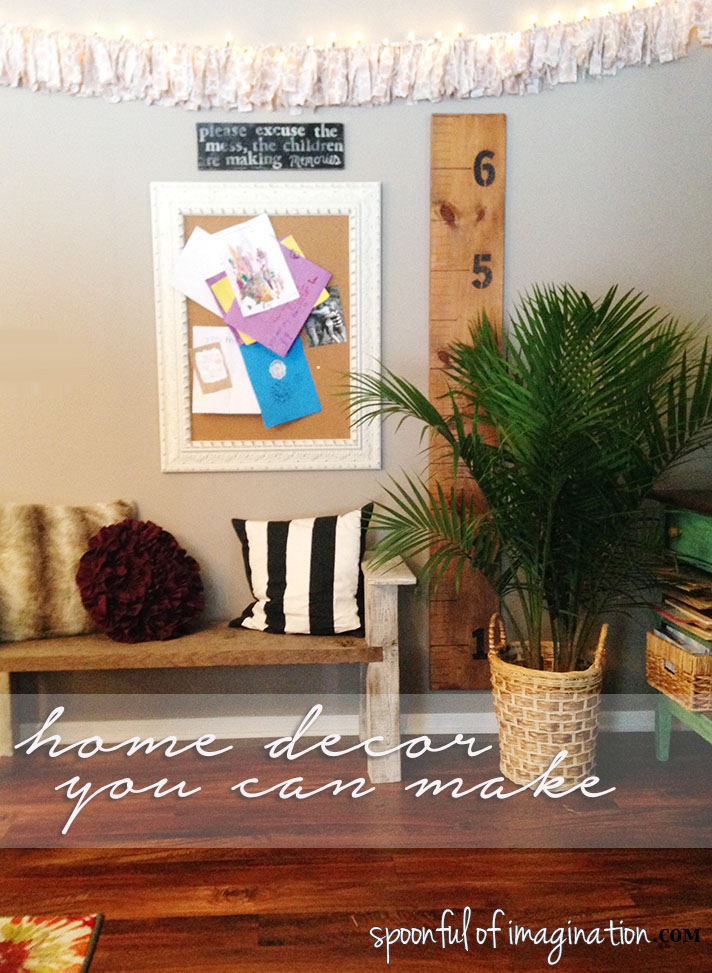
 I think it even looks pretty when it’s not lit! Wouldn’t this be so cute in a little girl’s room?
 What about you!? Do you have a thing for these fun little lights too? How do you create soft light in your home? I’d love to hear! Find me on Instagram (ericadeuel) and chat with me!


 I put my tractor stack aside and cut out some simple triangles and the letters of his name to add a special personalization to his garland. I loved mixing the bronze sparkle with the felt to add another texture and a bit of snaze :). The bronze also reminded me of dirt, which goes well with a tractor. This sweet four-year old boy probably won’t get the meaning of those details, but it was fun to create and think through this design.
 I sewed the letters to my triangles and as much of the tractor pieces together as I could. Once I had the tractors and name pieces ready, I sewed them all together to create a long attached garland and used hot glue to add some final touches to my tractor.


 I love how it turned out. For this garland, I sewed the tractors facing all the same direction. I think it would also be cute to space them out differently and have some tractors going the opposite direction.


