Spoonful of Imagination

Add it to a Family for Something Beautiful

  • Home
  • Our Family
    • Our Home
  • Courses
  • Shop
  • Contact

DIY Felt Flowers

September 29, 2013 By Erica Deuel 4 Comments

DIY_felt_flower_tutorial

There have been cooler temps here. We are wearing jeans and enjoying the new colors on the trees. I love fall. It is my favorite season of all.

Fall always makes me break out my felt crafts. Ever since I was pregnant with Reagan and started making her hair bows, I have loved playing with felt.

I have started creating a little decor for my first SpoonfulLab, and felt flowers are one thing that I have been creating. If you love felt and would like to make some bouquets that wont ever die, follow along with this post to learn how to make one beautiful felt flower.

how_to_make_a_felt_flowerThe first step is to gather some supplies:

    • Felt
    • Hot glue gun with extra glue sticks
    • Scissors
    • Floral Wire and Tape

felt_flower_materialsIn order to make this flower, I cut two different strips of felt to begin. One strip was about 1″ tall and the other was about 2″ tall (the width was the length of the 12″ felt square that I bought).

cutting_felt_flowersThen I just started cutting circles/ovals out of both strips of felt. I just eye balled them. They are all different and not perfect, but since they are all cut from the same strip they were pretty close in size.

cut_felt_circles

cutting_felt_flower_petals

The exact number of circles used per flower is up to you, for how big you want your flower. From my piles, I had enough circles/petals to create several flowers. The flower I’m going to show you, uses 6 small ovals and 9 large ovals.

To start the flower, pick one small petal and hot glue it around your flower stem. Once it is glued fold it like a taco around the stem, and then glue another one across from it. This creates the center of your flower. Be sure to not have the flower stem glued all the way to the top of the petal, as it would then stick out of the flower.

center_of_a_flowerYou then simply start gluing petals on the seems from the previous layer of petals, as shown below. No need to fold these petals, just apply them as ovals with a little glue and a pinch at the base of the petal.

adding_felt_petals

adding_felt_petalKeep building with the same small size petal until you have a size that is pretty uniform in shape that you like. Once the middle is complete, continue this same process with the larger size oval petals. This will create a bigger flower faster.

felt_flowersYou can add as many flower petals as you like. For my flower, I have about three layers of small petals and two layers of larger size petals. Depending on how you may use this flower, the size can range greatly. Once you have the flower the size you like, you are ready to finish off the stem.

Simply add a little glue at the base of your flower and stick the floral tape onto it. Wrap the tape around the flower, adding glue where you need to in order to prevent the tape from slipping down. Continue around the flower’s stem until you are off the felt flower and a little ways down the stem to blend it smoothly. Add a little more glue on the wire and rip the flower tape off and press it into that glue. As always, be careful with your fingers and that hot glue! If you are new to hot glue, you may want to consider wearing work gloves.

felt_flower_stemYour flower is then complete! I am enjoying making these while watching all my favorite shows. I love that fall also brings back the my favorite TV shows!

felt_flower

These little flowers look great by themselves, or in a jar with a whole bunch of them! you can also alter this idea and put the flowers on wreaths or little hair bows. Do you love felt too? It is such a cheap supply to have on hand and an easy way to add color to craft.

I hope you are having a great weekend! Before your week gets busy and gets away from you, registration is open for a SpoonfulLab in Roswell, GA for October 26. We already have a great group of ladies signed up, if you’d like to join us, click on over to my post to get more details and register!

signature

Share this:

  • Click to email a link to a friend (Opens in new window)
  • Click to share on Facebook (Opens in new window)
  • Click to share on Twitter (Opens in new window)
  • Click to share on Pinterest (Opens in new window)

Fall Mantel {with tips and tricks}

September 11, 2013 By Erica Deuel 3 Comments

fall_mantel_tips_and_tricksI decorated our mantel last weekend for fall! I already loved how it was decorated, so it was a little hard at first to start messing with it at first. Now, I love it again! For someone who doesn’t like change, I can quickly adapt to holiday decor.

I wanted to share a few tips that helped me brainstorm this creation. These are tips and tricks that I used and thought through to help create this look. I hope they can help you too! After the tips, I will break down where I got each item or link to the tutorial.

1. Don’t be afraid to try something new! I had never stuck a huge piece of bark on my mantel to act as a vase.

2. Mix the different textiles. I used rustic natural elements (bark, pine cones, hay, acorns), shine (mirror, pumpkins), pottery (clay vase), burlap (handmade flowers), glass and metal (frame, lantern), wood and words (art in frame). Tip: Since I was decorating for fall, using outdoor elements naturally gave it a fall-ish feel.

3. Try to balance your colors. I was going with a more muted and fall pallet, but I made sure there was one pumpkin on the left and two on the right. That way there was a pop of color at both ends.

4. Try to use height. I like the mirror and the bark vase that added height to my mantel. It grabs your eyes a little and adds dimension rather than everything being the same height as if they were sitting on a boring book shelf. Although the picture frame is not the same height as the bark vase, it was needed to balance out the other side. The vase of burlap flowers alone was too short on that side alone. It looked neglected. Which brings me to my next point.

5. Layer and Layer your items! I have items overlapping each other other (like the hay is even hanging over the edge). My pumpkins are in front of the mirror and the frame is behind the vase. The frame almost looks like an after thought, but it was placed on purpose to add height and an added material that I had not used yet.

fall_mantel

fall_decorI love how it all came together. I especially love that little pine cone bunting hanging down on the front. Our fireplace is so white, so the pine cones and added decor really liven it up. I got so into decorating it, I dressed up the little side table next to it as well. You can see I added a fun little owl, fresh flowers, and my rustic cake stand. There is the mix of layering, using lots of different textiles and materials.

fall_decorated_mantel

fall_decorationsSince I already had almost everything the set-up only cost me $1.35 for the wood frame at a thrift store over the weekend. You probably have similar type things that you can reuse as well. Here’s the list of everything I used, where it came from, and a handful of links to DIY tutorials to a few of my items.

Wood Bark Vase: Gift from my dad that he found in his yard

Fake yellow flowers: Recycled from a center piece from my in-laws

Huge Mirror: Years ago at Walmart

Black Lantern: Ikea

Pottery vase: Gift from my sister-in-law

Burlap Flowers

Painted Pumpkins

My collection of afghans

Gray Pillow

Acorns: Gathered at our old house & saved

Silver Owl & Tall brown vase with elements: Hobby Lobby

Rustic Cake Stand

Tall lamp & Wood frame: Thrift store

Glass frame: Wedding present

Fall Subway Art free printable from the talented Erin at How to Nest For Less

fall_livingroom_decorationsI hope my little fall makeover can help inspire you to decorate and reuse a lot of the items you already have in doing so! A spoonful of imagination can go a long way in decorating! Who would have thought a piece of bark could act as vase!? Think of the possibilities and have fun!

signature

Share this:

  • Click to email a link to a friend (Opens in new window)
  • Click to share on Facebook (Opens in new window)
  • Click to share on Twitter (Opens in new window)
  • Click to share on Pinterest (Opens in new window)

DIY Paper Pumpkins

September 9, 2013 By Erica Deuel 8 Comments

welcome_to_fall

I can’t believe fall is here. Although the “official” first day of fall isn’t till later this month, I am so excited to start decorating for my favorite season. This weekend I pulled out my bucket of fall decor and happily started placing my collection of pumpkins around the house. I love fall.

As I was in the basement getting my bucket of fall stuff, I saw my huge box of left over moving paper. When we moved in, I had a hard time throwing out the paper we used to wrap some of our breakable stuff, so I saved a bunch of it.

uses_for_moving_paper

We have been using it for painting projects. I let the kids paint on it, or I put it under other things we are painting to protect the surface. I decided to try to make a paper pumpkin with some of it.

I started by cutting a bunch of paper pieces the same size. Next, I cut the ends of my paper strips to be rounded. Once I had a stack of rounded edged paper pieces, I folded the paper into one big fan and wrapped it with a thin piece of wire.

making_a_paper_pumpkinSlowly, I started to pull the different pieces of paper out away from one another. This is a step that forces you to be some what patient. The moving paper is so thick that if I pulled to quickly the paper would rip.

making_paper_pumpkinOnce the paper pumpkin is fluffed, I glued the two end pieces (on either side) of the paper fan together to make the pumpkin hold shaped. I didn’t want it to separate back into a fan type shape, but I wanted it to hold the circle/pumpkin shape.

DIY_paper_pumpkin
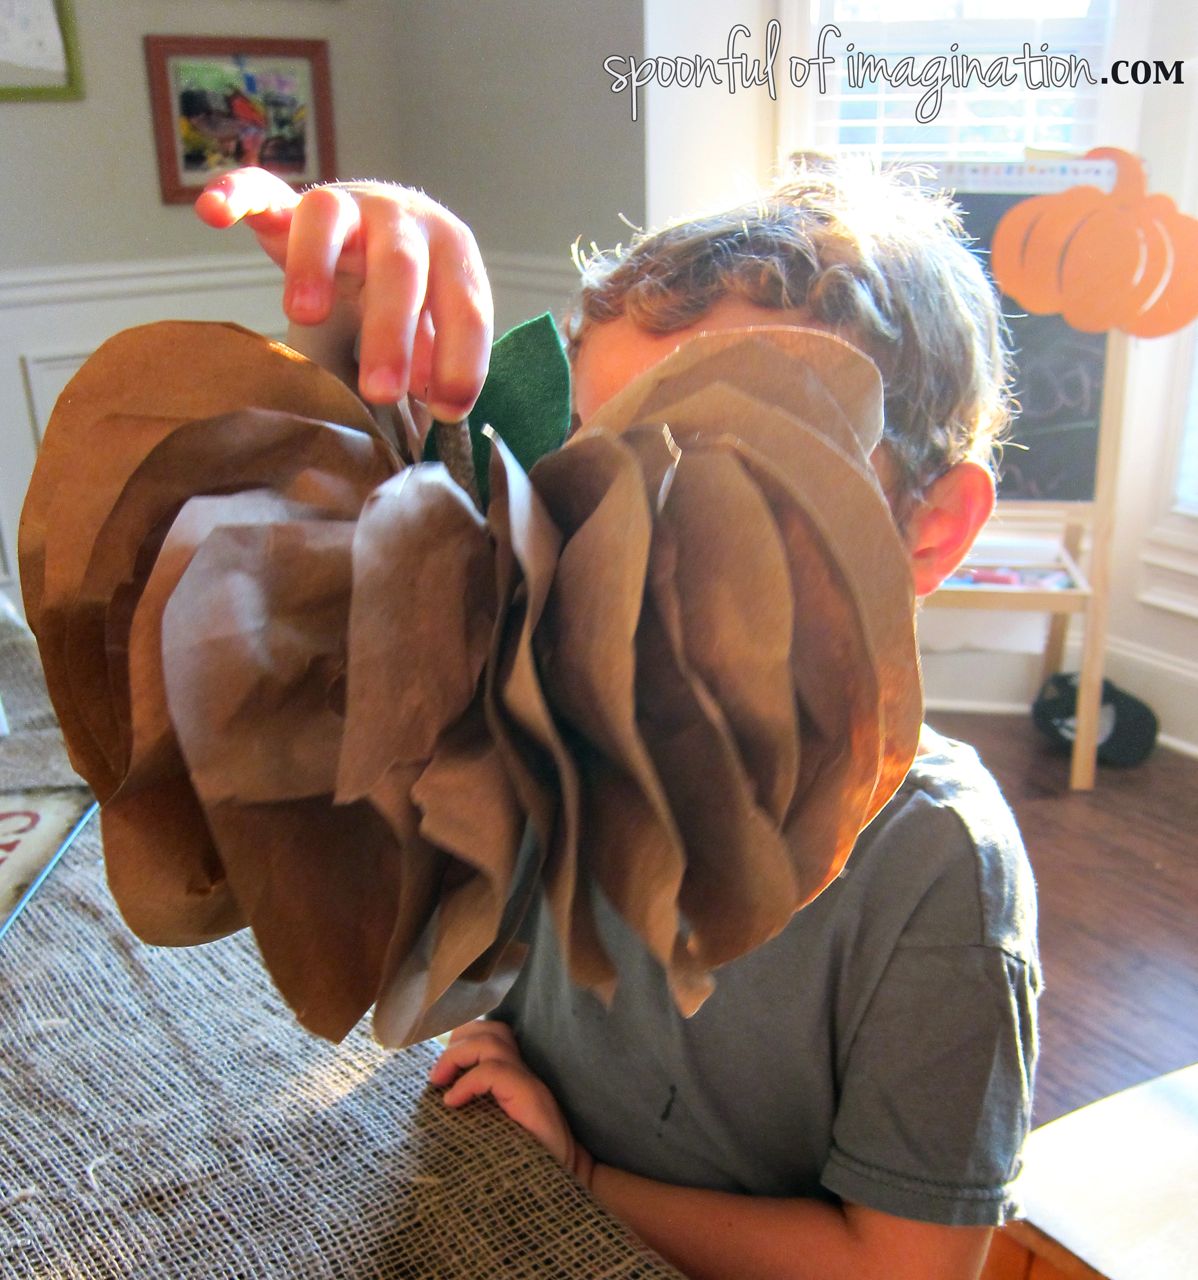
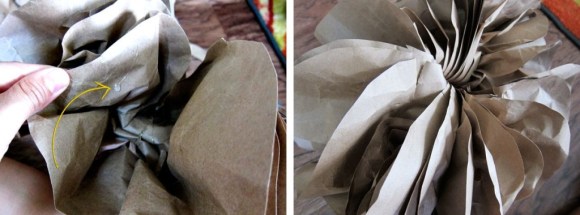
Our kids were really excited about seeing the pumpkins coming out, and they wanted to help in this project. I let them help fluff the pumpkin and to find a good stick or six of them to act as its stem.

Fall_kid_pumpkin_craft

boy_with_sticks
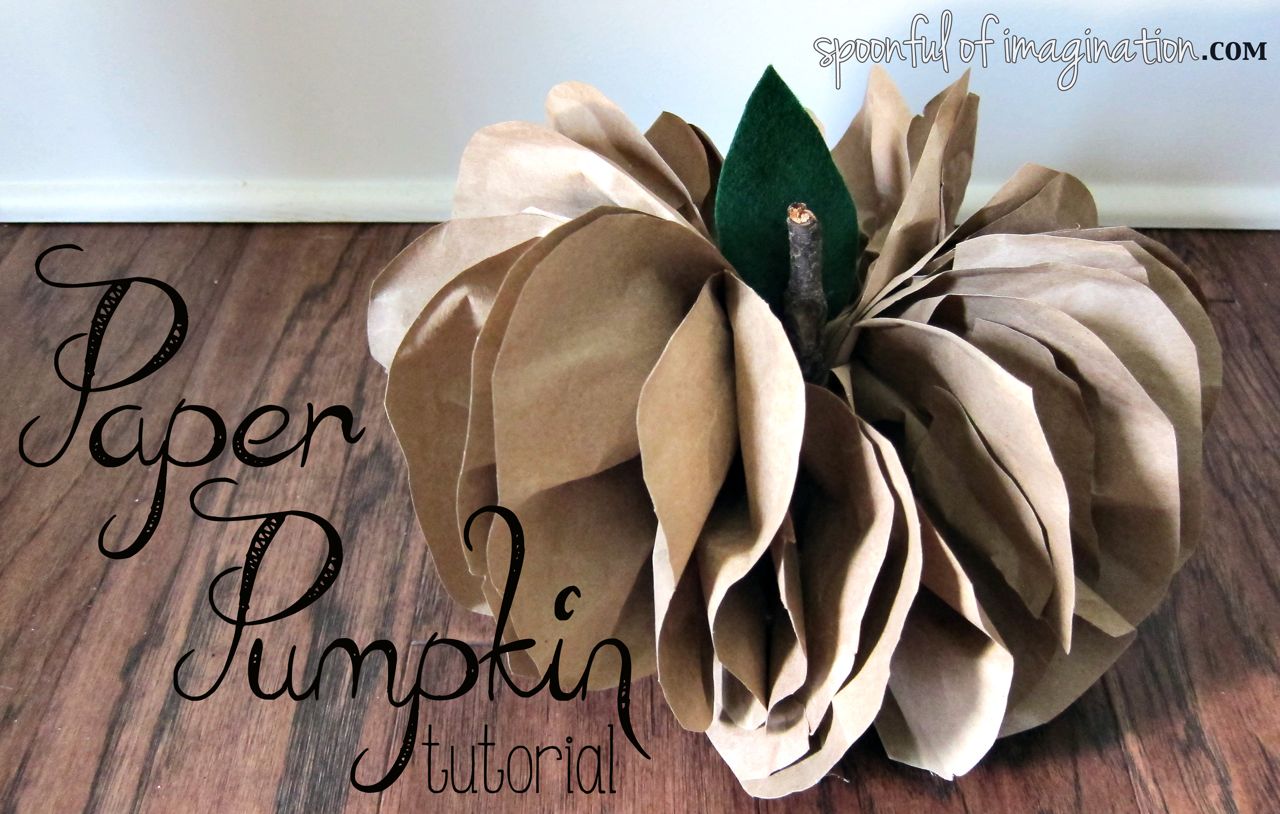
Once I had a good stick for a pumpkin stem, I glued the stick and a small piece of felt (that I cut to look like a leaf) into the center of my pumpkin. My paper pumpkin was than complete!

fall_craft

I’m pretty happy with this rustic paper pumpkin. I love that it was made with recycled materials and that it brings a little rustic charm to our decor.

paper_pumpkin_tutorial

Have you started decorating for fall? I hope you had the chance to incorporate a spoonful of imagination into your weekend!

A special shout out to L. Thompson for winning a set of my Burlap Greeting Cards. I will be in touch!
Thank you so much for stopping in! I hope you have a blessed day!
signature

Share this:

  • Click to email a link to a friend (Opens in new window)
  • Click to share on Facebook (Opens in new window)
  • Click to share on Twitter (Opens in new window)
  • Click to share on Pinterest (Opens in new window)

Give Thanks Blocks

November 9, 2012 By Erica Deuel 6 Comments

I have been so excited about today!  We are getting back to our Project Spotlight with these festive Give Thanks blocks. At the bottom of the post I’ll reveal our $50 Dancing Zebras giveaway grand prize winner!

Last week, we started our thankful tree, and it has been a lot of fun.

Every night at dinner, we go around the table and say one thing we are thankful for.  I write down these things and hang them on our “tree”.  It has been so inspiring to hear what each child is thankful for and to talk about these things together.


Even little Reagan is involved.  I’m sure she has no idea what she is saying, but when we ask her what she is thankful for, she always says something.  One of my favorites was when she screamed “Charleigh” this week.  Charleigh is one of her sweet cousins, who is in town visiting this week!  We are so excited to spend some good time loving on this little girl.

I wanted to make some blocks to put in front of our tree that would help remind us all day, and not just at our dinner table, to give thanks.  Here are the steps with on I came up with our give thanks blocks.

I started by getting a 2 x 3 board from Home Depot and measuring off 2″ slots.  I cut along those measurements and ended up with a bunch of rough blocks.

I sanded the blocks till their edges were smooth, and then I painted them a pretty fall color.

After they were a nice burnt orange, I decided I wanted to have a leaf outline on them as a watermark behind the letters.

I took a plastic leaf (I found a bag of these at the Dollar Tree and we are using them on our thankful tree.) to stencil around to have the outline of a leaf on my blocks. Using the Antique Gold paint, I lightly dabbed the paint brush around the stencil and edges of the block to create a subtle backdrop for the leaf. Once I had done this step, the blocks looked like this…

I made the leaves wrap around the blocks and painted them, rotating at different angles, with parts of the leaves “falling off” the block.  I love how they came out.  Next, I wanted the blocks to say “give thanks”.  I am not the best at hand painting fonts, but I decided to give it a try with this project.

I printed out my ideal font, and eye-balled the letters. To finish them off I lightly sanded around the blocks to give them a more vintage look. Finally I gave the blocks a coat of Mod Podge to seal everything with a slight sheen. They aren’t perfect, but I think they came out cute!

I love how they look in front of our tree.

Feel free to give these a shot for your Fall decor! What’s a special thing you do around your house to celebrate the Thanksgiving season?

Ok, it’s the big moment we’ve all been waiting for! Drum roll, please. The Grand Prize winner of the $50 Dancing Zebra Giveaway randomly chosen by Rafflecopter is, Kali Mallard! Congratulations Kali! I will be in touch with you on the details. In the meantime, you can go to my store and start window shopping for what you might like to have!


a Rafflecopter giveaway

Share this:

  • Click to email a link to a friend (Opens in new window)
  • Click to share on Facebook (Opens in new window)
  • Click to share on Twitter (Opens in new window)
  • Click to share on Pinterest (Opens in new window)
« Previous Page
Next Page »
  • Email
  • Facebook
  • Instagram
  • Pinterest
  • YouTube
YouTube-Channel
Erica Deuel

Subscribe for Weekly Updates!


Most Popular Posts

Painting Flower Pot Party Tips
The Perfect Collaborative Art Party Game

Categories

  • All About the Kids
  • art journal
  • Blogging
  • Christmas
  • Craft Projects
  • Dancing Zebras
  • DIY
  • Eddy's postcards
  • Embroidery Journal
  • Family
  • Featured
  • Fireside Chat
  • Foster Care
  • Giveaways
  • Guest Posts
  • Home
  • Homeschooling
  • Kid Activities
  • Kid Craft
  • My Heart
  • Our Outings
  • Project Spotlight
  • Send Out Love
  • Shop
  • Sponsored Posts
  • Spoonful Lab
  • Spoonful Tribe
  • Tips + Tricks
  • Traveling
  • Uncategorized
  • Vlog

Favorite Categories

Subscribe for Weekly Updates!

Favorite Categories

© 2025 Spoonful of Imagination, Inc.