Spoonful of Imagination

Add it to a Family for Something Beautiful

  • Home
  • Our Family
    • Our Home
  • Courses
  • Shop
  • Contact

Easy Narrow Nightstand (for that small nook)

August 18, 2016 By Erica Deuel 2 Comments

DIY_narrow_nightstandThis room just makes me happy.

There is color EVERYWHERE!

I’ve never been afraid of color, but lately I am having more and more fun going bold and mixing prints and styles to create something of my own. In this room, we have handmade and store-bought. There is new and rustic. There is color and then neutrals (or a color that acts as a neutral), and somehow it all works together to create a beauty that I love.

This room’s finishing touch was actually started years ago. Let me explain.

narrow_nightstand
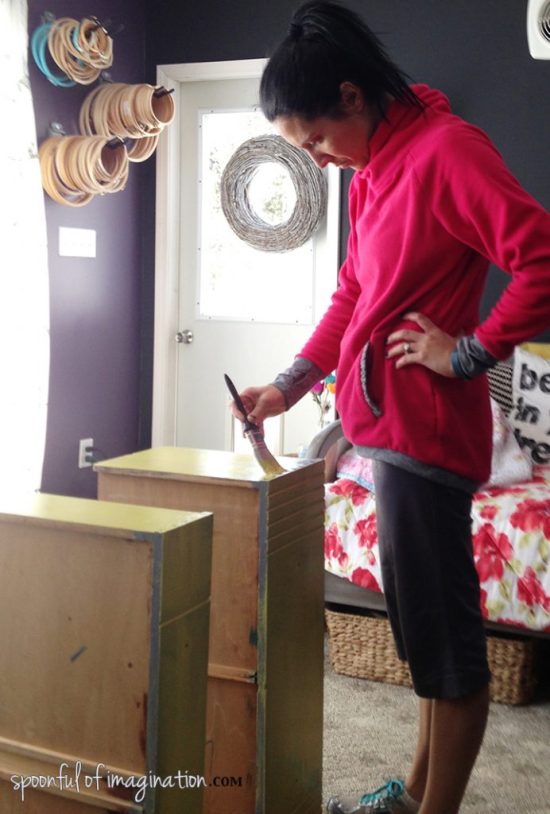
Shortly, before we moved to Indiana, I repainted an old dresser to give my J a new dresser. As I was getting ready to throw his old busted dresser out, I just couldn’t part with the drawers. It was an old really heavy, painted too many times dresser that needed to go, but the drawers seemed like good boxes. I knew I could use them for something someday. So, as we moved to Indiana, we loaded up these empty, someday project drawers to come with us. Can we say hoarder!?

It was worth it.

old_drawer_projectShortly after we moved into our new house, and started settling in, I remembered my drawers. I dug them out of the garage and gave them a fresh coat of paint. I thought if I added a few little wheels they would make awesome under the bed storage for my boys’ bedroom. This was about 18 months ago…about the time we got our pup. Who is now a full-grown German Shepard mix.

painting_drawers

painting_a_drawer

drawerI ended up paper mache-ing some wrapping paper to the bottom of the drawer and adding new handles, but that’s where the project came to a stall.

My drawers did go under the bed, but they weren’t being used. It was more of just a new, clean place to store my someday project (rather than the garage). They sat here until a few weeks ago when a new inspiration struck. I needed a small, narrow nightstand to go between the twin beds. I wondered, “could I use one of these old drawers as a nightstand?!” I hurriedly pulled one out and placed it between the beds. The size was perfect. But since there is a vent in the same spot, the nightstand couldn’t get pushed up against the wall and be a snug fit. It fell and the lamp broke (nothing a little super glue couldn’t fix). This is where I roped in my talented husband. He added shelves to the drawer and hung it up on the wall for me. Garage_work_shop

creating_small_wood_shelves

creating_small_wall_shelves

Ryobi_nail_brad_toolHe’s a genius. He placed the shelves right above the screws from the handles so no one would get scraped reaching for something off the shelf. This was a quick project but needed some thought and calculation. He used my Ryobi Nail Brad and whipped this up much quicker than I expected.

creating_small_shelves

Ryobi_nail_bradHe cut two 14 inch long 1×2’s and attached them to the wall. These provided a sturdy hanging option for the drawer while providing a little bit of space off of the wall. He was able to sink one screw from each of the support boards into a stud in the wall. Since the drawer wasn’t wide enough to span across to studs, he used drywall anchors to attached the other screws.

hanging_a_shelfOnce the supports were in place, I helped him hold the drawer up to the wall. He used the brad nailer to quickly attach the drawer to the supports. Then, he went back and added a few screws for more support.

hanging_bedside_tableOnce my drawer was hung, I painted the shelves the same teal as the flowers on the wall for an extra punch of color. I then styled the shelves, replaced my lamp on its new sturdy base, and my nightstand was complete!

colorful_nightstand

small_wall_shelf

narrow_nightstand_on_wall

hanging_nightstand

hanging_DIY_nightstandI love how this nightstand is narrow. It doesn’t take up a lot of space between the two beds, which allows for maximum floor space. Yet, it allows for a little lamp to be placed. This is our foster bedroom/guest room, so it is not currently in use. But now we are ready. Guests can place their phone to be charged or a bottle of water right beside their bed at night. I love it.

narrow_nightstandThis room has so many surprising fun elements from the wood chairs hanging on the wall all the way to the huge painted flower mural. Having a drawer converted to a nightstand just completes the look. Yes, it might have been cheaper to just find another drawer in Indiana rather than fill up more space in our moving truck from Georgia, but then I wouldn’t have as good of a story.

Have you repurposed anything recently!? I love to repurpose items. Turning our kitchen chairs into a bench is one of my favorite projects to date. I really loved this little dresser that had broken shelves that I turned into a fun piece too.

There are so many possibilities, if we use our imaginations! I’d love to chat with you about your projects! Find me on Instagram, @ericadeuel, and say hi!

Thank you so much for checking in! I will be back with a room round-up post full of links to the various projects soon!

signature

Share this:

  • Click to email a link to a friend (Opens in new window)
  • Click to share on Facebook (Opens in new window)
  • Click to share on Twitter (Opens in new window)
  • Click to share on Pinterest (Opens in new window)

DIY Outdoor Checker Board

June 14, 2013 By Erica Deuel 6 Comments

patio checker board

Have you been spending a lot of time outside lately? Whenever it’s not raining, we have been playing outside or walking down to the pool. One thing that we are definitely enjoying is our back deck. We didn’t have a patio or a deck at our old house, so this deck is like the coolest thing to us. My favorite times are when we use it are in the morning lounging after breakfast with our coffee or at night after dinner. The kids will actually bring out bean bags to sit with us. It’s fun family time with the woods to stare into.

We were given this hand me down old furniture to put out there till we could get some. You know it’s not my favorite, but it’s something and so we are thankful we have it! The one thing that really has been bothering me was the table. It was rocky because of a bent leg. I have been afraid cups would spill or my active toddler would climb on it and somehow fall off and get hurt. It had to go.

bad outdoor patio furniture

On one of our many trips to Home Depot, I saw their 16″ Pewter Stepping Stones. They were $3 and I knew I could do something with them. I stood there staring and it hit me. I would make an outdoor end table with one stepping stone. I think this idea came quickly because of my great love for my Log End Table. I was excited and inspired to turn it into something practical yet fun. I landed on making a checkerboard on top. Here is how you do it!

Materials:

  • 16″ Stepping Stone
  • Kills Paint Primer
  • Outdoor Spray Paint
  • Paintbrush
  • 1.5″ Painter’s Tape
  • Bottle Caps
  • Tree Log

The first thing I did was figure out how many squares are on a normal checker board. Google told me the norm is eight rows by eight columns. I decided the easiest way to measure and try to get those boxes even was to create rows and columns based on the width of my Painter’s Tape. I used the Painter’s Tape
to create my own ruler. Eight little pieces of tape all lines up side by side would equal the width of my checker board. Note: I ended up taping all those little pieces in a row on another long piece of tape, so i could quickly move my make shift ruler around without having to pick up each little piece at a time.

DIY Ruler with Painters tape

I used the ruler to figure out the length of the bottom of my checkerboard and I just eye balled it to go in the center of the stepping stone. I then pulled up my ruler and rotated it to get the side get the length for that side of the checker board, being careful to start the length at the top of the tape on the bottom. Use this method to get the following two sides for your checker board.

making a checker board

Once you have the outline of the checkerboard, tape off the remaining outside of the stepping stone to make it easier on you while painting. Then paint the Kills primer into the center of the stepping stone.

painting a checker board

Use your tape then to start measuring for your checker boxes. I started lining up long strips of tape side by side. I used tape as a placeholder to mark the spot, but as soon as I could I pulled it up and rotated it to the next place (see below). Once Your board is taped one direction, rotate your stepping stone and do the same thing going perpendicular to the tape you just placed.

stripes on a chcker board

homemade checker boardOnce you have your tape down, press over each strip to make sure it is tight. Then use an outdoor spray paint to cover in the squares. I thought about doing a fun color, but ended up doing the basic black. Once that dries, peal up the tape and lay it back down to COVER the black you just painted. You need to do this to create the checker effect. Right now you have 16 black boxes surrounded by the white. By moving the tape grid onto the already painted black you will open up the areas that still need black paint. I’m sorry I forgot to take a pic of this step. Just know that when you peel your tape the first time and wonder, “Oh no, what did I do wrong?” (like I did) you haven’t done anything wrong. You just need to paint one more round of black boxes.

making checker boxesOnce you have painted your second set of black boxes and they dry, your checker board is done! Peal up the side tape and place your board on your tree log-or any other creative item you might want to use as a base! I think even a cinder block might be pretty cool. You can also use whatever you want as the game pieces. I spray painted bottle caps as our game pieces. Note: If you use a stepping stone or something else heavy make sure your base is completely level and very sturdy to avoid it falling off when little ones bump it or lean on it.

checkers

DIY Checker game piecesIf you use bottle caps, spray the insides as well. I will show you further down as to why. I still need to go back and spay paint the insides of mine. We are currently storing our pieces in an old tin cane wrapped with jute rope and some fake flowers stuck in on top to make it look like a center piece.

storing checker pieces

yard checker boardWe are having so much fun already with this little table. I taught my six-year-old how to play the other day, and he might be obsessed now. Sitting outside and enjoying some time and laughs together is one of the highlights of my days.

playing games with your kids

learning how to play checkersEven my little girl is having fun playing her own version of checkers which is pretty cool to watch. She takes the checker pieces out and lines each one up in its own square. That is one to one correspondence and pretty cool to see her thinking and playing an age appropriate version.

one to one corespondenceThe reason I told you to spray the inside of your bottle caps is so you can tell which king is yours. We played that once you were “kinged” you turned your checker over. Well, by the end of our game, we could barely tell which king belonged to us.

queen me in checkersThis project cost literally $3.25 plus tax, since I already had all the other materials on hand.  Such a cheap decor to spruce up your outdoor living and help you enjoy the pretty days this summer. Here is a quick recap if you want to pin or bookmark how to make this outdoor checker board.

how to make an outdoor checkerboard

Thanks so much for stopping by! I hope you have a wonderful weekend and celebrate your dad’s amazingly well this week for Father’s Day!

back yard deck

signature


Share this:

  • Click to email a link to a friend (Opens in new window)
  • Click to share on Facebook (Opens in new window)
  • Click to share on Twitter (Opens in new window)
  • Click to share on Pinterest (Opens in new window)

Little Girl’s Bedroom

June 13, 2013 By Erica Deuel 9 Comments

Bedroom makeover

Reagan’s Bedroom is one of my favorite makeovers I have ever done. I think because for half of the creating and planning for it, we were not even in our new house yet. I learned a lot about trying to create for a space that you don’t get to walk by and stand in everyday to imagine and “see” your project come to life. I was stretched and now have made something I am proud of as a result.  If it was my choice, we would play in there all day everyday.

Although she may only be two, it is something Reagan is proud of as well. If you were to walk into my house right now, she would ask you to come upstairs and see her room…even if you have already seen it. It makes my heart so happy. Some work might have been required, but what an easy way for me to show love to my daughter by being able to create something she loves.

Since before we moved, I have been showing tutorials and DIY projects that I have been creating to incorporate in her room. I thought it would be helpful to put all those in one place, so there is a little summary of how create this room. Please feel free to bookmark it, pin it, or share it. It is my hope all these hours of creating can inspire others to create as well.

DIY little girl's bedroom

Minnie Mouse Silhouette

DIY Fabric Bunting

Burlap Lampshade

Refinishing Ikea Furniture

Painted Stool

Stick Heart Wall Art

Teal Rustic Dresser

DIY Painted Striped Wall

It’s so nice to have all these links in one place! Many of these projects are some of my favorites, and I am so glad I can give you this summary. A few other items that I have incorporated into this room are shown below.

Elements for a girls bedroom

Wood Log End Table

You are My Sunshine Rustic Sign

Hair Bows and Headbands

Thank you so much for checking out my little girl’s bedroom summary! I hope these links and posts can help inspire you. Please feel free to contact me, if you have any questions about how to do any of these tutorials!


signature


Share this:

  • Click to email a link to a friend (Opens in new window)
  • Click to share on Facebook (Opens in new window)
  • Click to share on Twitter (Opens in new window)
  • Click to share on Pinterest (Opens in new window)

DIY End Table

August 3, 2012 By Erica Deuel 1 Comment

I have been wanting to share this project with you for a while now.  I finished this little table back in May and was saving it for a week like this one…when my “projects” were not the spectacular crafty sorts but just more life sorts.  For example, tackling a consignment sale is not my every week sort of thing.

For eight years we have had the same two end tables in our living room.  I was getting a bit board with them.  We turned one of them into Caleb’s work bench outside.

He adores it!  He now has a place to store his tool box and work on his projects, where I wont start moving them all around and cleaning up.  It is his area.  The second table needed a makeover to keep using it in our livingroom, so I turned into a decoupaged, painted, fun piece.

I love the way it turned out!  I will try to keep these details short, since I have been having some rather lengthy posts lately.

Step One:  I primed it and painted it white.

Step Two:  I painted the bottom half with gray paint we had left over from our kitchen makeover.

Step Three:  I painted the top ridge with a light, light icy blue.  It almost looked white, until it was put against white.

Step Four:  I mod podged music sheets to the top of the table.  I did several coats of mod podge on top (letting it dry completely between each coat).

Step Five:  Put your hardware back on and enjoy!!


That picture fully shows my DIY photo coasters I made a while back.  I love to enjoy my projects once they are finally finished!!  It is such a rewarding feeling to see something you made, give a room a new look.  You guys can do this project!  So easy!  The hard part is waiting for the paint to dry!  I’m not a very patient person.  🙂

Thank you so much for checking into my Friday Project Spotlight!!  I am off to Ideafarm this weekend!  I can’t wait to join my hubby and the rest of the Broken Voices team for a life changing, inspirational weekend!  You guys might remember me talking about Ideafarm here.  In short…

“IDEAfarm is a four-day experience for college-aged people who are looking to take a specific discontent they have with the world today and do something about it. It’s an experience for young people who are looking to do something more, looking to be a part of something bigger. Each summer, IDEAfarm takes place at Lake Jackson in Atlanta, Georgia, providing an intimate environment for our students to grow and thrive. With the use of whole group sessions, small group meetings, and free time to spend both in community and in solitude, IDEAfarm’s purpose is found.”

I can’t believe this weekend/event is already here!  The summer flew by!

I hope you guys have a great weekend!  I’ll be back next week with a post of how this weekend went!  Please be praying for us and our students!

Party It Up at:  One Creative Mommy, Cheerios and Lattes

Share this:

  • Click to email a link to a friend (Opens in new window)
  • Click to share on Facebook (Opens in new window)
  • Click to share on Twitter (Opens in new window)
  • Click to share on Pinterest (Opens in new window)
  • Email
  • Facebook
  • Instagram
  • Pinterest
  • YouTube
YouTube-Channel
Erica Deuel

Subscribe for Weekly Updates!


Most Popular Posts

Painting Flower Pot Party Tips

Categories

  • All About the Kids
  • art journal
  • Blogging
  • Christmas
  • Craft Projects
  • Dancing Zebras
  • DIY
  • Eddy's postcards
  • Embroidery Journal
  • Family
  • Featured
  • Fireside Chat
  • Foster Care
  • Giveaways
  • Guest Posts
  • Home
  • Homeschooling
  • Kid Activities
  • Kid Craft
  • My Heart
  • Our Outings
  • Project Spotlight
  • Send Out Love
  • Shop
  • Sponsored Posts
  • Spoonful Lab
  • Spoonful Tribe
  • Tips + Tricks
  • Traveling
  • Uncategorized
  • Vlog

Favorite Categories

Subscribe for Weekly Updates!

Favorite Categories

© 2025 Spoonful of Imagination, Inc.