Spoonful of Imagination

Add it to a Family for Something Beautiful

  • Home
  • Our Family
    • Our Home
  • Courses
  • Shop
  • Contact

Decorating an Empty Chest

June 10, 2013 By Erica Deuel 2 Comments

Do you ever stare at a blank canvas and get over whelmed with what to do with it? Your canvas may be a

real painter’s canvas,

an empty cooking pot,

an untouched yard landscape,

a boring bookshelf,

blank pages in a journal,

an artless wall,

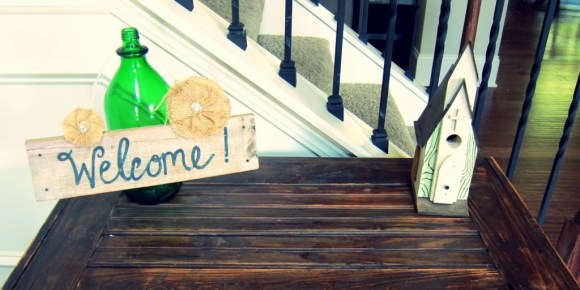
or endless other options. For me, I have been staring at an empty chest. This wood chest sits right inside my foyer and is one of the first things you see when you walk into our home. It’s very special as my brother made it for me almost 10 years ago. This piece probably drives him crazy because it was one of (if not THE) first wood projects he ever did, where now he is a professional. I love this piece because he made it for me, it’s a touch of his creativity, and I just love it!

foyer decor

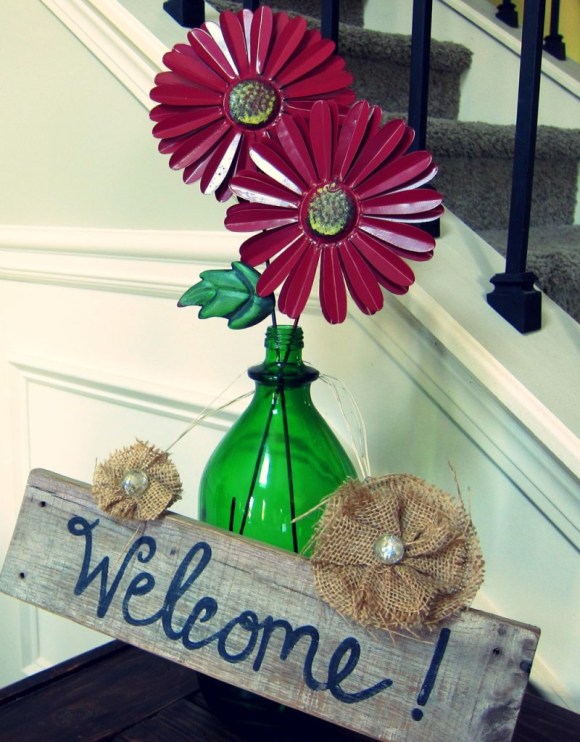
I have been trying to decide what to put on top (besides my purse, keys, and any other junk from the car when we walk through the door) now that it has such a prominent spot in our new house.  I played around with several things and ended up placing an old green jar, a welcome sign, and a little bird house on it. I really liked those simple elements. I thought they added a fun touch but still left room for my purse and keys (just minus the junk, mail, and receipts). Yet, something was missing. I left it for days trying to decide what it needed.

decorating a wood chest

welcome

Finally, one day in the Dollar Tree, I realized what it needed. It needed a pop of color and something that added a little height but was simple. I bought two metal flowers that I think are supposed to be placed outside in the ground or a flower-pot. I broke off one of the leaves and bent one of the ends of a flower so it would fit down in my glass jar lower and allow the other flower to be taller and created two different heights between the identical flowers. I love the use of metal and the added pop of color these two flowers brought to my wood chest.

using garden flowers inside

welcome sign

I love bringing outside elements indoors. I think sticks, pine cones, acorns, and plants look amazing inside. Now, I can add garden decor elements to that list.

using color to decorate

What about you? Are you decorating anything lately? Does a blank canvas sometimes intimidate you too? It’s crazy how breaking that intimidation and blank canvas can somehow bring so much satisfaction! It’s the process of just starting it, giving it time to process, and adjusting as you go that changes the emptiness into something.

signature

Share this:

  • Click to email a link to a friend (Opens in new window)
  • Click to share on Facebook (Opens in new window)
  • Click to share on Twitter (Opens in new window)
  • Click to share on Pinterest (Opens in new window)

DIY Feather Wreath

November 30, 2012 By Erica Deuel 4 Comments

I am so excited to share today’s Project Spotlight with you!  A few weeks ago, I fell in love with a white feather wreath at Target.  I stood there staring at it, trying to decide if I should buy it.  It cost $19.99, and I decided to pass it by and try to make it myself.

Today I am going to show you the technique I came up with to make this DIY feather wreath, and it only cost about $4.00 to make!  That is less than 1/4 the price at Target, and it really was so easy!

Here is what you will need to buy: one styrofoam wreath and white craft feathers.  I already had my hot glue gun with glue sticks, but if you do not have those items, you will have to buy them as well.  I got my foam wreath (normally $4.47) at Hobby Lobby with a 40% off coupon.  I also got my white craft feathers there, and they were 30% off this week.  So, the normal $1.99 a package of white craft feathers cost me about $1.30 each.  I completely used both packs.

I started by adding a big drop of hot glue to my wreath.

I added a feather and pressed my thumb on the spine of the feather to prevent getting burned.  I just want to briefly say here, I am so sorry for my messed up/old finger nail polish in all these pictures.  How embarrassing. 🙂 

I went about five or six feathers across the styrofoam of the wreath.

Those feathers were my first row.  I then started my next row about an inch lower on the styrofoam.  This allowed for lots of overlap but spread the feathers out a little, so I didn’t need as many.

I found that the five or six feathers across allowed for some “wrapping” on the sides of the wreath.  They started to go towards the back but also the back still had a bare streak, so as not to waste feathers that would not be seen.  Play with the amount of feathers you need.  Depending on the size of your ring of styrofoam and feathers you may need more or less.  The important part is to just cover the sides well because you don’t want any styrofoam to be seen at any angle your wreath ends up being displayed and seen.

You then just keep adding rows and rows of feathers doing the same steps until you are about to where you started.

From there you do your best holding/bending the first row of feathers back so you can stick glue in there behind them and glue those final rows.  It was a bit tricky managing it on my own, but it can be done!

After you get those last rows done, you are done!  You have just created a professional looking wreath for less than 1/4 the price!

I love it!!  I think it looks Christmasy yet also wintery.  Even after the rest of your Christmas decorations come down, this pretty wreath could stay up till the spring!

I think these wreaths would make amazing Christmas gifts for friends or family.  I think they would also make fun hostess gifts or a nice wedding/house-warming present.  The ideas are endless, and they are gorgeous and CHEAP!

I stuck my wreath up on my mantle with a little star I found at the Dollar Tree last week.  Today we are getting all of our Christmas decorations down out of the attic and I can’t wait to really deck my halls with this beauty!  I’m sure I will be back to show you my results!

Have you started decorating for Christmas?  Can you see yourself making this wreath?  Thanks so much for stopping by and I hope you have a wonderful weekend!


Linked up at: DIY Show Off, The C.R.A.F.T. Blog, Little Inspiration, Homeschool Creations, and Shaken Together


Share this:

  • Click to email a link to a friend (Opens in new window)
  • Click to share on Facebook (Opens in new window)
  • Click to share on Twitter (Opens in new window)
  • Click to share on Pinterest (Opens in new window)

Give Thanks Blocks

November 9, 2012 By Erica Deuel 6 Comments

I have been so excited about today!  We are getting back to our Project Spotlight with these festive Give Thanks blocks. At the bottom of the post I’ll reveal our $50 Dancing Zebras giveaway grand prize winner!

Last week, we started our thankful tree, and it has been a lot of fun.

Every night at dinner, we go around the table and say one thing we are thankful for.  I write down these things and hang them on our “tree”.  It has been so inspiring to hear what each child is thankful for and to talk about these things together.


Even little Reagan is involved.  I’m sure she has no idea what she is saying, but when we ask her what she is thankful for, she always says something.  One of my favorites was when she screamed “Charleigh” this week.  Charleigh is one of her sweet cousins, who is in town visiting this week!  We are so excited to spend some good time loving on this little girl.

I wanted to make some blocks to put in front of our tree that would help remind us all day, and not just at our dinner table, to give thanks.  Here are the steps with on I came up with our give thanks blocks.

I started by getting a 2 x 3 board from Home Depot and measuring off 2″ slots.  I cut along those measurements and ended up with a bunch of rough blocks.

I sanded the blocks till their edges were smooth, and then I painted them a pretty fall color.

After they were a nice burnt orange, I decided I wanted to have a leaf outline on them as a watermark behind the letters.

I took a plastic leaf (I found a bag of these at the Dollar Tree and we are using them on our thankful tree.) to stencil around to have the outline of a leaf on my blocks. Using the Antique Gold paint, I lightly dabbed the paint brush around the stencil and edges of the block to create a subtle backdrop for the leaf. Once I had done this step, the blocks looked like this…

I made the leaves wrap around the blocks and painted them, rotating at different angles, with parts of the leaves “falling off” the block.  I love how they came out.  Next, I wanted the blocks to say “give thanks”.  I am not the best at hand painting fonts, but I decided to give it a try with this project.

I printed out my ideal font, and eye-balled the letters. To finish them off I lightly sanded around the blocks to give them a more vintage look. Finally I gave the blocks a coat of Mod Podge to seal everything with a slight sheen. They aren’t perfect, but I think they came out cute!

I love how they look in front of our tree.

Feel free to give these a shot for your Fall decor! What’s a special thing you do around your house to celebrate the Thanksgiving season?

Ok, it’s the big moment we’ve all been waiting for! Drum roll, please. The Grand Prize winner of the $50 Dancing Zebra Giveaway randomly chosen by Rafflecopter is, Kali Mallard! Congratulations Kali! I will be in touch with you on the details. In the meantime, you can go to my store and start window shopping for what you might like to have!


a Rafflecopter giveaway

Share this:

  • Click to email a link to a friend (Opens in new window)
  • Click to share on Facebook (Opens in new window)
  • Click to share on Twitter (Opens in new window)
  • Click to share on Pinterest (Opens in new window)
  • Email
  • Facebook
  • Instagram
  • Pinterest
  • YouTube
YouTube-Channel
Erica Deuel

Subscribe for Weekly Updates!


Most Popular Posts

Painting Flower Pot Party Tips
DIY {easy} Burlap Wreath
Cheap lamp to Industrial Beauty
Engraved Wood Sign Tutorial (and Dremel Micro)
Repurpose Old Kitchen Chairs
The Encanto, Madrigal's House Craft For Kids
DIY Outdoor Checker Board
DIY Bookends (what you can make for being a hoarder)
The Way I Thrift
Chiffon Flower Tutorial

Categories

  • All About the Kids
  • art journal
  • Blogging
  • Christmas
  • Craft Projects
  • Dancing Zebras
  • DIY
  • Eddy's postcards
  • Embroidery Journal
  • Family
  • Featured
  • Foster Care
  • Giveaways
  • Guest Posts
  • Home
  • Homeschooling
  • Kid Activities
  • Kid Craft
  • My Heart
  • Our Outings
  • Project Spotlight
  • Send Out Love
  • Shop
  • Sponsored Posts
  • Spoonful Lab
  • Spoonful Tribe
  • Tips + Tricks
  • Traveling
  • Uncategorized
  • Vlog

Favorite Categories

Subscribe for Weekly Updates!

Favorite Categories

© 2023 Spoonful of Imagination, Inc.