Spoonful of Imagination

Add it to a Family for Something Beautiful

  • Home
  • Our Family
    • Our Home
  • Courses
  • Shop
  • Contact

DIY Burlap Lamp Shade

June 11, 2013 By Erica Deuel 9 Comments

burlap lamp

Do you love burlap? I know I do, but lately I have been wondering why. Is it because it is “in” or is there more to it. I have decided for me, there is more to it.

Burlap has a great texture and a natural quality that I love. It’s durable and one of the most inexpensive fabrics you can buy. Burlap can fit in with a lot of different kinds of home decorating looks. Someone who decorates beachy, cottage chic, modern or even bohemian can all use burlap and still capture the look they love. I think this is a versatile fabric that is timeless. I’ve used burlap to cover our old dinning room table, curtains for in Reagan’s room, and I’ve even made burlap flowers. Today, I want to show you how to make a burlap lamp shade. I’ve priced these out and seen them cost around $50 for a medium size shade. My shade cost about $2, since I had some materials on hand and was just recovering an old shade. Here is how I did it…

Materials:

  • hot glue gun with glue sticks
  • Scissors
  • burlap (length depends on the size of your lamp shade)
  • Creme/neutral fabric as liner
  • Scrap Fringe
  • Old lamp shade
  • Spray paint

The first step is to take your old lamp shade and spray paint it white. This will help diminish the pattern or design that is currently on it. Since my pattern was so bold and bright on my old shade, I actually gave my shade two coats of spray paint.

spray painting a lampshadeNext, lay your burlap out and on  top of it lay a creme or neutral color fabric. Since burlap is an open-weave fabric, this creme fabric helps to act as a liner and adds a better cover to the shade.

making a lampshadeI took both layers of fabric (burlap plus liner) and just wrapped it around my lampshade, so I had an idea of the length of fabric I would need. I cut off the excess, so I wasn’t trying to manage fabric I would not need at the end of this project.

measuring a lampshadeYou might have seen that in covering a lamp shade with regular fabric you can use a spray glue to attach your fabric. That material is not strong enough to hold burlap for lasting effects. I put a strip of hot glue down the length of my neutral liner and rolled the shade on to it. I pressed the shade down for several second to seal the glue.

hot gluing a lamp shadeRoll the shade and put a strip of glue on the other side of the neutral fabric, so the burlap can also be glued to the shade.

hot gluing lampshade linerContinue rolling your shade every 2 inches or so and doing this gluing step. It is annoying to have to glue for both the neutral and burlap layers, but it is necessary. One strip of glue will not go through and attach both layers of fabrics. Be sure to tug on the two layers of fabric after every roll to stretch them out and not allow air pockets or fabric to bunch up. You want the shade to be nice and tight.

covering an old lampshadeOnce the shade is completely covered, fold the end over to create a fringeless edge and hot glue that down onto the shade. You want to try to get it as straight as you can.

lampshade seem

making lampshadeYou are almost done! That was the tedious part. Next cut off the extra length of fabric from the top and bottom of the lamp shade except for about 1/2 to 1″ in length. That amount of fabric is needed to allow for a strip of hot glue to be placed inside the lampshade and the fabrics to be pressed into. You most likely will have to do two strips of hot glue here as well to catch both the liner and burlap.

trimming edge of a lampshadeYou can stop there or you can add fringe! I was making my lampshade almost right along with when I was making my fabric bunting, so I had a big pile of fringe and pretties out in my work area.

sewing fringeI decided I would hot glue two layers of different fringes to the bottom of my shade to add some embellishment.

embellish a lampshadeThen my shade was done! That is how you make a DIY burlap lampshade! If you can cut and hot glue, you can do this project and save loads of money!

diy burlap lampshade

I love how the lamp fits in Reagan’s room and adds of touch of neutral and more rustic to her girly decor.

burlap lamp shade

That is the last tutorial I have for Reagan’s room (for now;))! Check back later this week for a summary and post with the complete round-up of tutorial posts from this bedroom makeover!


signature


Share this:

  • Click to email a link to a friend (Opens in new window)
  • Click to share on Facebook (Opens in new window)
  • Click to share on Twitter (Opens in new window)
  • Click to share on Pinterest (Opens in new window)

Decorating an Empty Chest

June 10, 2013 By Erica Deuel 2 Comments

Do you ever stare at a blank canvas and get over whelmed with what to do with it? Your canvas may be a

real painter’s canvas,

an empty cooking pot,

an untouched yard landscape,

a boring bookshelf,

blank pages in a journal,

an artless wall,

or endless other options. For me, I have been staring at an empty chest. This wood chest sits right inside my foyer and is one of the first things you see when you walk into our home. It’s very special as my brother made it for me almost 10 years ago. This piece probably drives him crazy because it was one of (if not THE) first wood projects he ever did, where now he is a professional. I love this piece because he made it for me, it’s a touch of his creativity, and I just love it!

foyer decor

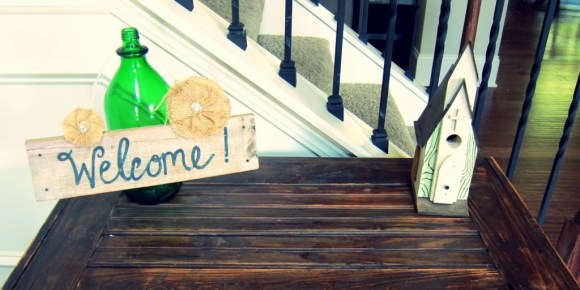
I have been trying to decide what to put on top (besides my purse, keys, and any other junk from the car when we walk through the door) now that it has such a prominent spot in our new house.  I played around with several things and ended up placing an old green jar, a welcome sign, and a little bird house on it. I really liked those simple elements. I thought they added a fun touch but still left room for my purse and keys (just minus the junk, mail, and receipts). Yet, something was missing. I left it for days trying to decide what it needed.

decorating a wood chest

welcome

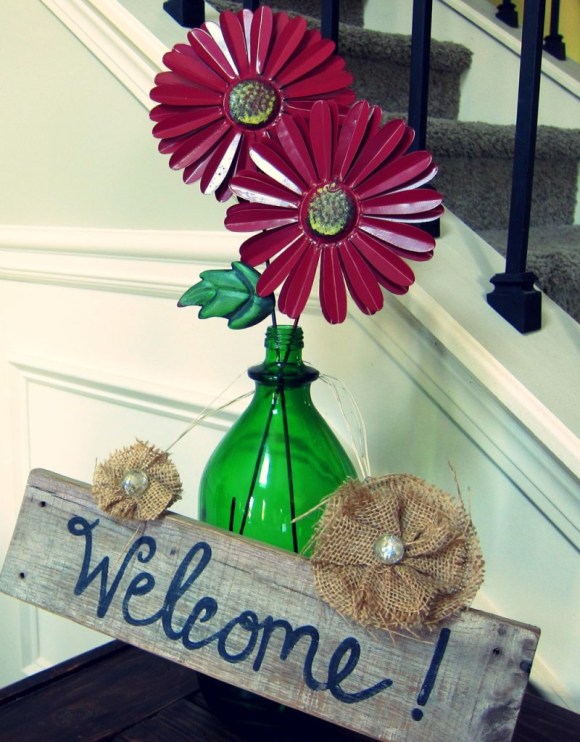
Finally, one day in the Dollar Tree, I realized what it needed. It needed a pop of color and something that added a little height but was simple. I bought two metal flowers that I think are supposed to be placed outside in the ground or a flower-pot. I broke off one of the leaves and bent one of the ends of a flower so it would fit down in my glass jar lower and allow the other flower to be taller and created two different heights between the identical flowers. I love the use of metal and the added pop of color these two flowers brought to my wood chest.

using garden flowers inside

welcome sign

I love bringing outside elements indoors. I think sticks, pine cones, acorns, and plants look amazing inside. Now, I can add garden decor elements to that list.

using color to decorate

What about you? Are you decorating anything lately? Does a blank canvas sometimes intimidate you too? It’s crazy how breaking that intimidation and blank canvas can somehow bring so much satisfaction! It’s the process of just starting it, giving it time to process, and adjusting as you go that changes the emptiness into something.

signature

Share this:

  • Click to email a link to a friend (Opens in new window)
  • Click to share on Facebook (Opens in new window)
  • Click to share on Twitter (Opens in new window)
  • Click to share on Pinterest (Opens in new window)

Homegoods Blogger Party

January 21, 2013 By Erica Deuel 17 Comments

coffee on a cold morning

Have you ever wanted to go shopping in your favorite store on a private shopping spree before the store opens to the public?  The thought of being able to park up close and get in when no one else is around, has always seemed like a dream.

Would I set my alarm to get up early, scrape ice off my car windows, make a stop to get my coffee, all to shop at Homegoods before the store opens to the public…all without my kids?

welcome bloggers

Yes.  Yes, I would!  This weekend I had the chance to do just that.

Rhoda at Southern Hospitality invited local bloggers to join her at Homegoods BEFORE the store opened for our own private shopping experience.  I love Rhoda, and I love Homegoods.  So, of course I said, “YES” I would be there!

rhoda at southern hospitality

Here is Rhoda being her sweet self and welcoming us to her Homegoods party.  If you have read Rhoda’s blog, you probably think she is the most creative, sweet, southern, talented, hospitable girl in the world.  She really is that way in person as well.  I would hang out with Rhoda any time.

rhoda southern hospitality

I blog because I love it, but another reason I love to blog is all the friendships I have made through it.  I love getting to know the girls behind the blogs I read, and especially when I find out they are just as amazing in person.  I finally got to meet Lisa at Before Meets After and it was so fun to be with her and a bunch of other local bloggers at Homegoods.

We walked around talking and brainstorming about what we would do with different items throughout the store.  It was so casual and easy as we have so many similar loves: decorating and blogging.  As we found something that caught our eye, we debated how we would spend our money on all the different items we loved in the store.

homegoods stools

homegoods stool

I loved all those fun stools.  All the different colors and fun designs were calling out to me.  I had to silently remind myself that I already have four step stools in this little house.

heidi at decor and more

I have gotten to know Heidi at Decor and More, and she is a blast.  She is so creative and fun to talk to.  I loved how when we were walking down an aisle and she saw me pick up these pillow shams, she mentioned how they looked like just me and would go perfect in my little girl’s room.

pillow shams

I refrained from the pillow shams, but I was also tempted by this gorgeous painting below.

you are my sunshine painting

blogging friends

Donna at My Sweet Things and I laughed about this gigantic friend hanging out behind us as we talked.

carved wood owl

I was so tempted to buy this thick wood carved owl.  For $14 he was a steal!  I put him back, thinking I have enough owls in this house, but I regret it.  I might be making a trip back to Homegoods (with all three of my kiddos) this week to rescue this owl and bring him home.

homegoods signs

My friend Sally and I both found beautiful signs that have messages that spoke right to us!  I love how she picked the hot pink sign to go in her kitchen. Amazing style!

my homegoods finds

I had a wonderful time at Rhoda’s Homegoods party, and I don’t know how I left with only two treasures.

I did buy that sweet sign.  I love every line on it and especially how it starts with “create something everyday.”  I hung it up in our school/craft room, as it is the room we spend the most time in.

homegoods signs for your house

I also found a beautiful deep purple ruffled pillow.  I had made a hot pink felt pillow similar for my daughter’s room, but I loved this pillow and for $12, I didn’t want to try to make it.  I added it to our sitting room in the kitchen.  I love the pop of purple it adds to the creme pillows already on the love seat.

homegoods pilow displayed

homegoods pictures

What do you think of my finds?  Would you get up early too to go shopping with friends at one of your favorite stores?  Thank you so much Homegoods and Rhoda for this fun experience!

colorful pillows

Thank you so much for stopping by!  I hope you have a great Martin Luther King Jr. Holiday and can enjoy a day with those you love!  We are headed to the Hawks game.

signature


Share this:

  • Click to email a link to a friend (Opens in new window)
  • Click to share on Facebook (Opens in new window)
  • Click to share on Twitter (Opens in new window)
  • Click to share on Pinterest (Opens in new window)
  • Email
  • Facebook
  • Instagram
  • Pinterest
  • YouTube
YouTube-Channel
Erica Deuel

Subscribe for Weekly Updates!


Most Popular Posts

Heartfelt Valentine's Finds
How to Embrace Winter's Warmth
New Year and NOT a New Me.
The Stories We Tell
Butterfly Nature Craft for Kids
Celebrate Earth Day 2023 with your artist!
What to do with the nerves that come with trying something new!
How to Support your Teen's Creative Endeavors
Why Writing Greeting Cards Still Matters
Imagine the Possibilities with me!

Categories

  • All About the Kids
  • art journal
  • Blogging
  • Christmas
  • Craft Projects
  • Dancing Zebras
  • DIY
  • Eddy's postcards
  • Embroidery Journal
  • Family
  • Featured
  • Fireside Chat
  • Foster Care
  • Giveaways
  • Guest Posts
  • Home
  • Homeschooling
  • Kid Activities
  • Kid Craft
  • My Heart
  • Our Outings
  • Project Spotlight
  • Send Out Love
  • Shop
  • Sponsored Posts
  • Spoonful Lab
  • Spoonful Tribe
  • Tips + Tricks
  • Traveling
  • Uncategorized
  • Vlog

Favorite Categories

Subscribe for Weekly Updates!

Favorite Categories

© 2025 Spoonful of Imagination, Inc.