I am amazed at how many extremely talented people I have in my life. From family to friends (new and old) there is so much creativity around me. I am continually inspired and challenged by those creative juices of so many I love.
I shared with you the other day about how one of our best friends is making films in LA. Today, I want to share with you a birthday party that one of my friends threw her little girl, Zoë.
Rebecca is oh so talented. She is a professional photographer and is so sweet to let me share her gorgeous work with you here. She took these pictures and created this picture perfect party. She has skills!


One thing that I adore about Rebecca is the heart behind the parties she throws for her kids. Every detail and gorgeous bit of her parties comes from the heart to honor, celebrate, and love her child.
As a homeschool mom of three, pastor’s wife, daughter, friend, and all the other hats Rebecca wears, I love that it is such a priority for her to make her children know they are so loved.
From start to finish her kids help her pick the theme, find inspiration on Pinterest, and create the finished product.
How cute are those “fairy jewels” (pictured above) they created!? She and her girls created them by coloring the inside of an acorn cap with a marker and filling it with school glue. How simple is that!? They are gorgeous.


I have wanted to throw one of my kids an art party for years. The boys have not gone for it yet, but maybe with Reagan I will get this dream. Rebecca came up with some amazing crafts for her party theme. Her daughter, Zoë, was turning five and loves art, so it was a perfect fit.
One of the first activities at Zoë’s party was to paint a fairy house. Rebecca got some $1 bird houses at Michaels, cut the perch off, and had acrylic paint and paint shirt cover ups for the guests. They did this activity first, so the houses would dry by the time the party was over. What a creative idea! A birdhouse is the perfect size house for a fairy. Genius!


Another craft the girls created was a fairy friend! She had all the supplies (popsicle sticks, tulle, yarn, felt, small artificial flowers, sharpie, hot glue gun, and a stick) ready, so the girls could just piece together what they wanted to dress their fairy. While the girls played a game, Rebecca hot glued all the elements together to make a fun puppet.
Reagan would love this! She is so into Tinkerbell (as you might see after Halloween), and she would love to have a little Tink to fly around. I have to remember this craft!


On top of the fun crafts, the girls got to run and be ferries together. Rebecca had a pair of wings for each girl. The wings were decor and doubled as a party favor. They also wore them for a creative version of “duck, duck, goose”.
 The girls look like they had the best time. There was so much creative energy and time spent to make such a special day.
The names of the food are perfection!


What an incredible party! I’m currently thinking through my J’s fifth birthday that is coming up. I know he doesn’t want a fairy party, but Rebecca has inspired me to think through what HE would like and not what I want him to like. It is all about celebrating him and the interests and gifts that he possesses.
At the end of the day, if he feels loved and celebrated like this picture of Zoë portrays of her feelings, I will be happy.
 Isn’t she stunning!? I was blessed to hang with this sweet family last week. Can’t wait to do so again soon! Thank you so much Rebecca for letting me share your party with the world!


 My J loves stickers, and we are constantly working on building a little more confidence and independence in him. This simple craft was something he could do on his own, have fun, create, and make something he was proud of.
 There was no glue or paint to clean up. We simply threw away the sticker backs, and his frame was complete. Side note: Peeling sticker backs off can be a task for a preschooler and really practiced his eye hand coordination! The teacher in me had to say that ;).
 He made something he was proud of, and I hope built that little self-confidence up while having a blast. I love how the natural background looks with the pop of leaf color. You could always paint it, wrap it with string, or create a paper collage on your frame to make it a little more intricate and a step harder. Another idea is to use this idea for a card rather than a picture frame and write a message inside. The possibilities are endless to stretch or use this technique!


 Slowly, I started to pull the different pieces of paper out away from one another. This is a step that forces you to be some what patient. The moving paper is so thick that if I pulled to quickly the paper would rip.
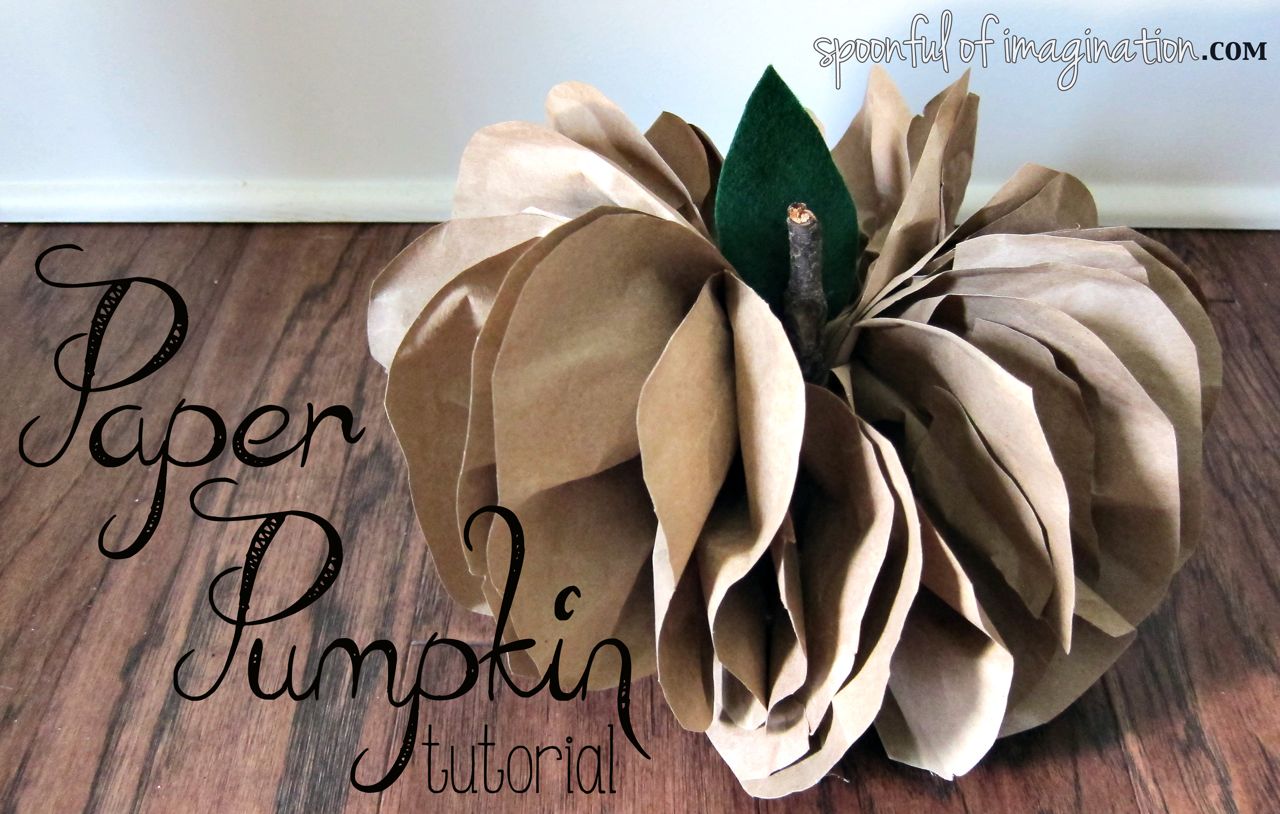
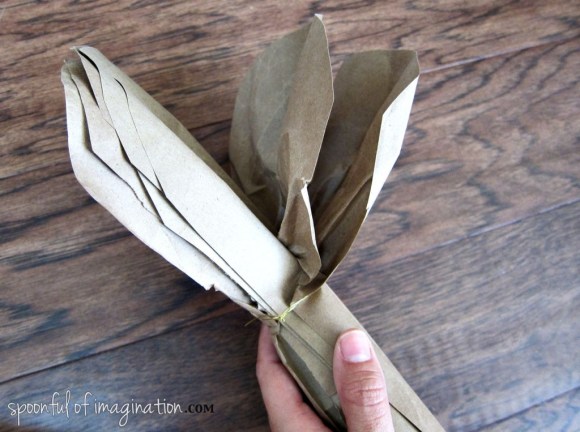 Once the paper pumpkin is fluffed, I glued the two end pieces (on either side) of the paper fan together to make the pumpkin hold shaped. I didn’t want it to separate back into a fan type shape, but I wanted it to hold the circle/pumpkin shape.
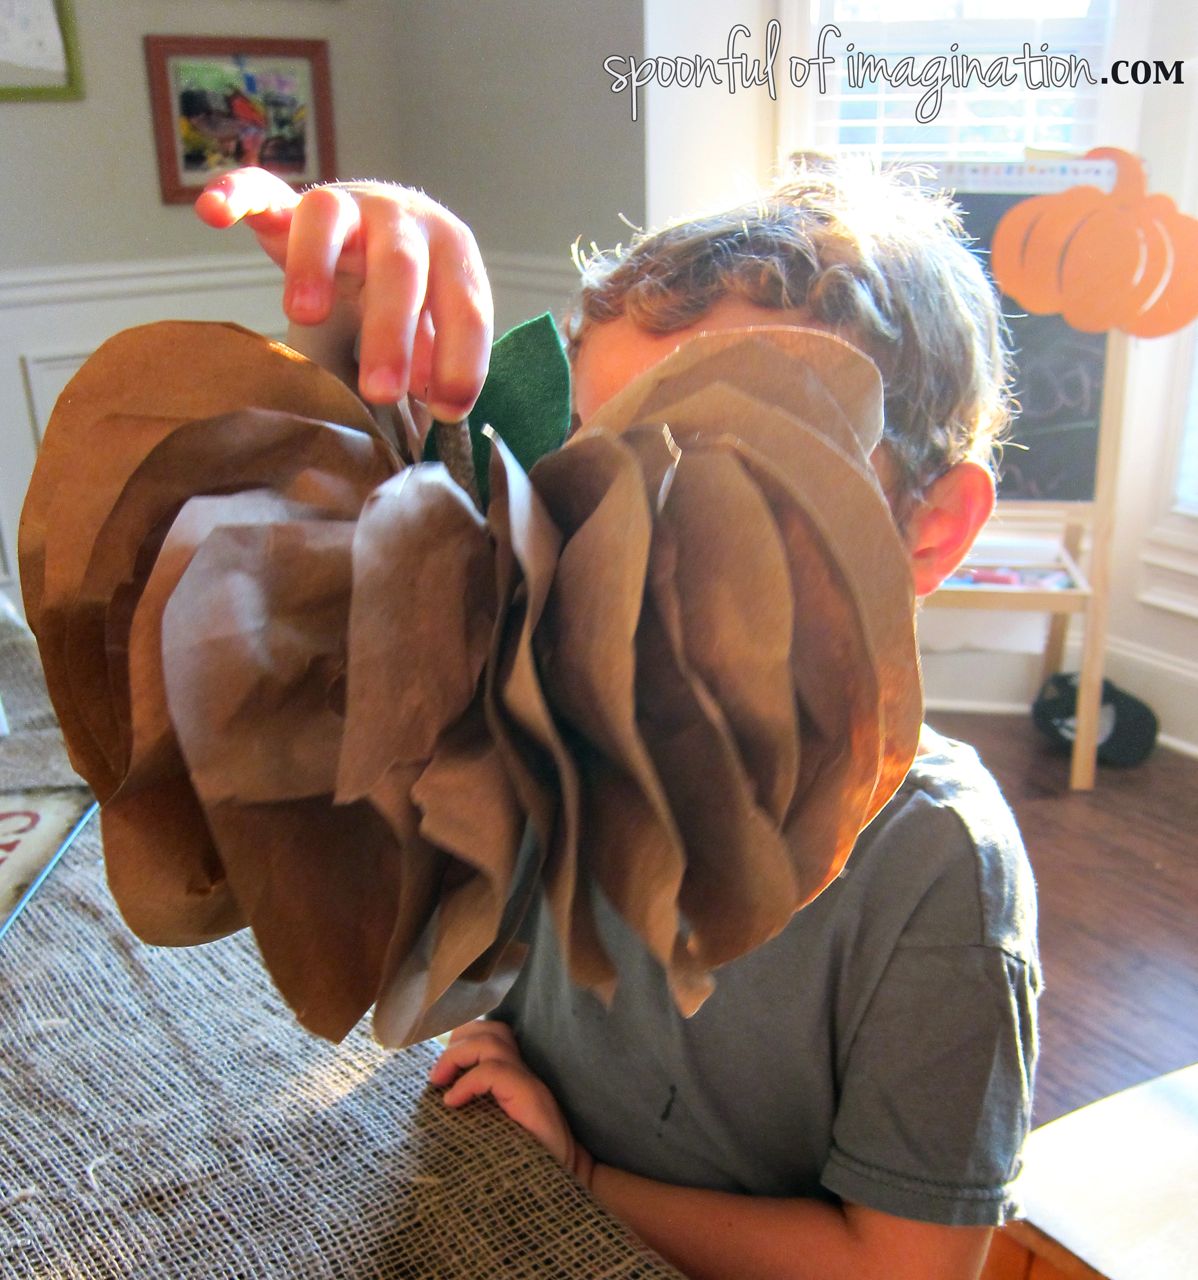
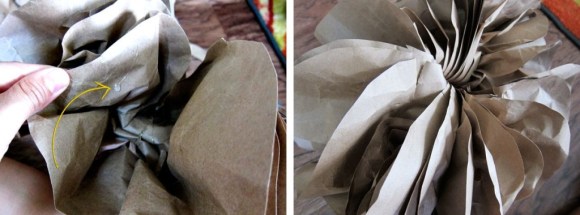 Our kids were really excited about seeing the pumpkins coming out, and they wanted to help in this project. I let them help fluff the pumpkin and to find a good stick
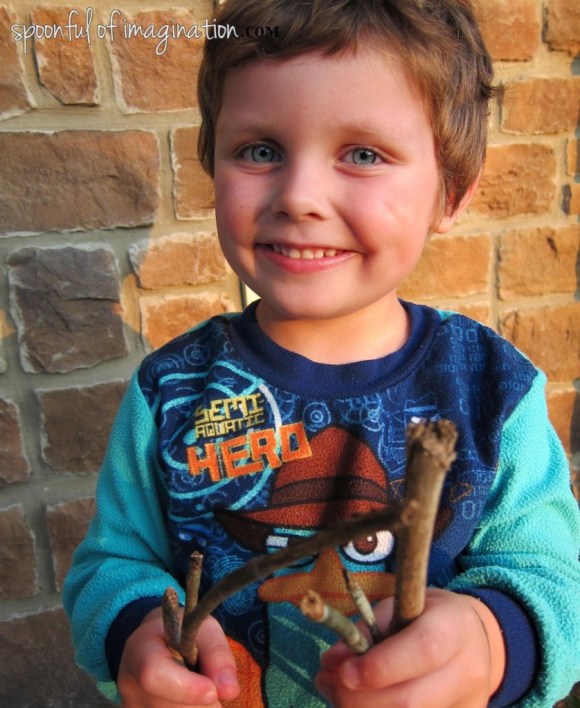 Once I had a good stick for a pumpkin stem, I glued the stick and a small piece of felt (that I cut to look like a leaf) into the center of my pumpkin. My paper pumpkin was than complete!