Spoonful of Imagination

Add it to a Family for Something Beautiful

  • Home
  • Our Family
    • Our Home
  • Courses
  • Shop
  • Contact

DIY Minnie Mouse Silhouette

April 26, 2013 By Erica Deuel 6 Comments

It’s crazy we are finally at the weekend where everything is happening! We will be closing on both houses and moving in the next few days. It is so exciting!

I want to give you a quick DIY project you could do over the weekend.

DIY minnie mouse silhouette

In my post about Reagan’s dresser makeover with Disney paint, I showed a few decor items I have made to help decorate her room. One of those decor items was this simple Minnie Mouse Silhouette. It was such a quick and easy project that you could knock out quickly! Here are the series of steps to do, so you too can create one of these subtle but fun Minnie Mouse vintage signs.

1. Find an old piece of wood.

piece of scrap wood

2. Sand the wood really good on the sides and top. This will lessen the cause of splinters and make it look more finished.

sanding a piece of scrap wood

3. Find bowls that look proportional to the size of Minnie’s head and ears.

drawing minnie mouse4. Trace the bowls.

drawing minnie mouse silloutte
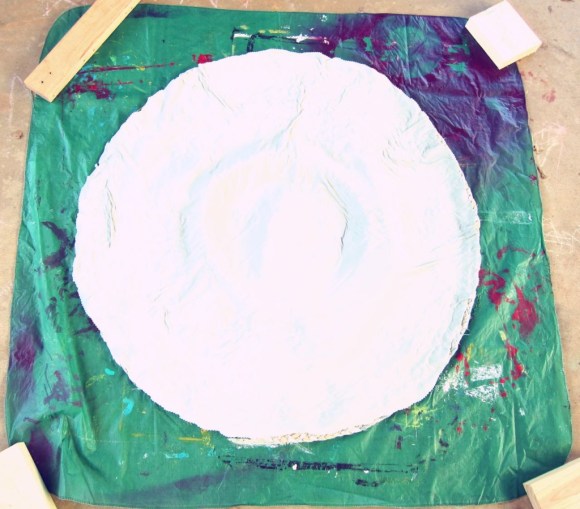
5. Paint inside all the circles to create a solid Minnie Mouse silhouette.

painting mickey mouse6. Draw a bow on a piece of paper and cut it out. Lay it where you want it to go.

minnie mouse bow7. Trace around the bow, so you have it stenciled on to your sign.

minnie mouse bow stencil8. Paint in the bow. I used Disney Paints’ Fashionista paint color to color in my bow.

painting minnie mouse bow9. Once the paint is dry, give it a nice coat of stain. This creates a more vintage, subtle, yet stunning design.

vintage minnie mouse10. Once the stain is dry, your sign is complete! Style it where ever you want! I think it makes a great decor item to a little girl’s bedroom, but it would also be an awesome gift to any age Disney fan!

how to make a minnie mouse signWhen I showed my little Reagan her sign, she squealed with delight. She was so excited and kept saying “my Minnie Mouse!” as she tried to hug the wood sign. 🙂

little girl love for minnie mouseI can’t wait to pull Reagan’s room together this next week! Be sure to follow me on twitter and instagram to get pics and updates of the whole moving process and sneak peeks of Reagan’s room getting pulled together. I hope you have a great weekend, and I will try to post again soon!

minnie mouse room decor

signature

Share this:

  • Click to email a link to a friend (Opens in new window)
  • Click to share on Facebook (Opens in new window)
  • Click to share on Twitter (Opens in new window)
  • Click to share on Pinterest (Opens in new window)

Recycled Old Dresser Makeover

April 12, 2013 By Erica Deuel 67 Comments

vintage recycled dresser

“One man’s trash is another man’s treasure” is exactly the phrase I attach to this fun piece of furniture. I found this pretty wood dresser in my neighbor’s trash. No joke. I wish I had a picture of the sign because it said “take me home” and that is just what I did.

old dresser before

old dresser project

This is a real wood piece. I loved the shape and size immediately, but it needed some loving. The bottom two drawers were broken. I stared it for several weeks trying to decided what I wanted to do with it. I debated colors and if I wanted to fix the drawers or just turn those slots into shelves. I liked the idea of the piece have space to hide a little bit of stuff, so I left one drawer. I kept picturing the other slots holding pretty craft supplies and baskets, so I am glad I took a chance and turned them into shelves. I love what I came up with! I am going to show you exactly what I did step by step, in case you have an old piece that needs some tender loving care as well.

The first thing to do is to give your piece a good sanding and brush off all the saw dust.

sanding a dresserNext, paint the dresser. It was really hard for me to leave the top wood. I knew if I could fight the urge to paint it, I would love the result. And I do. I love the contrast of the dark stain with the teal paint. As for my paint, I didn’t worry about priming or using a paint and primer in one paint. I knew I was going to re-sand the piece, so my paint job didn’t have to be thick or perfect.

painting a dresser

If you are a messy crafter like me, there might be sections of paint on part of the piece where you didn’t want paint.  Simply sand that area again.

touch up sand job

Staining is the next step. You see the piece really come together and the dramatic change. I stained my whole piece. I did the top, all the teal paint, and even the inside of where my shelves would be.

staining woodThere were areas I went back and did a second coat of stain, but the stain color you use will determine a lot of how your piece looks. The stain I used here is called Early American and its a nice deep brown. It’s not too dark nor does it have any shades of red.

Here is where I recruited my awesome husband. Saws scare me. I will use them, but I love it when I don’t have to. Matt cut some 1/8″ panel boards and attached them with wood glue for me. Isn’t he amazing!?!

making a dresser shelf

After the wood glue dried, I stained those boards as well. Note: Be careful with the wood glue! If you get it on your board, it wont stain over that area as well, as you can see below in my picture.

staining dresser shelves

Once the stain is dry, your piece is almost done! I switched out my knobs for some vintage, deep yellow wood ones from Hobby Lobby. I bought them months ago because I loved them, and I have been saving them for a project like this one. It was a perfect match! I love how my piece turned out.

old dresser after

I don’t know where it will end up in our new house, but I am excited about it. Isn’t it funny that you can pick an item out and not know where it will go, but if you love it…you will always find a use or way to incorporate it into your home? That is this piece to me. I hope the teal works somewhere :). It could go in our craft room, the dinning room,  in our foster kids’ room, or maybe even behind a couch? I’m not sure yet, but I will keep you posted on what we do with it.

before and after of old dresserCan you believe this piece that is full of life and fun used to be that old brown dresser? It is crazy what a little paint and time can do. Now I will leave you with some eye candy. Since I can’t stage my shelves for me yet, I staged them up for you to get an idea of how a piece like this can be used. I hope you are inspired!

vintage dresser

recycled dresser

vintage dresser makeover

vintage furniture

Thank you so much for checking in today on one of my favorite furniture makeovers I have ever done! It is Friday, and I hope you all have a wonderful weekend!

signature

Share this:

  • Click to email a link to a friend (Opens in new window)
  • Click to share on Facebook (Opens in new window)
  • Click to share on Twitter (Opens in new window)
  • Click to share on Pinterest (Opens in new window)

DIY Rug

March 22, 2013 By Erica Deuel 25 Comments


DIY rug

Have you ever had a project where once you were in the middle of it-the idea of it didn’t seem quite as grand?  You decide you will never do it again, but in a twisted way you are still glad you did it, and you might actually like the project!?  That was this DIY rug for me.

As we were clearing out and getting rid of stuff to put our house on the market (Our House Attack), I found all our old queen bed sheets.  They were stuffed in the back of our linen closet and have not been touched since we got our king bed last summer.  I put them in a huge pile and was getting ready to throw them out or donate them, when I had an idea.  That pile of sheets was a lot of neutral color fabric that had to be able to be used for something.

a craft for old sheets

I had been wanting a new rug for our sitting room, and decided that a circle rug would look best.  As I priced them out, I saw that they could be pricey, so once I saw that pile of fabric, I knew I needed to try to make a rug.

I started by folding each one of my sheets over, so when I cut my 3″ wide strips, I was saving time by cutting through four layers of fabric at once.

folded sheets

cutting strips of fabric

I literally cut 3″ wide strips out of all of the flat-bed sheets.  The length doesn’t really matter when you are cutting the fabric, but I would go back later and cut them to be about 3′ long.  You ultimately want 3″ x 3′ long strips of fabric to braid.  Much longer than that gets too hard to maneuver.

strips of fabric cut

After all your fabric is cut, you are ready to start braiding.  Braid three pieces of fabric together, just like you would braid anything else.  I used a pin to hold my ends together on a basket to make it easier to braid.

braiding a rug

braided rug

When one of my small strips ran out while braiding, I simply hot glued another strip (of a different fabric pattern) to it and kept braiding.  Once you have a long strand of braided fabric, you can start to curl it to form the rug.  I know most tutorials say to hand stitch the braids together.  I didn’t want to spend that amount of time on this project.  I pulled out my hot glue gun, and it did an amazing job of bonding the braids together.  I simply added some glue and then stuck my braid to it as it curled around.

hot glueing a rug

hot glueing a rug together

Once I ran out of braid, I went back and braided some more strips till I had a long braid once again.  Next, I simply took both ends and hot glued the different strands together.

attaching fabric to braid longer

attaching fabric to braid

attaching more braid strands

I feel like there is so much cushion for error and imperfections with this project.  The ends are barely noticeable by being hot glued straight together like that as you can see in the picture below.

attaching more braids

Although it is slightly noticeable in the picture because of my arrow pointing to it, standing on my rug now, I don’t see any of them.  There was nothing hard or precise about this project.  It was literally just braiding and gluing as I have shown.  The part of this project that made me say I would NEVER do it again is how much time it took.  Granted it didn’t require any thinking, so I did it in front of the TV, but now I have a new understanding of why rugs cost so much.

I kept going with the braiding and gluing steps until my rug grew and grew.

rug growing 1

braided rug tutorial

Finally, I ran out of strips of fabric.  The rug didn’t end up being as big as I would have liked, and it might have a slight ripple speed bump in it.  Overall, I really like it!

I wanted to try to help smooth it out and reinforce my hot glue by adding a back fabric to the rug.  I used another big sheet to cut out a circle of my rug that I then sprayed glued onto the rug.  I still want to go back and use a stronger cement type glue to seal the edge of the under layer fabric to the rug more securely.

back of a rug

added rug support

We have been walking on it for over two weeks now, and it is holding up great!  My dogs love to curl up on it and I think it looks so good in the little sitting area in our kitchen.

sitting area

I think the circle shape helps close the spot in better than the long rectangle shape rug did.  What do you think?  Do you have a circle rug or obsession with circles?  After making my circle mirrors and working on this circle rug, I am obsessing over circles.

the difference in a rug

Thank you so much for stopping by today!

**Congratulations to Candice H. for winning my Easter Basket worth of handmade goodies!  I will be in touch!

signature


Share this:

  • Click to email a link to a friend (Opens in new window)
  • Click to share on Facebook (Opens in new window)
  • Click to share on Twitter (Opens in new window)
  • Click to share on Pinterest (Opens in new window)

DIY Mirror

March 1, 2013 By Erica Deuel 6 Comments

DIY Small Mirror

I don’t know about you but I treat my house like a canvas. The pictures and creations of our family fill our home. I love it that way. Unfortunately when selling a house you have to stage it in a way that people can envision their home and not mine. The whole process has lead to a lot of amazing clean up, de-cluttering, and even new creations along the way. Many of you gave me awesome feedback and suggestions on twitter and facebook.  Thank you for teaching me how to decorate shelves that look more aesthetic and pleasing to the eye. I’ve learned a lot.  I have a whole post coming to share what I have learned, but today I want to show a quick DIY mirror I came up with to use as a staging item on my shelves.

book shelf items

natural elements on book shelves

living room shelves

These simple little mirrors were so cheap and easy to make.  I think they make a great item to display that adds a pop of color, yet they are not a picture, candle, or book.

To make your own mirrors here are a few supplies you will need:

  • Wood circles (I got mine for $1.99 each at Michaels)
  • Mirrors (I got mine for $1.00 each at the Dollar Tree)
  • Acrylic paint
  • Paint brush
  • Sandpaper
  • Super glue
  • Spray gloss finish

supplies to make a mirror

The first step is to pick out the color you want your mirror(s) and paint it a solid color.  I wanted my three mirrors to kind of coordinate, so I decided to try something new.  After I let that first coat of paint dry, I switched up my three paint colors and painted over the dried paint with one of the other three colors.

painting coordinating colors

painting tip

painting over other colors

I literally poured paint onto my wood circle and painted it a solid color in a different color.  Try to do a nice thick, even coat.  I then used some sandpaper to lightly sand the edges, sides, and top of my wood circles so the first paint color would show through.  I love how this step created a worn, artsy, colorful look.  Be careful to not sand to hard or much or you will completely wear off that first layer of paint and go straight down to the wood.

light sanding to wood

two tone color mirrors

Once the wood circles are sanded, it is time to make them look a little more finished and professional.  I used Rust-oleums clear gloss to spray a nice even coat of finish over my wood circles.  Once you have done this step, let the circles completely dry.

rustoleum gloss clear spray

spray shine

After the shine finish has dried, use a little super glue to stick onto the back of the mirror to place it in the center of your wood circles.  After the glue has dried, your mirror(s) is done!

gluing a mirror

make a Mirror

I love the simple pop of color these mirrors add to my shelves.  They were such a quick and easy project to do.  I kind of want to make a dozen more, but I am refraining.  Since I already had a couple of the supplies, each mirror cost me about $3.00!  What a great deal for a fun piece to have in my house.

staging book shelves

DIY decorative mirror

I am really into circles right now which might be one reason why I love these mirrors so much.  I’m currently STILL working on my circle rug.  It hasn’t gotten much attention lately, but I plant to work on it more this weekend.  Do you have a project lined up for the weekend?  I would love to hear about it!

signature


Share this:

  • Click to email a link to a friend (Opens in new window)
  • Click to share on Facebook (Opens in new window)
  • Click to share on Twitter (Opens in new window)
  • Click to share on Pinterest (Opens in new window)
« Previous Page
Next Page »
  • Email
  • Facebook
  • Instagram
  • Pinterest
  • YouTube
YouTube-Channel
Erica Deuel

Subscribe for Weekly Updates!


Most Popular Posts

Painting Flower Pot Party Tips
DIY Paper Butterflies- Spring decor for cheap
DIY {easy} Burlap Wreath
The Encanto, Madrigal's House Craft For Kids
Repurpose Old Kitchen Chairs
School Desk Makeover
Cheap lamp to Industrial Beauty
DIY King Size Rag Quilt {Repost}
Engraved Wood Sign Tutorial (and Dremel Micro)
DIY Fabric Bunting

Categories

  • All About the Kids
  • art journal
  • Blogging
  • Christmas
  • Craft Projects
  • Dancing Zebras
  • DIY
  • Eddy's postcards
  • Embroidery Journal
  • Family
  • Featured
  • Fireside Chat
  • Foster Care
  • Giveaways
  • Guest Posts
  • Home
  • Homeschooling
  • Kid Activities
  • Kid Craft
  • My Heart
  • Our Outings
  • Project Spotlight
  • Send Out Love
  • Shop
  • Sponsored Posts
  • Spoonful Lab
  • Spoonful Tribe
  • Tips + Tricks
  • Traveling
  • Uncategorized
  • Vlog

Favorite Categories

Subscribe for Weekly Updates!

Favorite Categories

© 2023 Spoonful of Imagination, Inc.