 Want to add a pop of color in your house without purchasing anything new? This is a project you can do!
In our last house, we had this small desk lamp in our boys’ bedroom. We haven’t used it in our new house, so its just been sitting in a closet. I loved the shape and it worked so we have just held on to it. If you have boys who occasionally turn the living room into a football field, you know it’s important to keep a few items on the sideline should a picture frame or lamp take a direct hit. Just saying.
Now, that we have the art studio, I am finding a lot of days where I am working on setting up workshops, emailing, and spending more time on the computer. I needed a functioning desk with a lamp.

I pulled out my old lamp and put it back to work. The only problem was it had a lot of white on it, and the lamp shade I wanted to use also had a lot of white. It was easier to change the lamp base than to find another lampshade that fit and looked great. Here is what I did to my lamp base.
First, I used painters tape to cover the light bulb socket and switch section of my lamp.
 Next, I pulled out a couple of my leftover spray paints that I liked and did a light coat of each color all around my lamp.
 I let each color dry completely, before I sprayed the next color. I overlapped the colors a little as I sprayed to create a natural ombre look.
For this project, it was easy to hold the light bulb socket area and rotate the lamp to create the even coat. Please note: To avoid drip downs of paint, it is better to do two light coats of spray paint than to do one thicker/heavier layer.
 It’s always a little more challenging to do spray paint projects during the dead of winter. It’s been hovering around “Brrrr, it’s cold” to “I can’t feel my face” this past month. Which means spray painting is happening in the garage. While it’s certainly warmer than outside it still feels like “I’m losing feeling in my toes” after about 20 minutes. So all that to say, it takes things a lot longer to dry. Be sure to let your lamp dry completely, so you don’t get fingerprints or scratch marks on your new colorful project.
 Once your lamp is dry, add a light bulb and lampshade and you are ready to go! I love the way that my white lampshade looks with this new colorful base. It’s such a fun mix!
Pssstt… did you notice I left the gray layer on the base of my lamp base? I liked that color, so I used it as the first layer and just added more color to the middle and top!
 I’m hoping this little desk and lamp helps me to have a focused workspace. Maybe it will help my kitchen counter from becoming an office.
 Do you remember when I made these rustic mirrors? They may be one of my favorite crafts of all time.
What do you think? Do you have a lamp, basket, or flower pot that is hiding away in a closet, basement or garage that could be brought back to life with a little color added to it? Have fun! Use your imagination and have fun giving old items, new life. This is also a great way to make someone a special and customized gift without spending lots of money.
Thanks so much for stopping by! If you try this project, tag me on social media with #spoonfulproject so I can see your handy work!

 Do you ever have natural instincts towards something, but you can’t always fully explain it until you keep learning in towards it!? Whew. That’s a bit confusing. Let me explain.
 I love color, so I gathered my usual color scheme. I used leftover latex paint from when we painted our studio. We had a great selection of samples and colors that we had used to paint the studio’s walls. To use what I had and save money I chose to not use fabric paint. Please note: this did make my curtain more crisp and stiff.

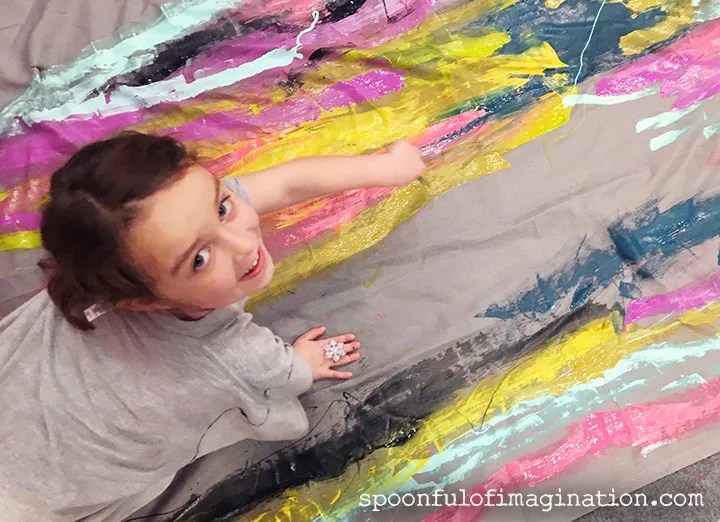

 Oh man. There were so many smiles, laughs and brainstorms as they created side by side. As they filled in the gray…


 The hardest part of this whole project was waiting for it to dry. We might have driven back over to the studio (where we painted it) to pick it up a few hours latter…only to realize it wasn’t dry yet. We ended up letting it dry overnight and then brought our masterpiece home. My girl tried to claim it as a blanket. Haha! It would not be a very good blanket since the material was thin and now also stiff. It was the perfect curtain though.
 I hung it in my room. My husband no longer needs to pin a shirt up to our window. Success! I love how the colors on the curtain add a fun pop of color to my gray walls and light colored bed quilt, yet it combines with my
  What do you think? Do you enjoy the art process too? Would you ever try a large scale abstract process art project like this!? If you don’t want to do it or it feels intimidating, don’t do it…kids will gladly step in and make it happen for you! 😉
 In this day and age of online shopping and gift cards, it can be a struggle to make gift giving feel personal. Don’t get me wrong, I certainly send my share of gift cards and I love when I receive them… but this year I am determined to add a personal touch that helps add to my gifts – DIY Gift Toppers.
 Once I had my pieces, I did a quick sanding to smooth down the corners and edges. I pulled out a variety of spray paints. I then gave my wood pieces one coat for a background color. You could go with acrylic paint, but it will probably take a couple of coats.
 Once you’ve completed painting, the next step is to drill a small hole for the Gift Topper to be tied onto your gift or to add it’s hanging strap like I did on mine below.
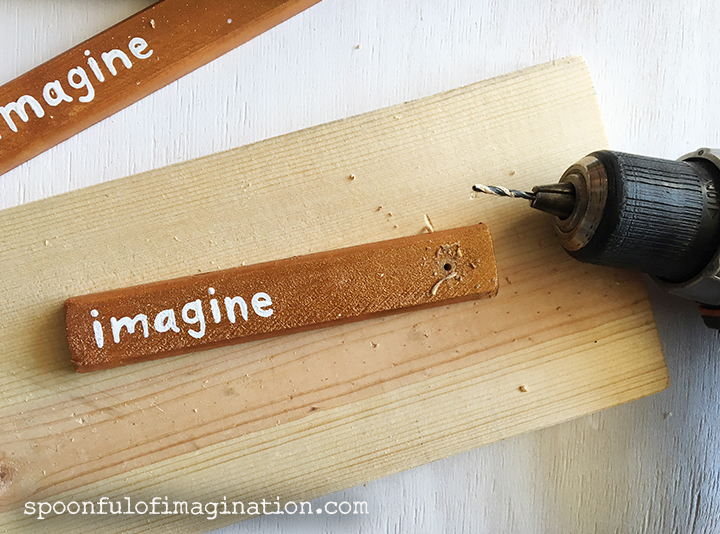 I cut elastic strands in 8-10 inch pieces and then tied them to my Gift Toppers. Originally, I was just going to tie the Gift Toppers to the gift as is. But then it clicked, by adding this little extra step, the Gift Topper becomes part of the gift. It can be later hung as an ornament or decoration around the house.
 If you want one more touch, you can also go back to your finished wood pieces and do a little more sanding or possibly even staining to give them that worn rustic charm.
 I just love these little things, and I’m so excited to put them under the tree. I hope you do too! Please make some and add your own variations and embellishments. Just make sure to share it on social media using #spoonfulproject so we can all enjoy your creation.
 Do you have a child who is fascinated with things in the kitchen? How about the pot holders? We do. Random, I know. What can I say? One of our sons uses them anytime he is warming up stuff or toasting things in the kitchen. I’ve tried to show him he’s not in a real danger zone with his warming duties, but he loves the pot holders. Maybe it makes him feel like a real chef!? It’s one of those easy parent-child issues that doesn’t really matter, so we’ve embraced the pot holder fetish.
 I started out by gathering a ton of supplies. Next, I had to consider what type of animal or creature to make! A monster or dinosaur were my first ideas because you could get super creative with colors and textures. With Thanksgiving coming up, I decided to make a turkey (knowing my first grader would have a blast with him).
 I started by cutting out the turkey’s beak. After placing it where it should go, I decided it needed to be a bit bigger. It helped me to cut out several of my pieces from the felt and just place them where they would go, before hot gluing them in place. This checked scale and placement before I committed to it.
 After I had my main design, I hot glued the felt pieces in place and started playing with more materials. I added googly eyes and feathers for more fun textures.
 I loved it so much, I started snapping pictures to send to my husband immediately. I knew this turkey needed someone besides me to talk to, so I whipped up a horse to be his friend.
 My favorite part of the horse is the eyelashes! They are the side of a feather.

 What do you think!? Do you need to create some pot holder puppets as well!? I don’t think these will be used with our toaster oven, but they sure make a fun toy! Let your imagination go wild! What creature would you make??