 Does your Christmas tree have a theme? My Christmas tree’s theme is “kid creations”. I am a sucker for all the cute handmade and picture ornaments. My kids paint or create several ornaments every year, and they are my favorite ones on my tree. If you saw my reindeer hands post, you got some tips on how to craft this season (and survive) with little ones. Here is a craft you can try out those tips. My Christmas Ball Ornaments are easy enough for a toddler to make.
Start with some ball-shaped ornaments. I used glass ornaments, but I would think plastic would work really well with this method as well. I cut up a bunch of tissue paper into about 1″ long squares or rectangles. I gave my kids some glue and showed them how you put a dab of glue on the ornament and then stick a piece of tissue paper on it, and let them run with the craft.
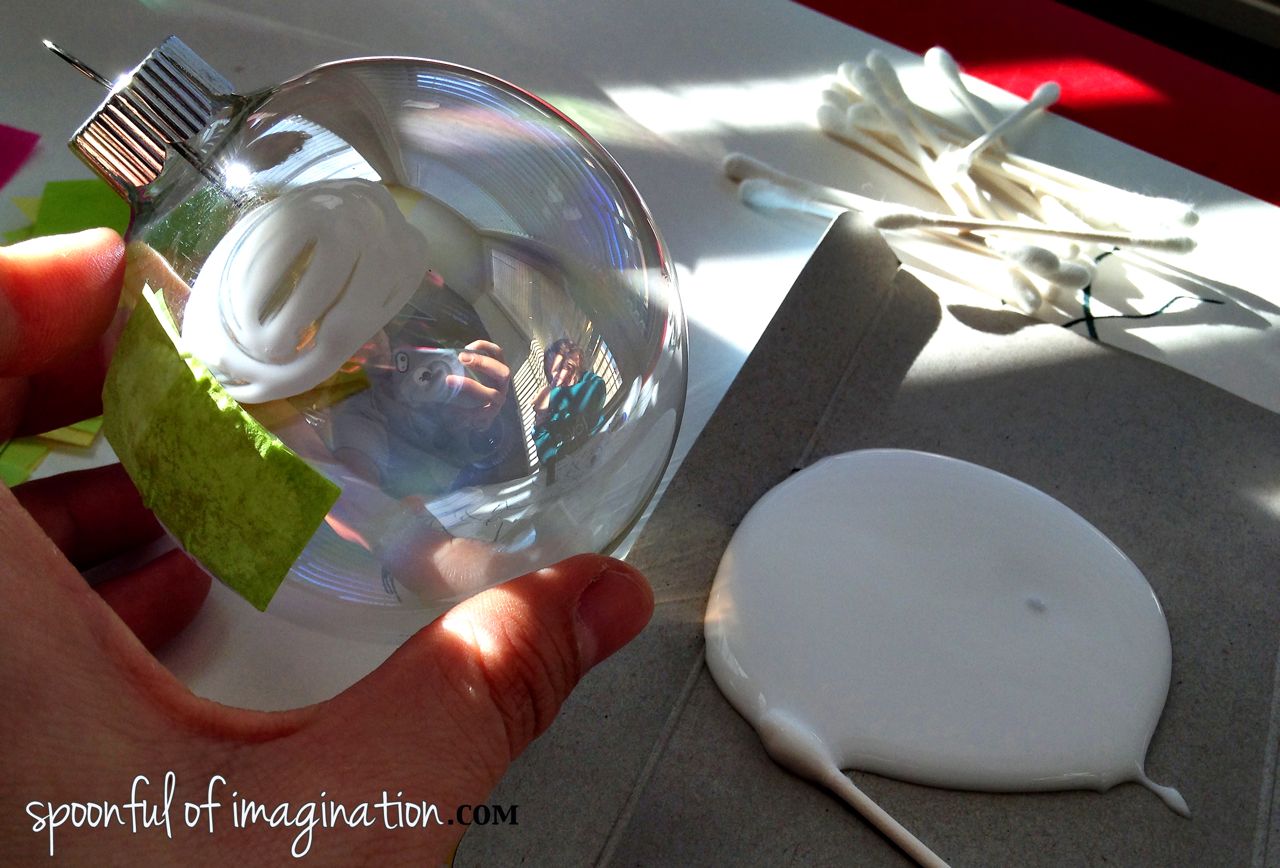

 A full collage of paper tissues over lapping one another is ideal, but my J simply wanted to create a row of paper around his ornament and be done. That works too. Reagan used a Q-tip to apply the glue on her ornaments which was easier for her little hands than to squeeze the glue bottle like the boys opted to do.
Once my kids said they were done with their ornaments, I applied glue all over the outside of the tissue paper. This step pushed down all those fly away pieces sticking up and got them to lay flat on the ornament.
 Our ornaments were then wet, so I quickly slipped in some string and hung them up to dry. This prevented any part of the ornament getting ruined and not drying onto another surface.
 Once the ornaments were dry, I sprayed them with my favorite clear shiny gloss spray from Rust-oleum. I love the shine that this spray added to our ornaments.
 The last step was to add some string, ribbon, or embellishments to make them unique and special to you. I added bells and feathers and even a little star with the date to one of ours. Note: I did this step without the kids help. 🙂
 Our ornaments were then done and ready to be given as gifts or hung on the tree! Soooo have you gotten to craft or make any presents yet? I hope you are able to unplug, relish in the normal simple things, and enjoy this season.
Happy week friends!!

 Since it is a busy holiday week, I always feel bad asking people to add another thing to their schedule. It’s the people pleaser in me. Lucky for me, J is still young and oh so sweet. When asked who he wanted to invite to his birthday party, he named all family. You know
  These invites were easy, and I made them while watching a few shows one night. I love the personal touch of these invites. I think allowing him to create a “theme” that he adores and using his “picture” were two simple ways I could show him how much I value him. You could easily switch out the sticker, tape color, and Batman wrapping paper character for your party theme.
 Another craft I created was a simple felt Batman garland. You know I am obsessed with felt, and I haven’t created with it since my
  That was it! J is so excited! He is already saying he wants to hang it above his bed after the party. I love that he loves it so much.
 We don’t usually pull out the birthday decorations till the night before their birthday. That way they wake up and it’s a fun, exciting surprise. This year is different. I’m slowing building up to his birthday cause after his birthday it will all come down quick for our Thanksmas (Thanksgiving + Christmas) party here with all my family in a week!
 Imagine a mom out in the backyard playing with her kids. As she is noticing the change of color in the trees and enjoying the cool breeze, she can’t help but keep gathering sticks and throwing them in a pile. To do what with them she does not know, but she has to save them.
 I then picked one stick up at a time and hot glued a strip of glue along it ad placed it onto my green board. I simply kept doing this method, so my tree grew taller and taller till I had transferred all the sticks.

 Next, I took extra sticks and filled in gaps and holes in my tree. This step created a more dimensional, layered, and full tree.
 I really like the simplicity of this tree. I didn’t want to dress it up much, since it was pretty obvious it was a tree. I simply glued a little yellow, wood star at the top and my tree was done.
 My last step was to add JOY to my Christmas sign. What is Christmas without joy, right!? I picked out the letters from one of my stencils, and I dabbed red paint to paint the letters onto my board. I then decided to paint the letters in solid and outlined them with a thin Sharpie to give the joy a small pop.
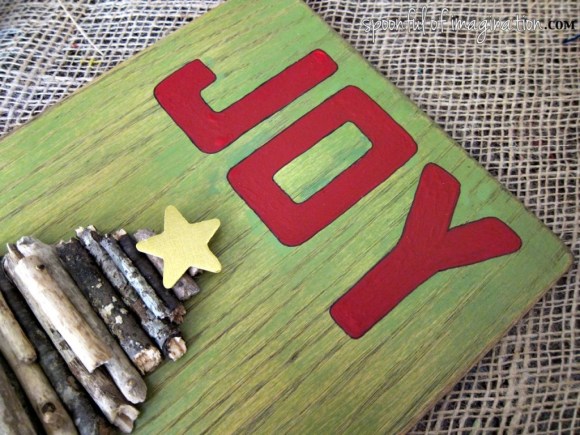 My Christmas sign was then complete! I love how it turned out. It was free to me, since I had all the supplies. I think this simple craft makes a great Christmas decor item.
 Have you started decorating or creating for Christmas yet?


