 Has Encanto been on repeat at your house too!? My Reagan has easily seen the movie over a dozen times. If we are honest though, I love it too.
A movie about family, gifts, color, helping others, culture, and community is a magical mix! We’ve listened to the soundtrack, watched the movie and now crafted to its theme! If you’re a fan of it too, we’d love to share an inspirational project for your Encanto loving artist!
 If you treat this project like the movie’s theme, “the miracle is not some magic that you’ve got, the miracle is you”, than you will have a blast. Gather some supplies and have fun!
It’s not what you have that will make it amazing.
It’s the process and using what you have to bring you and your artists’ ideas to life!
 It’s no secret that I love to use what supplies we have on hand. The creative process should not be expensive. So gather some basic supplies that are close to what is pictured or listed below and then we will tap into that imagination!
Supplies:
- base house shape (we used a wood sign board we already had)
- paint
- paintbrushes
- scrap paper, foam sheets, cardboard
- glue or mod podge
- scissors
The first step is to paint your house! The Madrigal house is really colorful and several floors, so we picked three bright colors of paint and used each one to represent a different floor of the house.

 Our house is a little more narrow then the Madrigal house in the movie, but it is the type of board we had on hand. If your house is wider, than you may be even able to add more windows and details in this next step than we were able to add.
The next step is to cut and glue scrap papers to create a roof and overhang details to the different floors.
We did three different styles of roofs and simply glued the papers in place on the painted boarder seem between the floors.


 The final step is in all the details! Add as many layers of paper you want to make your magical house pop! We added trees, windows, flowers, and then drew in a magical candle.
Use your imagination and create as many details as you want to add!
 We were inspired by the Madrigal house, but now you are making your own magic house. There is no right or wrong. This is your moment to take an inspiration and play with the process!
Have fun and make the project your own! Do you have supplies that we didn’t mention? Break them out and see what you can do when you experiment and use your imagiantion!

 We had so much fun creating and playing with color!
What do you think? Do you know an artist who would love to make their own Encanto House? Go on a scavenger hunt around your house to collect some supplies. You can do this! You just need a few things, an imagination, and a little time!

**Local friends, we will be releasing this fun project as a creative kit in our online store THIS Friday! If you don’t want to gather the supplies, let us do the work and grab the kit from us.
 We’ve been enjoying a winter storm here in Indiana. The kids are going on day three of school moving from in person to e-learning for the amount of snow we have had. They estimate we have had more than a foot of snow in 48 hours.


 Although we love the outdoor play, we have had more indoor play as well. It got us thinking that others might be looking for some indoor fun too. We thought we would share this fun and multiple step snowman project with you to encourage some creative fun in your home this winter. Gather a few supplies from around your home and join us to build a snowman!
 Once you have the supplies and are ready to create, the first thing you do is draw a snowman! I love how Reagan drew a two circle snowman and Jeremiah drew a three circle snowman that is zoomed in on, as part of his shape is “off” the page.

 After you have used your drawing tools to draw the snowman, then you are ready to paint a winter scene for the snowman to live in! Paint the background surrounding the snowman. You can ask your artist why you should NOT paint in the snowman. Hopefully, they value clean, white snow too.

 The final step is to embellish and add details to that snowman. We used scrap paper to cut hats and scarfs to dress our snowmen. You can also use your drawing tools from step one to add more details to the snowman or background.


 Wasn’t that super easy? This is such a fun project to do with a few students or a whole class! Just as a review the steps are..

 We had so much fun creating some indoor snowman. Jeremiah suggested that real outdoor snowmen are more fun to create. It’s hard to compete with snow, right!? But, if you too need some indoor fun, try this fun project. My artists are in 5th and 7th grade and they still had fun. We are never too old to play with creative tools! The pieces don’t have to be saved for forever. Stick them on your mantel for the season like we did, and then feel free to toss them out. The most important part is to to HAVE FUN!

 It’s the week of hearts.
 I started with a bunch of cardboard boxes. I cut off the box flaps and use those pieces to then cut into heart shapes.

 After I painted my hearts and they were completely dry, I used Elmers glue to attach them to one another. I used blue Elmers Glue, only because it was the first glue I found. Any school glue or hot glue would work!
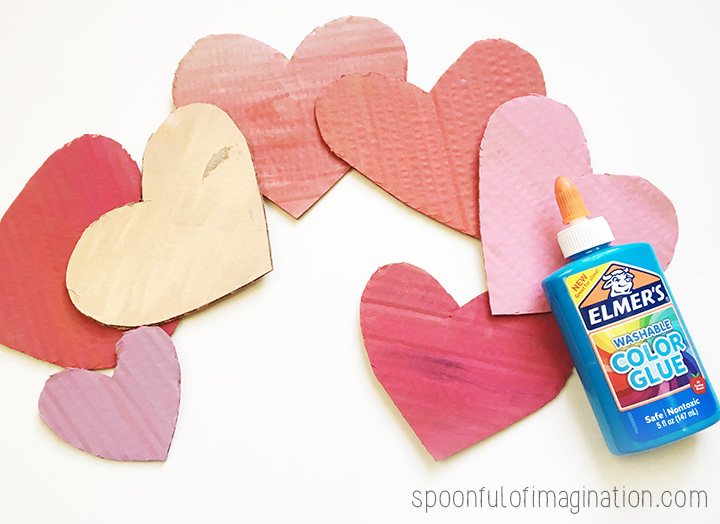

 You can probably tell by the pictures I created a base with the bigger hearts and then the smaller ones on top. It helps create a thicker, 3d shape and gives it some depth.
 After I made my wreath, I thought this could be such a fun quick class party craft.

 Do you have any emoji fans in your family?
 The first step is to turn one plate over on top of another and staple around the edges to attach the plates to one another.
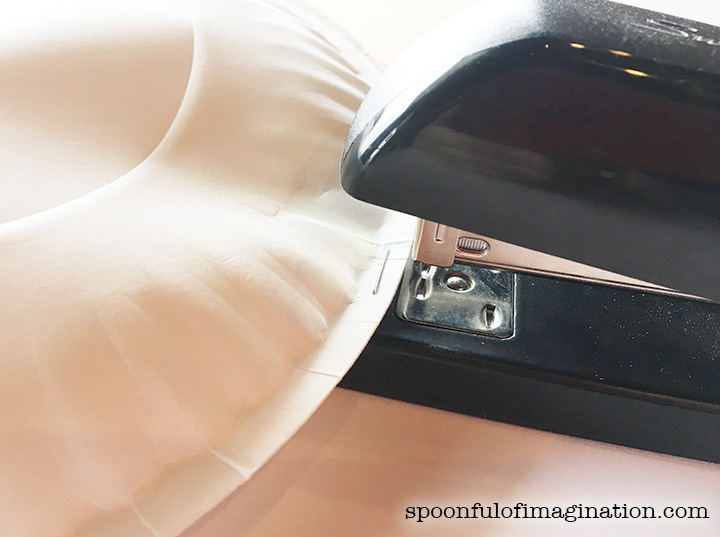
 After you have a face form, I used a little hot glue to attach my craft stick inside the plates. There was enough room between the stapled areas to stick a glob of glue on one of the plates, place a craft stick on top, and hold the sides of the plate together until the glue holds and hardens.
 After you have attached your stick, your emoji is ready to be created. This is where you can use whatever you have on hand! Markers, crayons, colored pencils, and even construction paper would be great tools to use to create your classic emoji face.


 It was so fun to see the artists laugh at one another’s creation as they guessed which face they were making. These were quickly used as puppets or props as kids talked and acted out little skits with them. It’s a magical moment to watch a creation turn into inspiration for more fun!
 This is such a simple project that you can personalize however you want! Maybe you want to paint your face-that’s great too!
