
“One man’s trash is another man’s treasure” is exactly the phrase I attach to this fun piece of furniture. I found this pretty wood dresser in my neighbor’s trash. No joke. I wish I had a picture of the sign because it said “take me home” and that is just what I did.


This is a real wood piece. I loved the shape and size immediately, but it needed some loving. The bottom two drawers were broken. I stared it for several weeks trying to decided what I wanted to do with it. I debated colors and if I wanted to fix the drawers or just turn those slots into shelves. I liked the idea of the piece have space to hide a little bit of stuff, so I left one drawer. I kept picturing the other slots holding pretty craft supplies and baskets, so I am glad I took a chance and turned them into shelves. I love what I came up with! I am going to show you exactly what I did step by step, in case you have an old piece that needs some tender loving care as well.
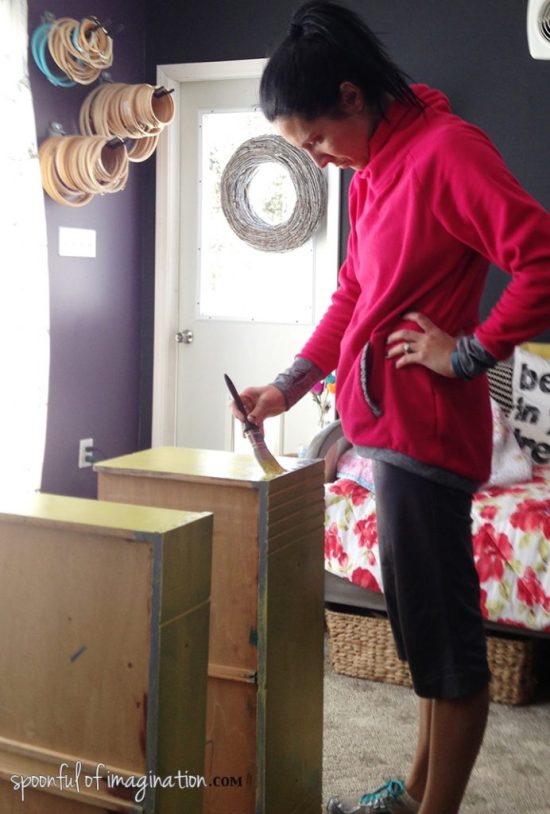
The first thing to do is to give your piece a good sanding and brush off all the saw dust.
 Next, paint the dresser. It was really hard for me to leave the top wood. I knew if I could fight the urge to paint it, I would love the result. And I do. I love the contrast of the dark stain with the teal paint. As for my paint, I didn’t worry about priming or using a paint and primer in one paint. I knew I was going to re-sand the piece, so my paint job didn’t have to be thick or perfect.

If you are a messy crafter like me, there might be sections of paint on part of the piece where you didn’t want paint. Simply sand that area again.

Staining is the next step. You see the piece really come together and the dramatic change. I stained my whole piece. I did the top, all the teal paint, and even the inside of where my shelves would be.
 There were areas I went back and did a second coat of stain, but the stain color you use will determine a lot of how your piece looks. The stain I used here is called Early American and its a nice deep brown. It’s not too dark nor does it have any shades of red.
Here is where I recruited my awesome husband. Saws scare me. I will use them, but I love it when I don’t have to. Matt cut some 1/8″ panel boards and attached them with wood glue for me. Isn’t he amazing!?!

After the wood glue dried, I stained those boards as well. Note: Be careful with the wood glue! If you get it on your board, it wont stain over that area as well, as you can see below in my picture.

Once the stain is dry, your piece is almost done! I switched out my knobs for some vintage, deep yellow wood ones from Hobby Lobby. I bought them months ago because I loved them, and I have been saving them for a project like this one. It was a perfect match! I love how my piece turned out.

I don’t know where it will end up in our new house, but I am excited about it. Isn’t it funny that you can pick an item out and not know where it will go, but if you love it…you will always find a use or way to incorporate it into your home? That is this piece to me. I hope the teal works somewhere :). It could go in our craft room, the dinning room, in our foster kids’ room, or maybe even behind a couch? I’m not sure yet, but I will keep you posted on what we do with it.
 Can you believe this piece that is full of life and fun used to be that old brown dresser? It is crazy what a little paint and time can do. Now I will leave you with some eye candy. Since I can’t stage my shelves for me yet, I staged them up for you to get an idea of how a piece like this can be used. I hope you are inspired!


Thank you so much for checking in today on one of my favorite furniture makeovers I have ever done! It is Friday, and I hope you all have a wonderful weekend!

 This room just makes me happy.
 Shortly, before we moved to Indiana, I repainted an old dresser to give my J a
 Shortly after we moved into our new house, and started settling in, I remembered my drawers. I dug them out of the garage and gave them a fresh coat of paint. I thought if I added a few little wheels they would make awesome under the bed storage for my boys’ bedroom. This was about 18 months ago…about the time we got our pup. Who is now a full-grown German Shepard mix.

 I ended up paper mache-ing some wrapping paper to the bottom of the drawer and adding new handles, but that’s where the project came to a stall.


 He’s a genius. He placed the shelves right above the screws from the handles so no one would get scraped reaching for something off the shelf. This was a quick project but needed some thought and calculation. He used my Ryobi Nail Brad and whipped this up much quicker than I expected.

 He cut two 14 inch long 1×2’s and attached them to the wall. These provided a sturdy hanging option for the drawer while providing a little bit of space off of the wall. He was able to sink one screw from each of the support boards into a stud in the wall. Since the drawer wasn’t wide enough to span across to studs, he used drywall anchors to attached the other screws.
 Once the supports were in place, I helped him hold the drawer up to the wall. He used the brad nailer to quickly attach the drawer to the supports. Then, he went back and added a few screws for more support.
 Once my drawer was hung, I painted the shelves the same teal as the flowers on the wall for an extra punch of color. I then styled the shelves, replaced my lamp on its new sturdy base, and my nightstand was complete!


 I love how this nightstand is narrow. It doesn’t take up a lot of space between the two beds, which allows for maximum floor space. Yet, it allows for a little lamp to be placed. This is our foster bedroom/guest room, so it is not currently in use. But now we are ready. Guests can place their phone to be charged or a bottle of water right beside their bed at night. I love it.

 Surely I’m not a hoarder, right!? There are things that are easy to throw out. Toys the dogs have chewed on, stained socks with holes, and junk mail… no sweat!
 I decided I would make some simple heart blocks and books ends. I love the simplicity yet loud message a heart speaks. What a cute little accent these would be on shelves and dressers.
 I then picked out some fun colors and painted the blocks. Once they were painted on both sides, I cut a heart out of cardboard to create a stencil. I then placed this in the center of my block and painted the heart in.

 I ended up creating several different sized heart stencils. This idea for a sign is similar to

 I love how the blocks turned out. To turn some of the larger ones into book ends, I attached a 4″ L bracket to the bottom of two of the blocks.


 I think the blocks and bookends turned out so bright and fun. I really like them.

 I donated this round of blocks to a fun home decor sale in our town. The profits from this sale help send kids in Zambia, Africa to school! If you are local to Warsaw or Winona Lake, Indiana, please come check out the Hither and Yon sale October 16-17. You can find more details on their
 I think one of the best gifts we have is the ability to use our gifts for good. What a power. The surprise is that we get something in return. It’s a win-win. I was thrilled to make some creations for a good reason. I just might have to buy one of these blocks back because I really like them.

 For months my boys have slowly been adding things to their dressers. It started as one small card or lego creation to a full on craze. In their eyes, it is the most beautiful mess.
 Do you see the beauty as well or do your mom nerves (like mine) kind of cringe too at those pictures? You can see what the chartreuse dresser first looked like
 You may have some of these supplies on hand, but a lot of the supplies can be altered depending on how you finish your shelves off. I will list the supplies I used to make my shelves, but just know you can alter and make do with different things to get this same look.
 From wall to wall it measured 35″, so I used my
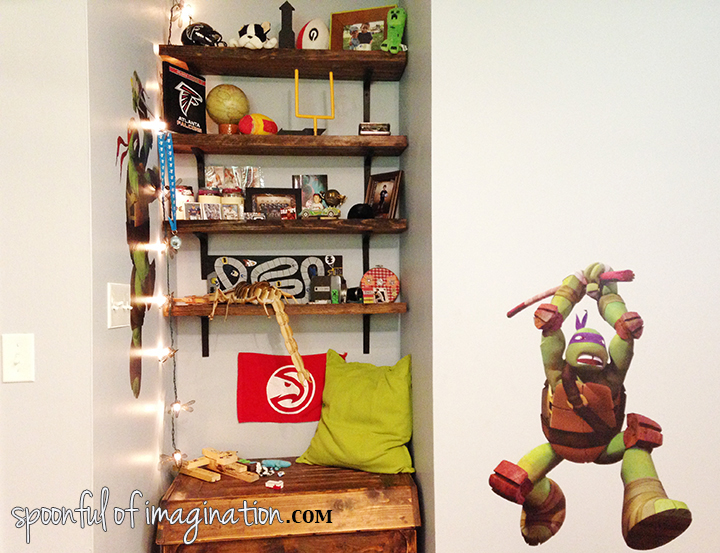
 After all the boards were sanded, I used my nail gun and nailed the garden stacks to one side of the 10″ wide boards. My original thought was that this little lip would face down and create an illusion that the shelf boards were made from a thicker, rustic wood. While nailing the boards together though, I decided to use the lip face up, so it created a little wall that could help keep the boys stuff from falling off the shelf easily. This is a boys’ room with a basketball hoop on the bunk bed, so who knows what can happen.

 After all the shelves were pieced together, I used wood filler to cover my nail holes. I let the wood filler completely dry, sanded over it, and was then ready to stain my shelves.
 I used a foam craft brush and painted the stain on. I left it to completely dry (instead of rubbing it off with a cloth). I wanted a dark look. I did both sides and then my part was done!

 Matt did the hard part of measuring, spacing the shelves out, and making sure they were level. These little plastic braces were so inexpensive, yet they totally work. I think they look great! We didn’t have any black screws on hand, so we used the silver we had and I went back and painted a little acrylic paint over each screw and you can’t tell the difference.

 Next, the really fun part happened. The boys got to decorate their shelves. They were so excited. They would hold something and contemplate if it should go on their shelf. After placing it, they would stand back and admire. They were so excited. I literally bit my tongue as I saw my beautiful shelves get decorated….well beautifully :).

 We do a lot of tasks for our kids as parents, I hope my kids feel us pursuing them more than anything else we do. Their little hearts, interests, memories matter most.
 We have already built a lot of shelves in our time here in Indiana. You might like these as well. Click either of the pictures below to be redirected to those blog posts, if you are interested in their tutorial.


